How to customize a cluster image in GITA?
Customizing a cluster image in GITA allows you to choose the version of the probes used, use images from your own registry (private, internal, or with specific cluster permissions), and have full control over the configurations and versions used in your containers, ensuring compatibility and security according to your needs.
-
Access your Cluster Interface in Gita:

Image 01: Cluster Selection Panel

Image 02: Cluster Interface
-
Click on the Configuration section on the left side of the Interface screen:
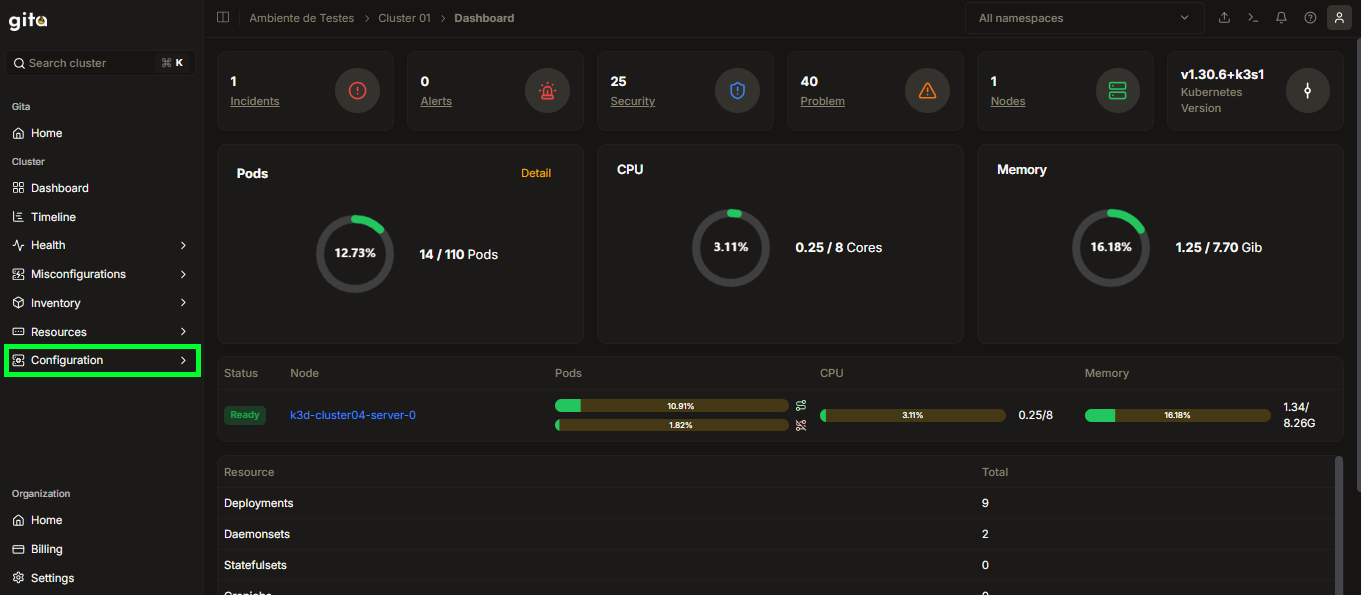
Image 03: Configuration Section
-
Inside the Configuration section, click on the Installation tab:
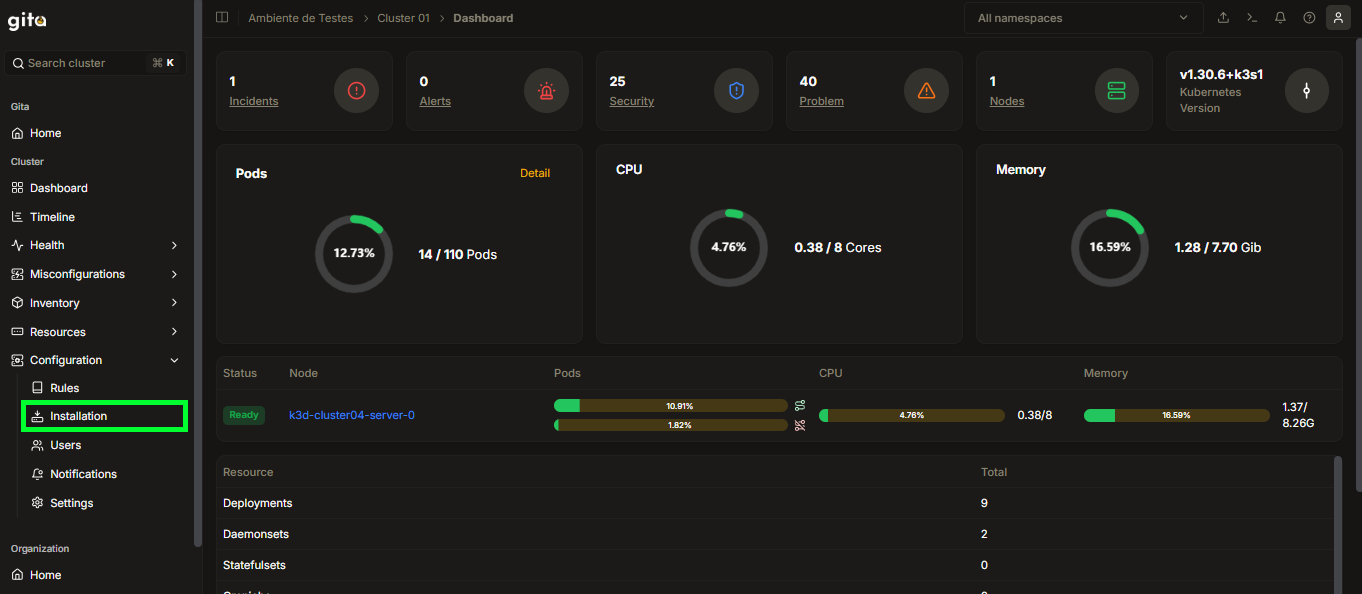
Image 04: Installation Tab
-
In the Installation tab, you can view the versions of the cluster images:
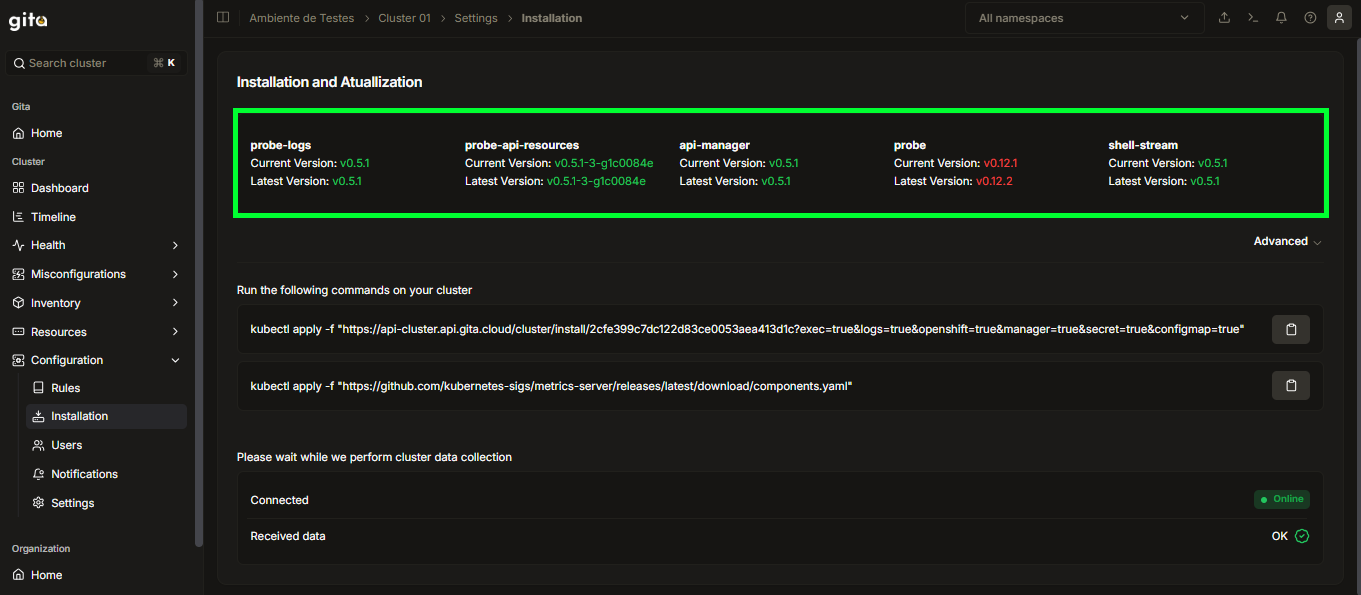
Image 05: Versioning View
Explanation about the displayed versions:
For each cluster component, two version pieces of information are displayed:
- Current Version: Indicates the image version currently in use in your cluster.
- Latest Version: Indicates the latest version available for that component.
If the current version is different from the latest, it will usually be highlighted in red, indicating that an update is available. Keeping images up to date is important to ensure access to bug fixes, security improvements, and new features.
-
To add a custom image, click on the Advanced tab:

Image 06: Advanced Tab
-
In the Advanced tab, you can view the images currently used by the cluster:
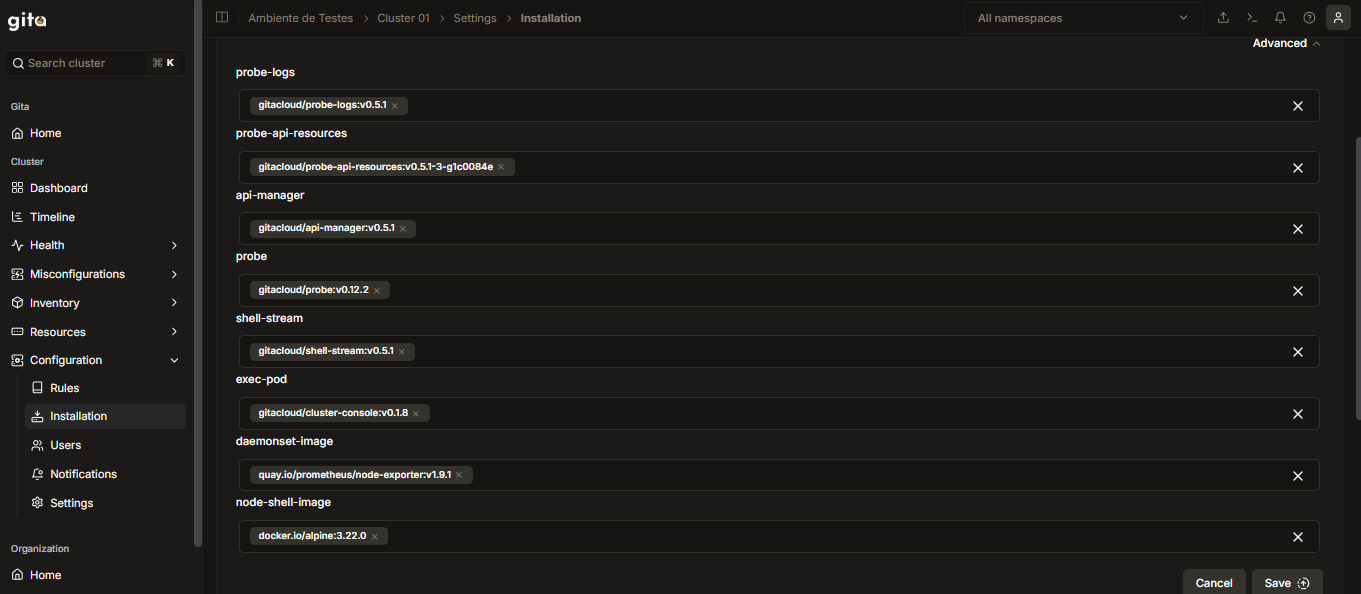
Image 07: Cluster Images View
-
Identify where you want to add the new custom image in the cluster. To do this, remove the current image by clicking the delete (X) button:
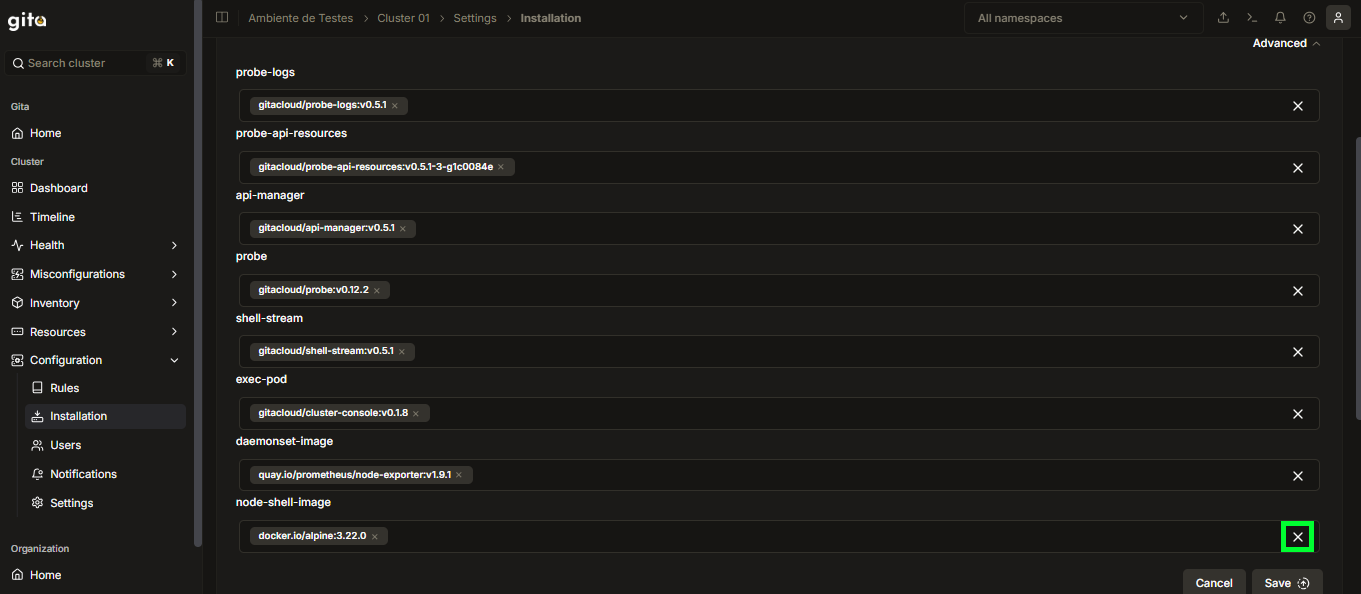
Image 08: Delete Button View
-
After removing the image, if you change your mind, you can restore it by clicking the undo button. To proceed with adding a new custom image, enter the desired image address in the appropriate field and click Create to save the change:
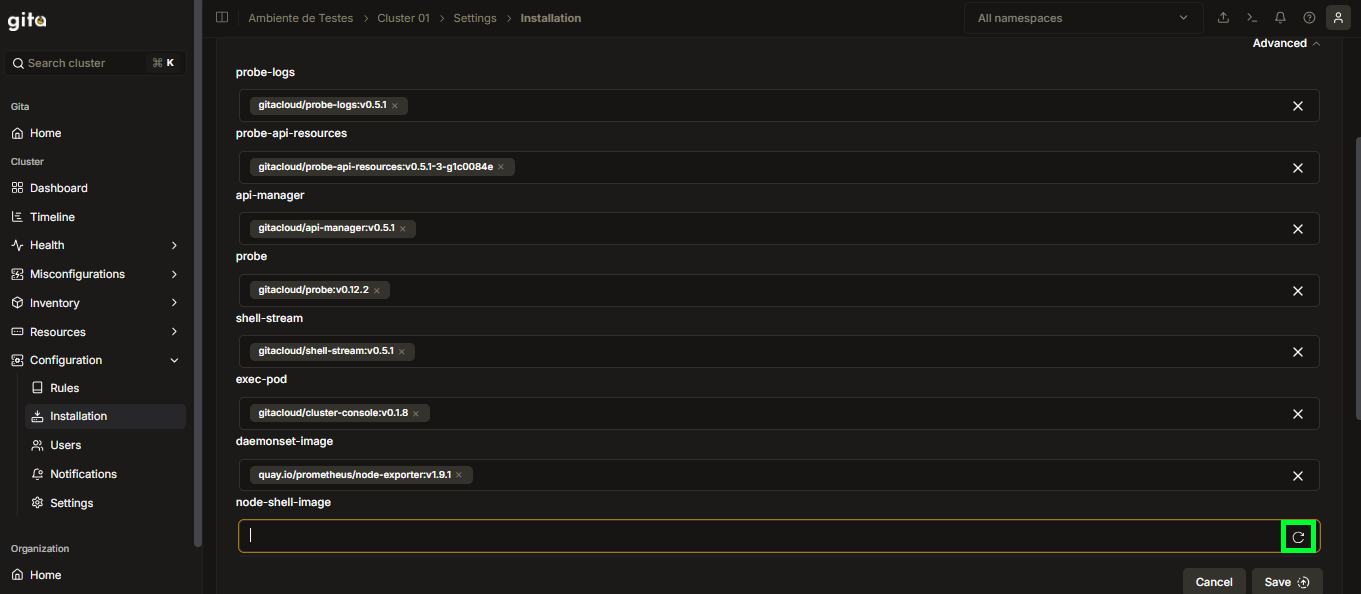
Image 09: Undo Button View
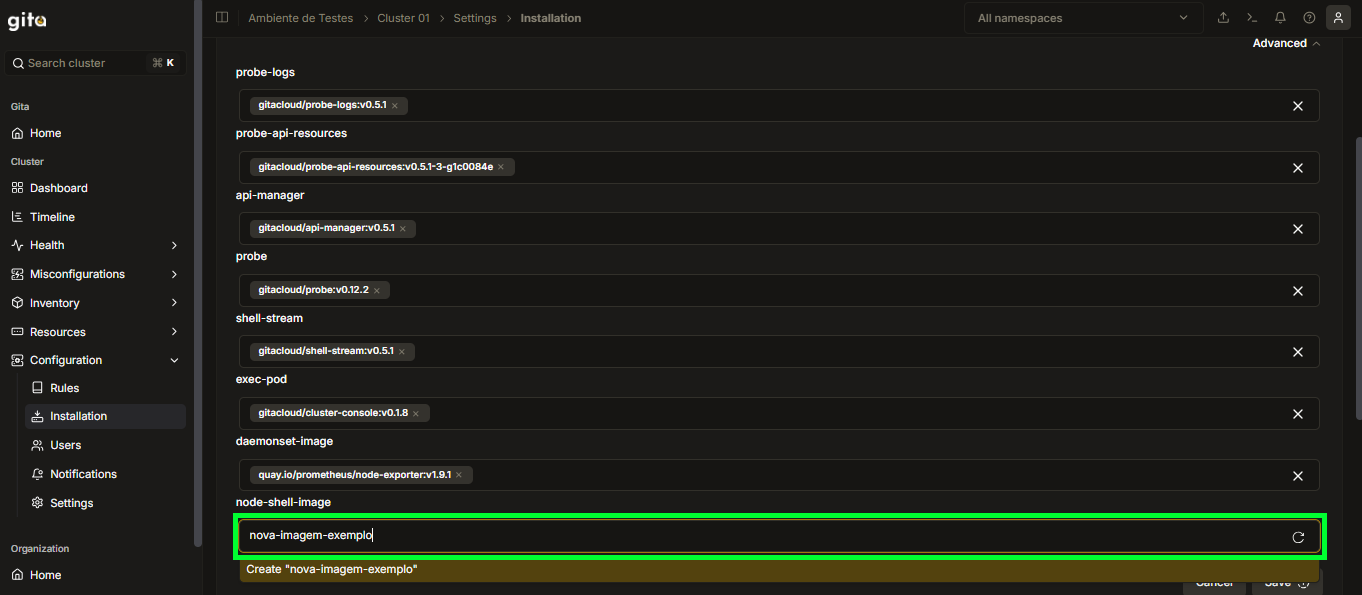
Image 10: Add New Image View
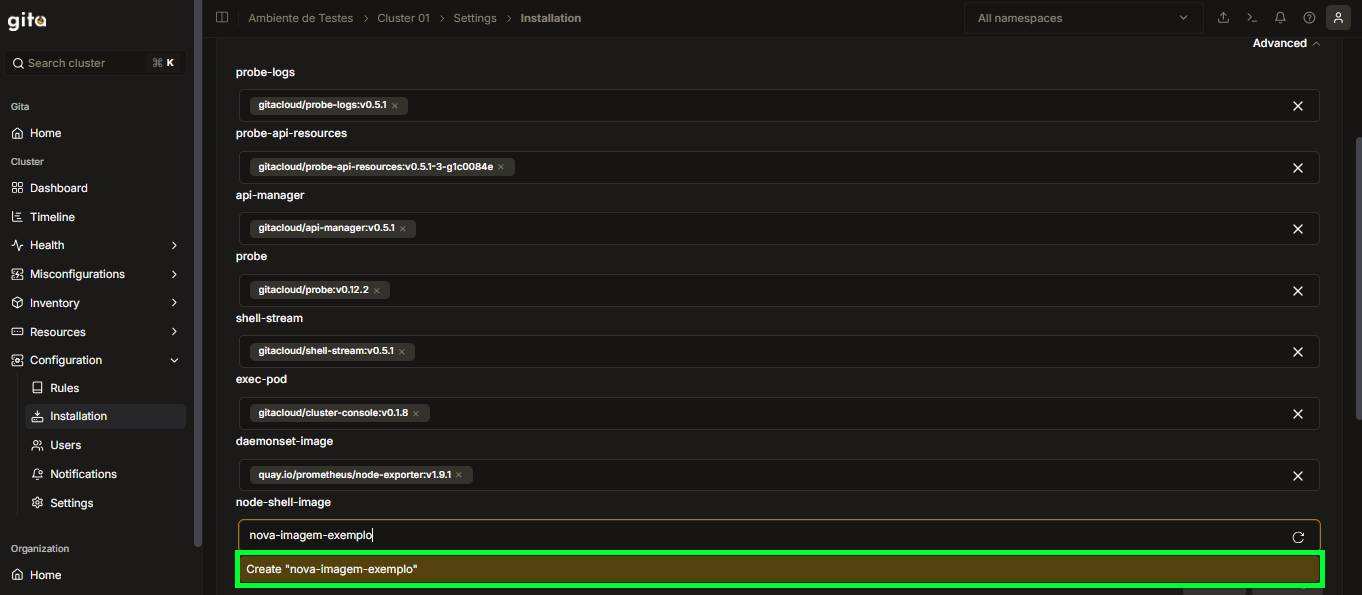
Image 11: Create View
-
Click the Save button to save the image change and wait for the process to finish:
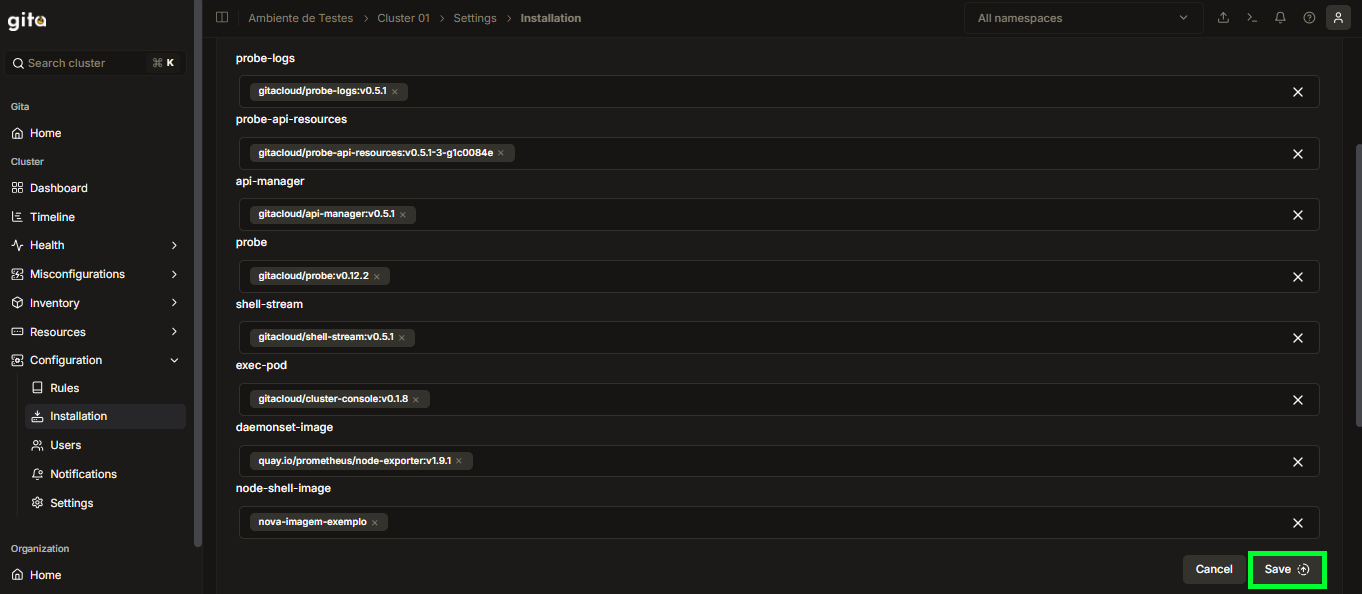
Image 12: Save Button View
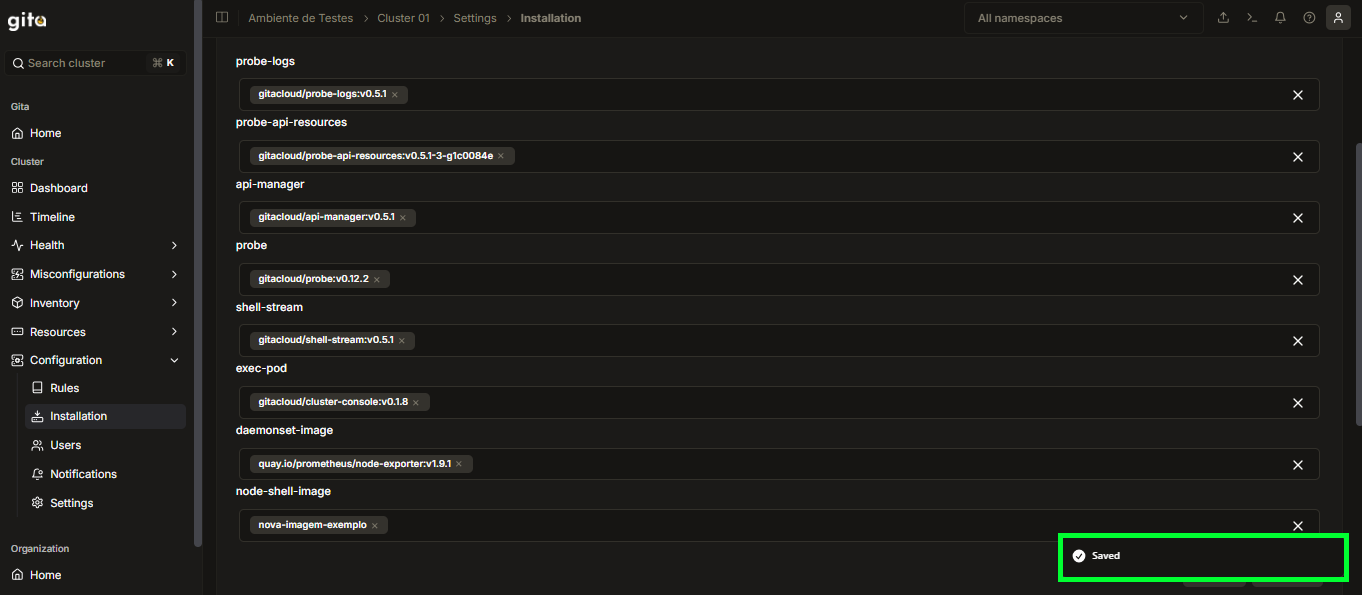
Image 13: Save Confirmation View
-
For the image changes to be effectively applied to the cluster, you need to run, in the terminal, the commands shown on the screen, following the presented order. Use the copy button next to each command to make the process easier: copy, paste, and run each command in the terminal, one at a time, until you complete the indicated steps. After completing these steps, the new images will be applied to the cluster:
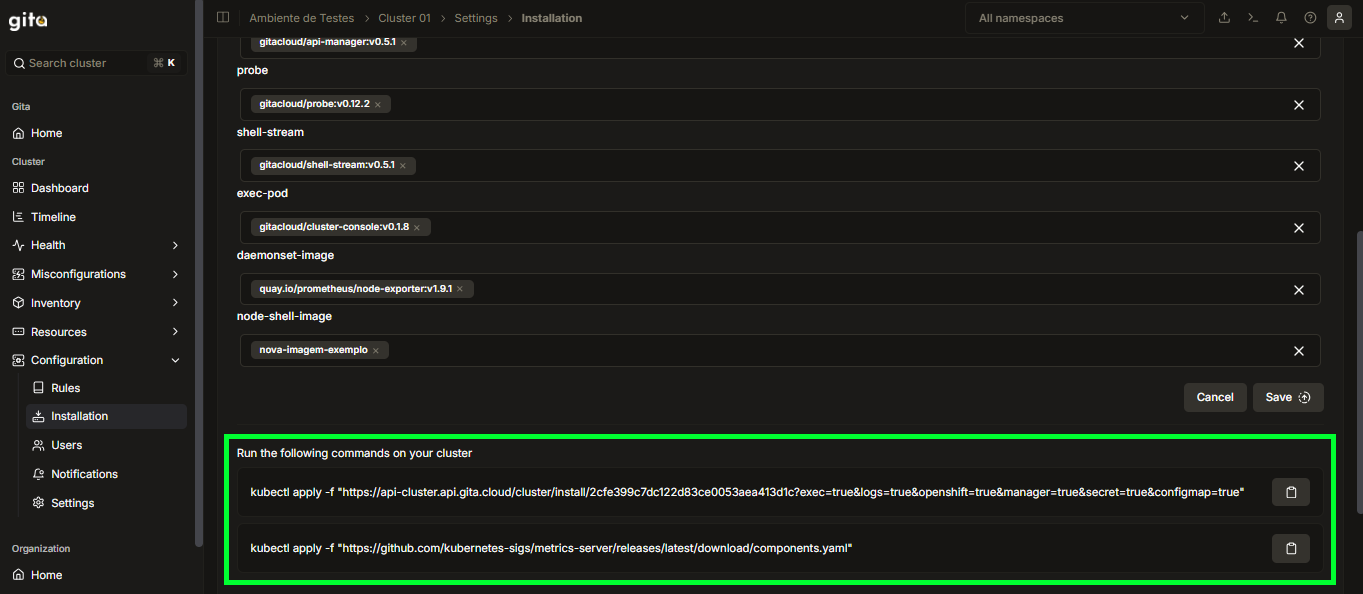
Image 14: Commands View
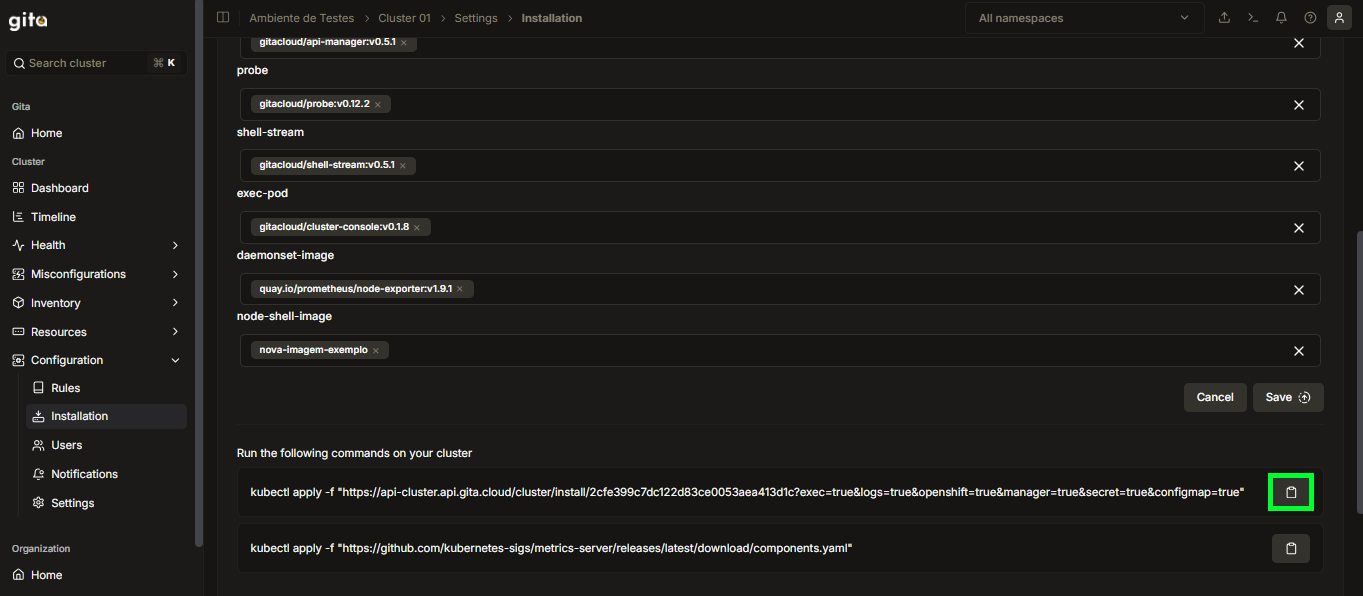
Image 15: Copy Button View