Notification Settings
This document describes how to create a notification channel on Gita that allows the system to send automatic alerts according to the rules defined for the cluster. This ensures that critical events, warnings or important information are delivered to those responsible at the right time. Channel configuration involves selecting events, receiving intervals and the means by which the notification will be sent (e.g., Mattermost, Slack, Webhook, etc.).
Enabling Notifications
- Access the System Interface
- Choose the Organization: Select the organization where you want to create the channel.
- Select the Corresponding Cluster: Choose the cluster that will receive the notifications.

Image 01: Main panel - Organization
4. Access the Sidebar Menu
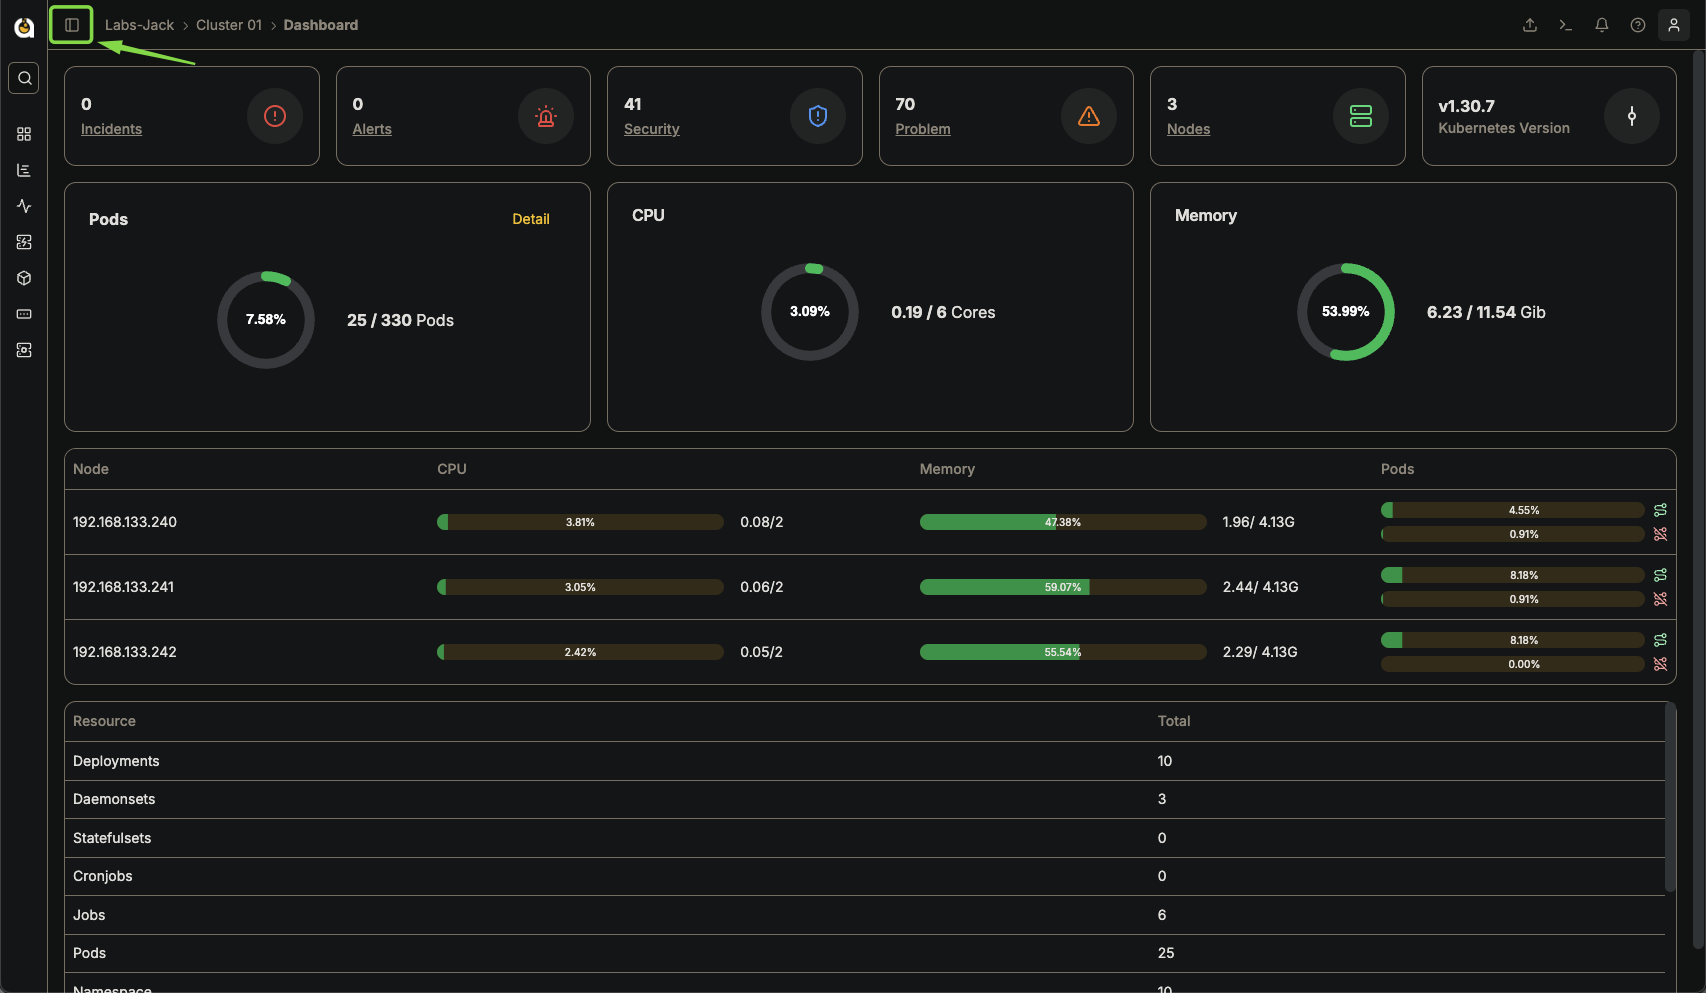
In the top left corner, open the sidebar menu.
Image 02: Main panel - Highlight sidebar
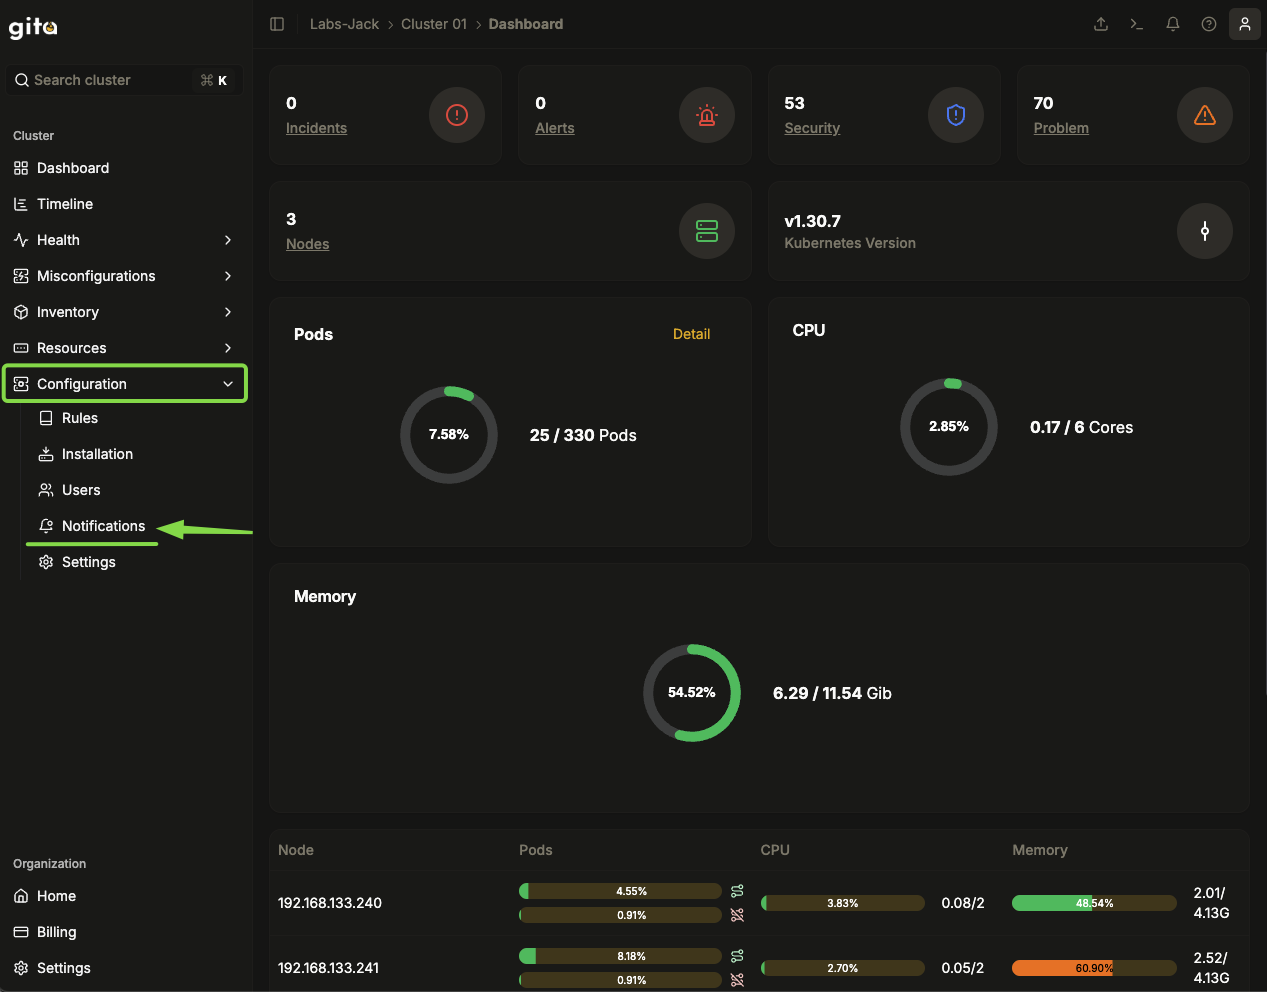
5. Go to Configuration → Notifications
Access the system notification settings.
Image 03: Settings - Highlight 'Notifications'
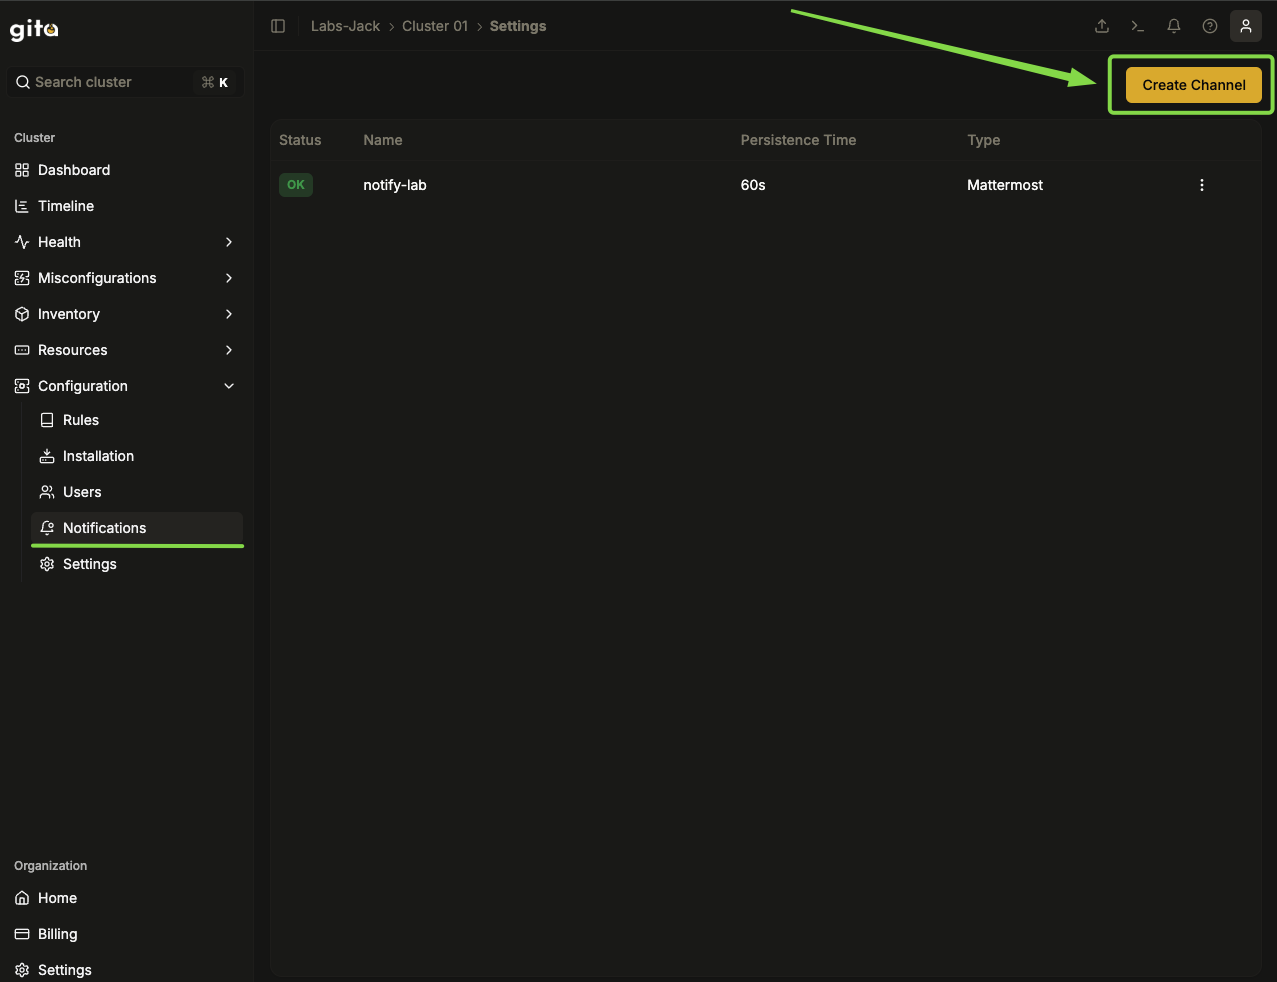
6. Click on "Create Channel"
Start by creating the notification channel.
Image 04: Settings - Highlight 'Create Channel'
7. Choose Events to be Monitored
-
Select the events you want to associate with the channel based on severity level.
-
Use the filters available in the interface to refine the selection.
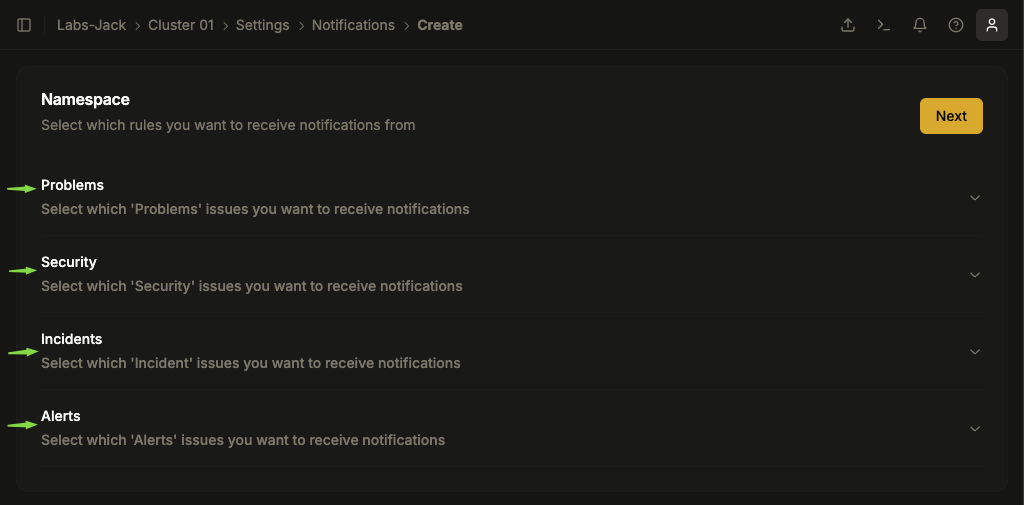
Image 05: Settings - Filter selection
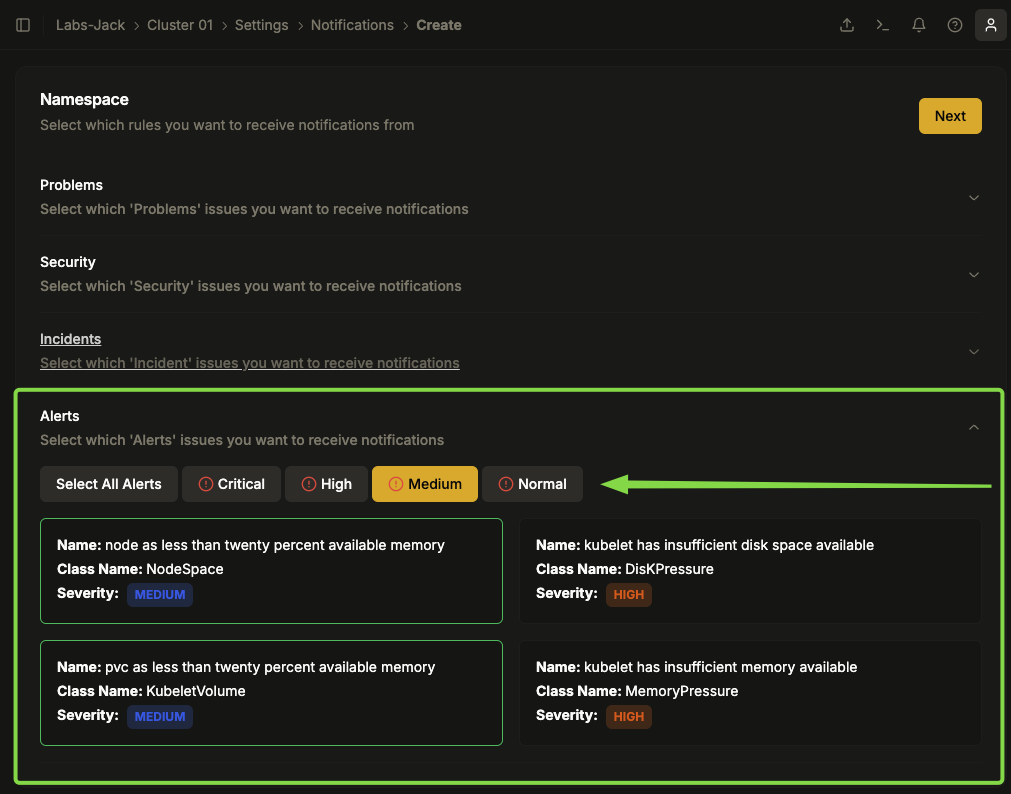
Image 06: Settings - Highlight 'Alerts'
8. Confirm Rules and Proceed
- After defining the desired rules, click "Next" in the top right corner.
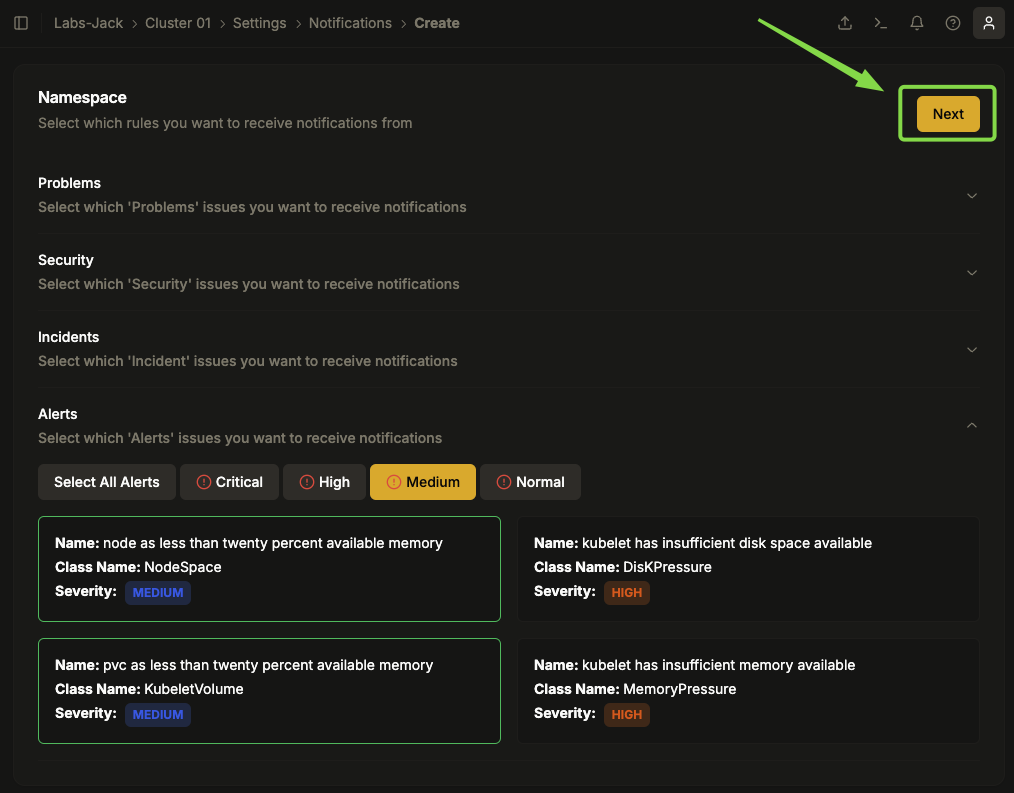
Image 07: Settings - Highlight 'Next' button
9. Configure Notification Receiving Interval
- Set the days of the week and times you want to receive notifications.
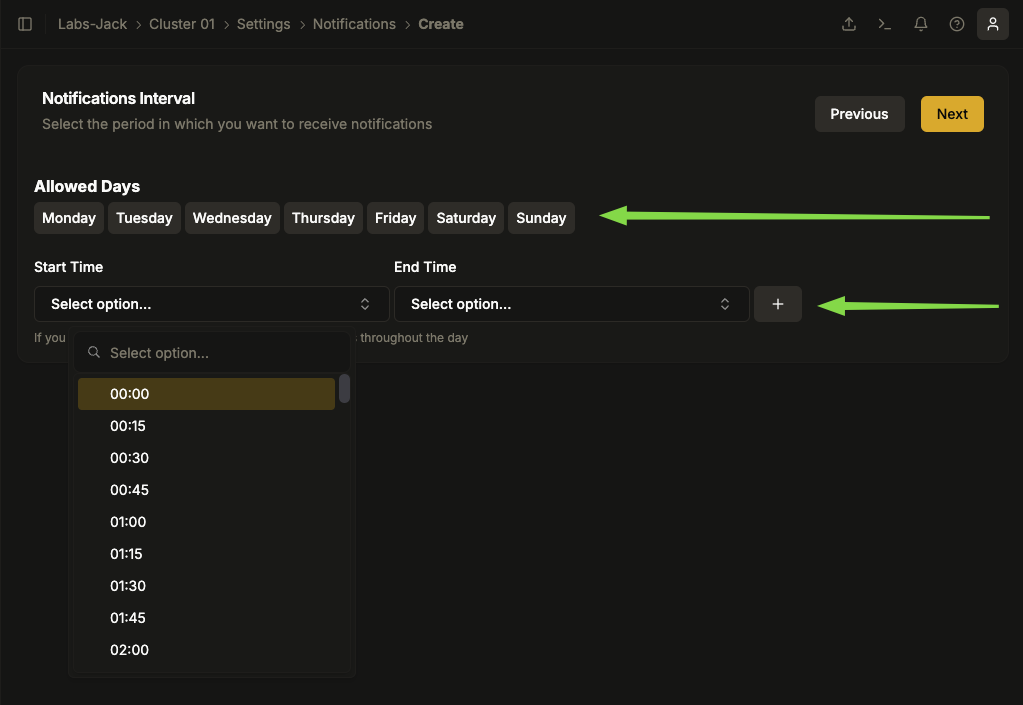
Image 08: Settings - Interval definition
10. Adjust Notification Intervals
- Configure specific times within the selected days.
- If you need to exclude an interval, click the trash icon.
- After defining the times correctly, click "Next".
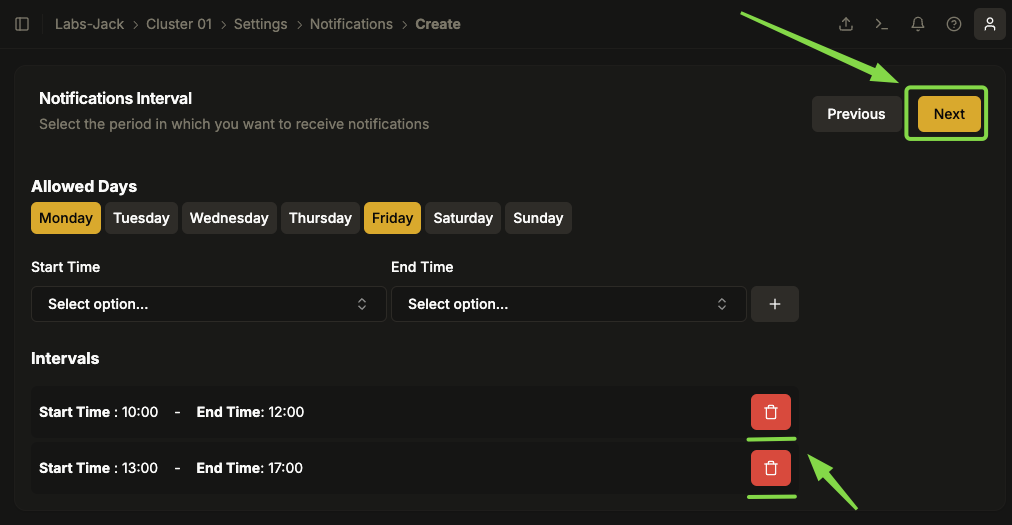
Image 09: Settings - Notification interval
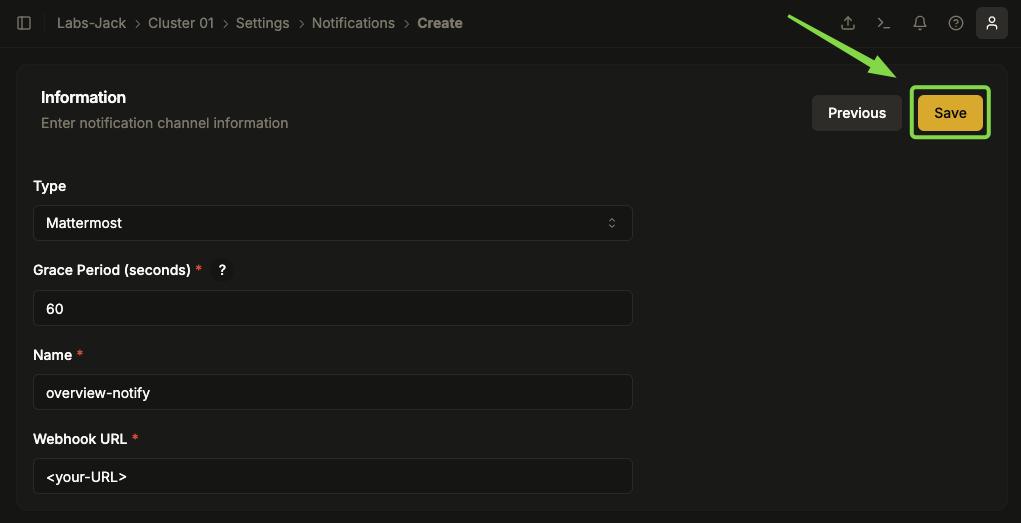
11. Configure the Notification Channel
- Choose the channel where notifications will be sent (Email, Webhook, etc.).
Fill in the following fields
- Notification Name: Descriptive name for channel identification.
- Destination: Email, Webhook URL or other receiving method.
- Grace Period (seconds): Event persistence time before sending notification.
After filling in the fields, click "Save" to complete.
Image 10: Settings - Highlight 'Save' button
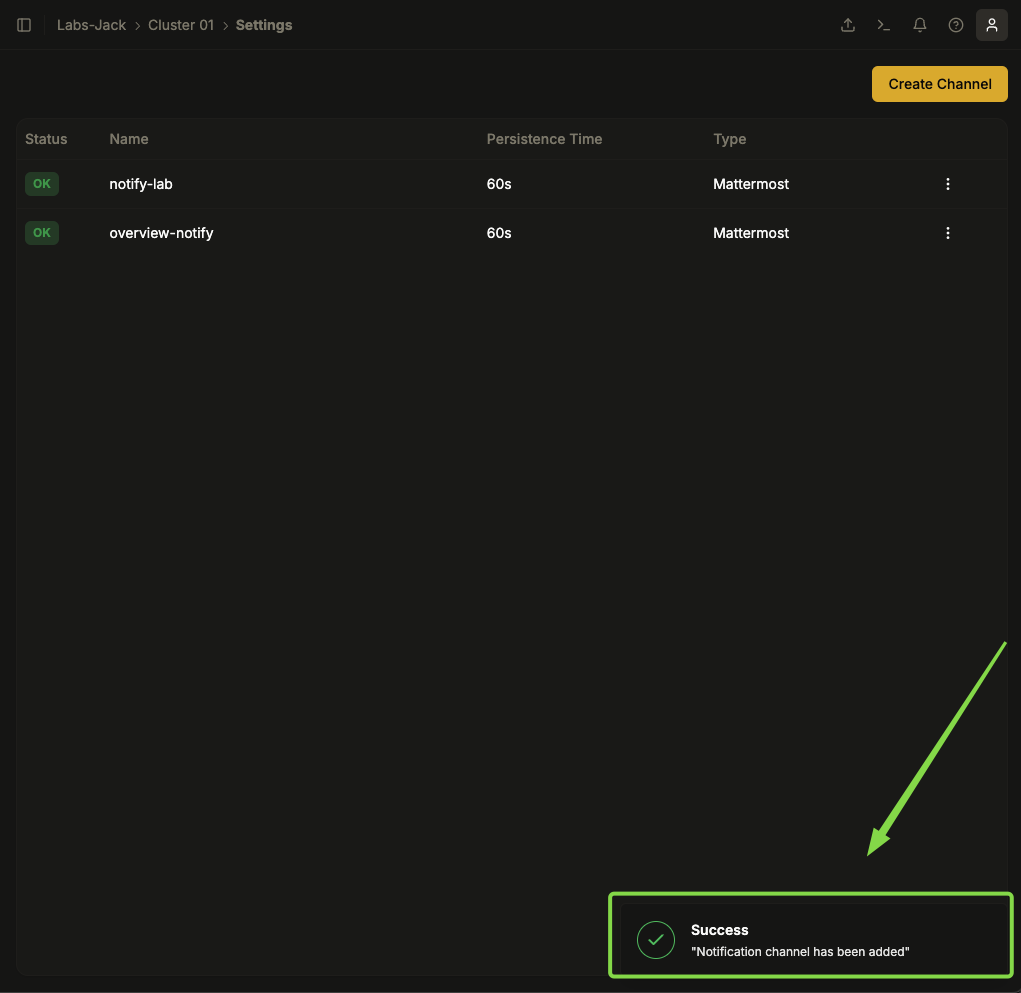
12. Confirm Notification Activation
Wait for the success message confirming that notifications are active.
Image 11: Settings - Highlight 'Success message'
Editing Notifications
-
Access the notification management panel.
-
Locate the notification you want to edit.
-
Click on the three dots icon next to the desired notification.
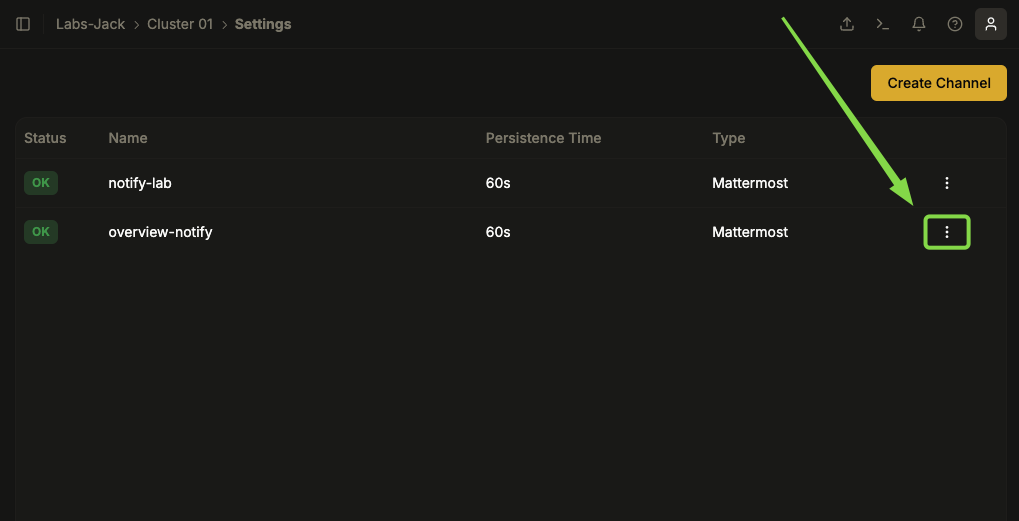
Image 12: Settings - Notifications
-
Choose the Edit option.
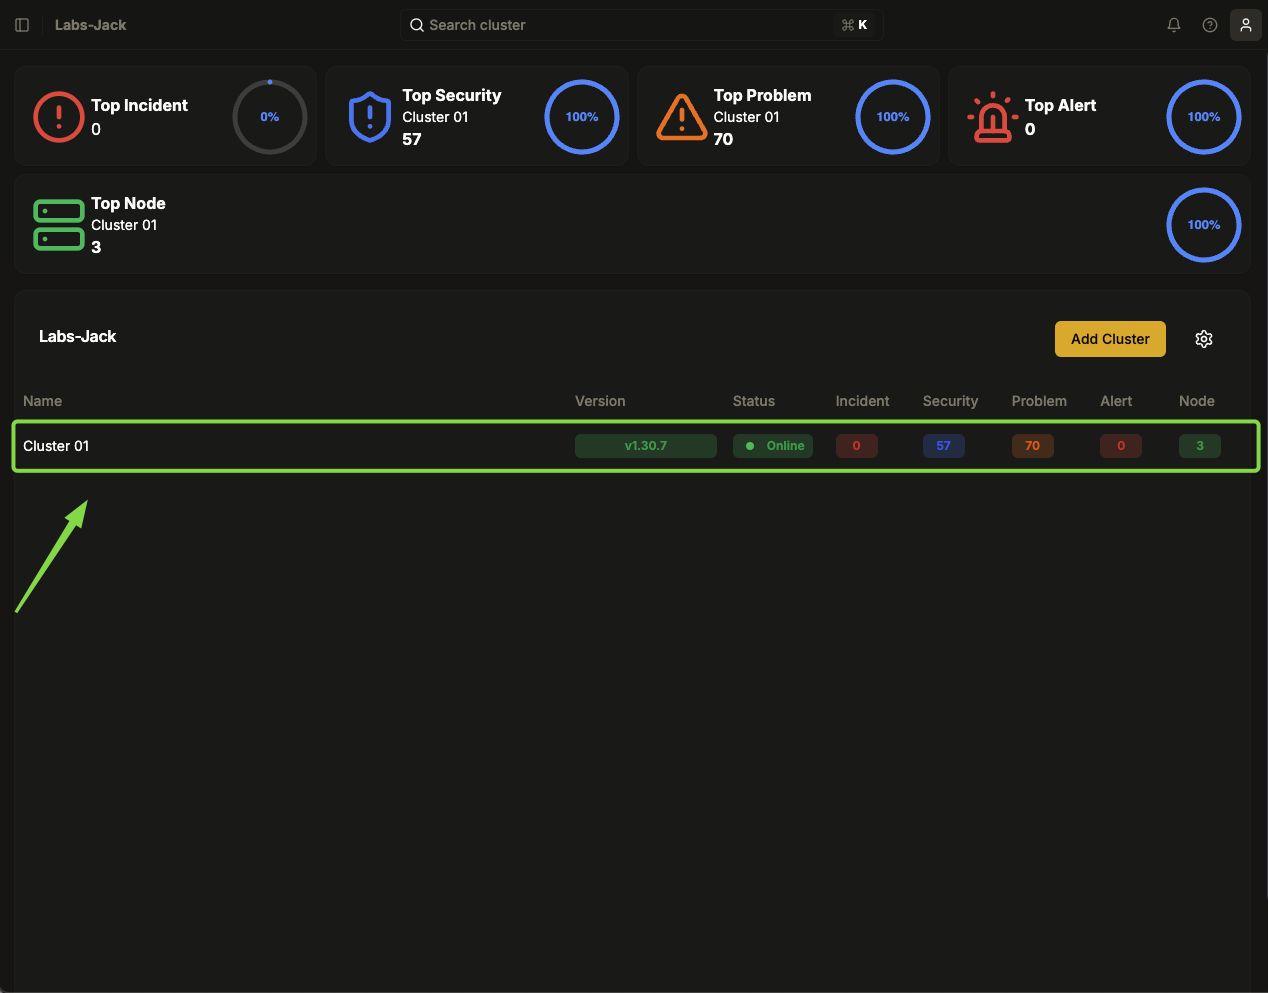
Image 13: Main panel - Highlight 'Cluster'
-
Modify the desired parameters, such as:
- Types of monitored events.
- Communication channels.
- Rules for notification trigger interval.
-
Save the changes and wait for the successful edit notification.
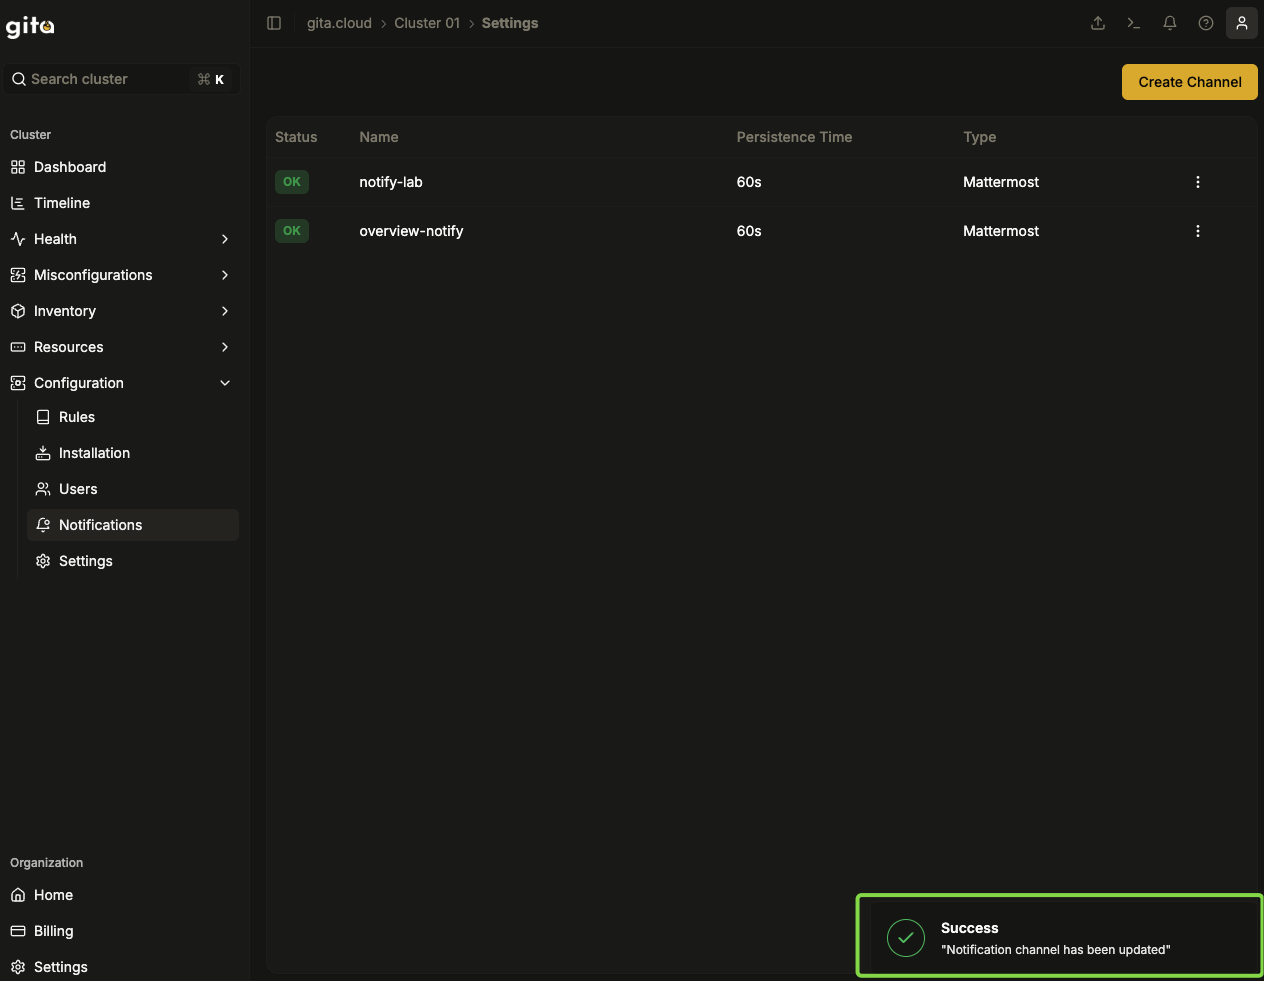
Image 14: Settings - Highlight 'Message indicating success'
Deleting Notifications
- Access the notification management panel.
- Locate the notification you want to delete.
- Click on the three dots icon next to the desired notification.
Image 15: Settings - Notifications
- Choose the Delete option and confirm the action.
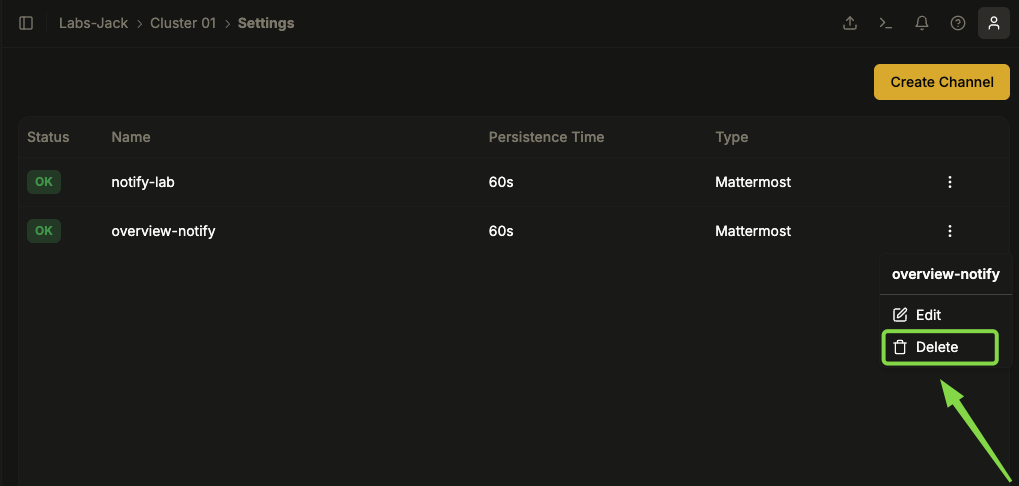
Image 16: Settings - Actions for notifications
- Confirm the deletion and the notification will be deleted immediately.

Image 17: Dialog Box - Confirm channel deletion
Best Practices
- Enable notifications only for critical events to avoid alert overload.
- Periodically review settings to ensure only relevant events are notified.
- Use different communication channels for different types of alerts.
- Test the configuration after any changes to ensure notifications are being delivered correctly.
- Document which events are being monitored, ensuring the team is aligned.