Client Proxy Configuration in a Cluster
This document describes the procedure for configuring a client proxy in a cluster, either during cluster addition or later, via settings.
Option 1: During Cluster Addition
-
Choose your organization.
-
Access the organization's initial panel and click on Add Cluster.
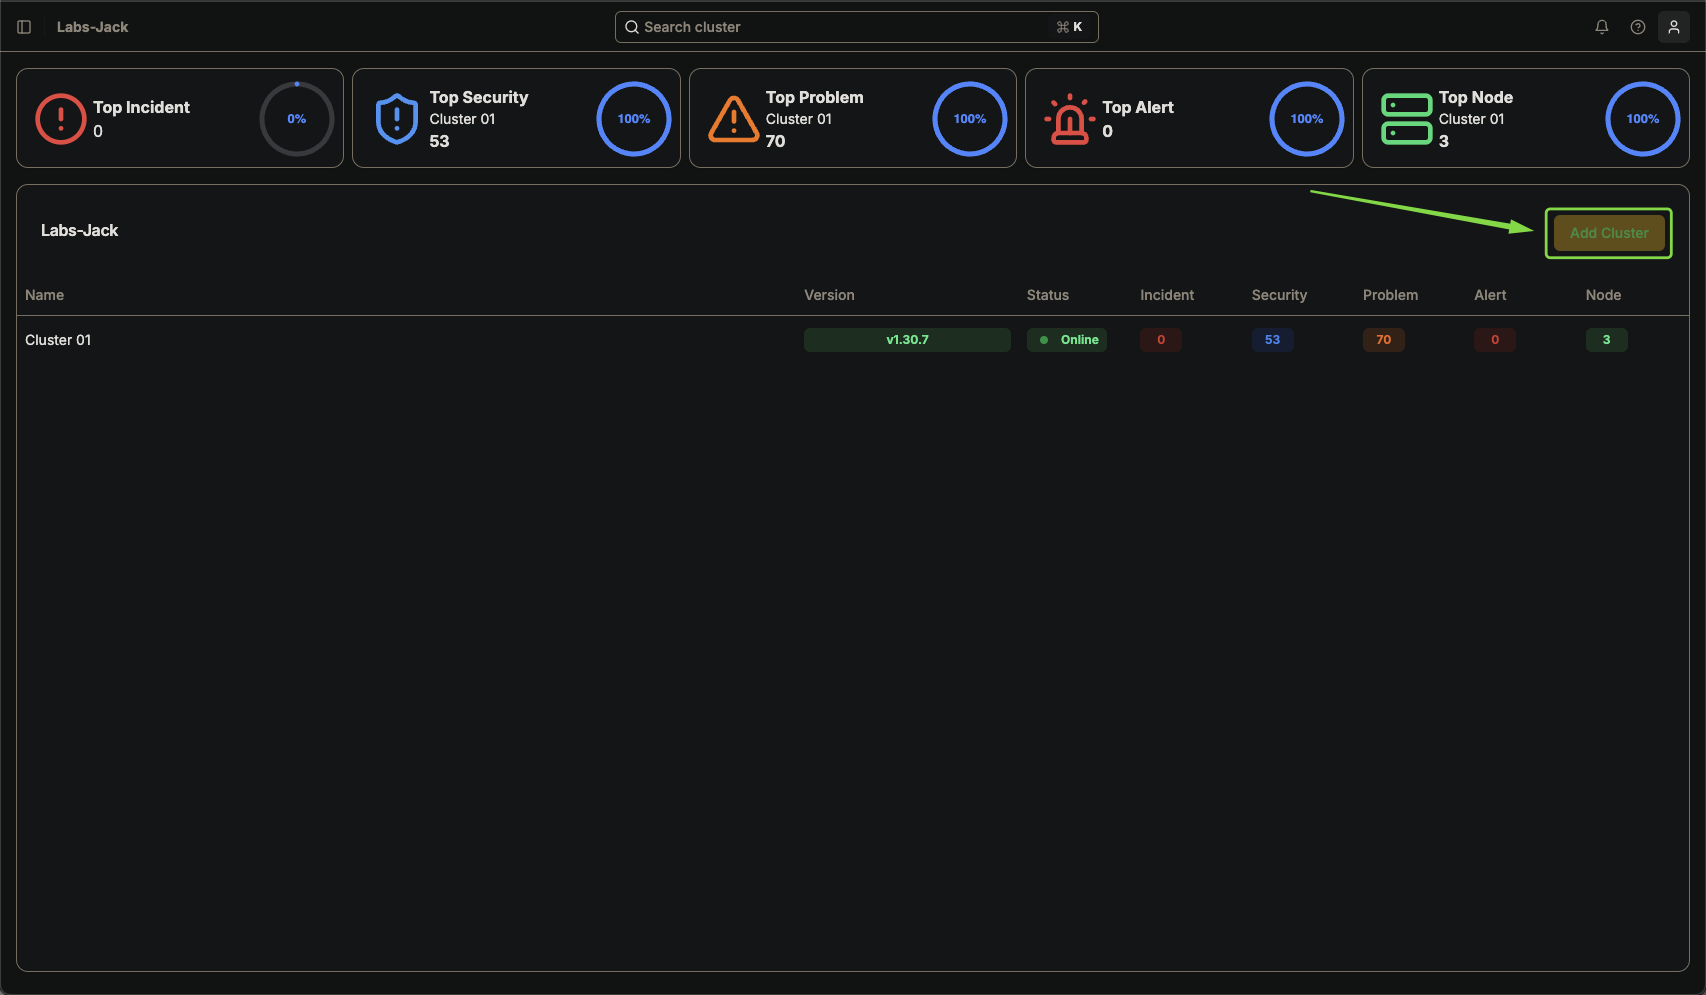
Image 01: Main panel - Highlight 'Add cluster'
-
Enter the cluster name and click Next.
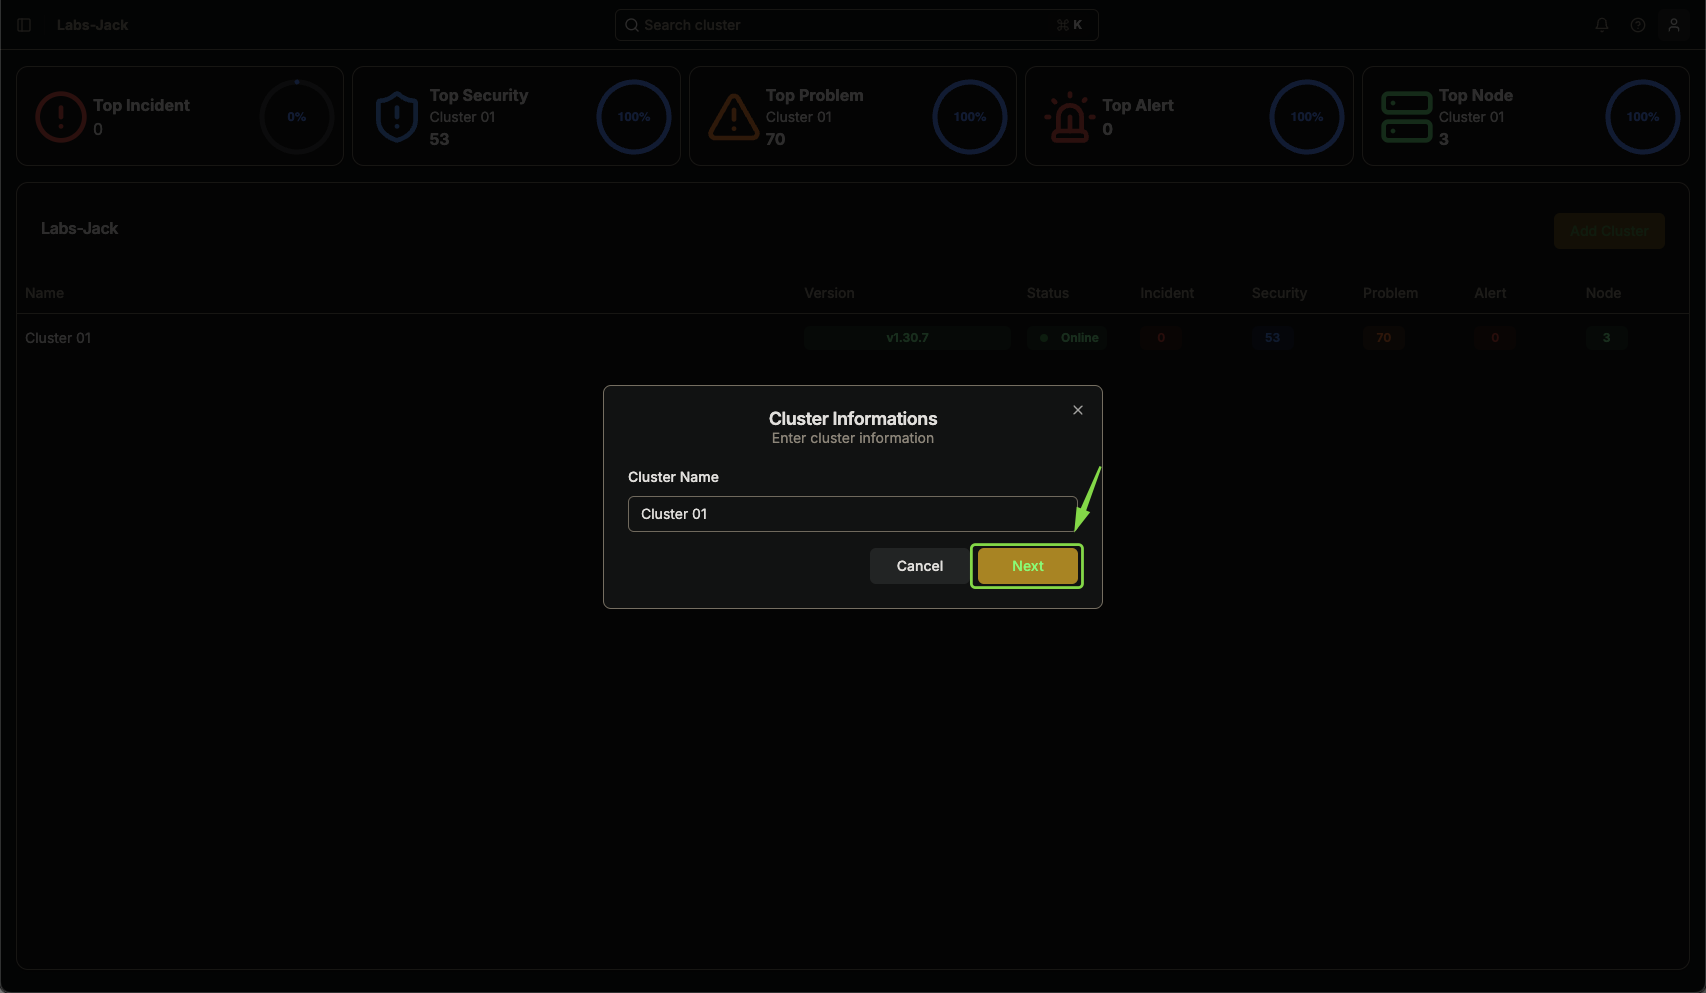
Image 02: Dialog box - Cluster addition
-
To configure the proxy, click on Add Proxy.
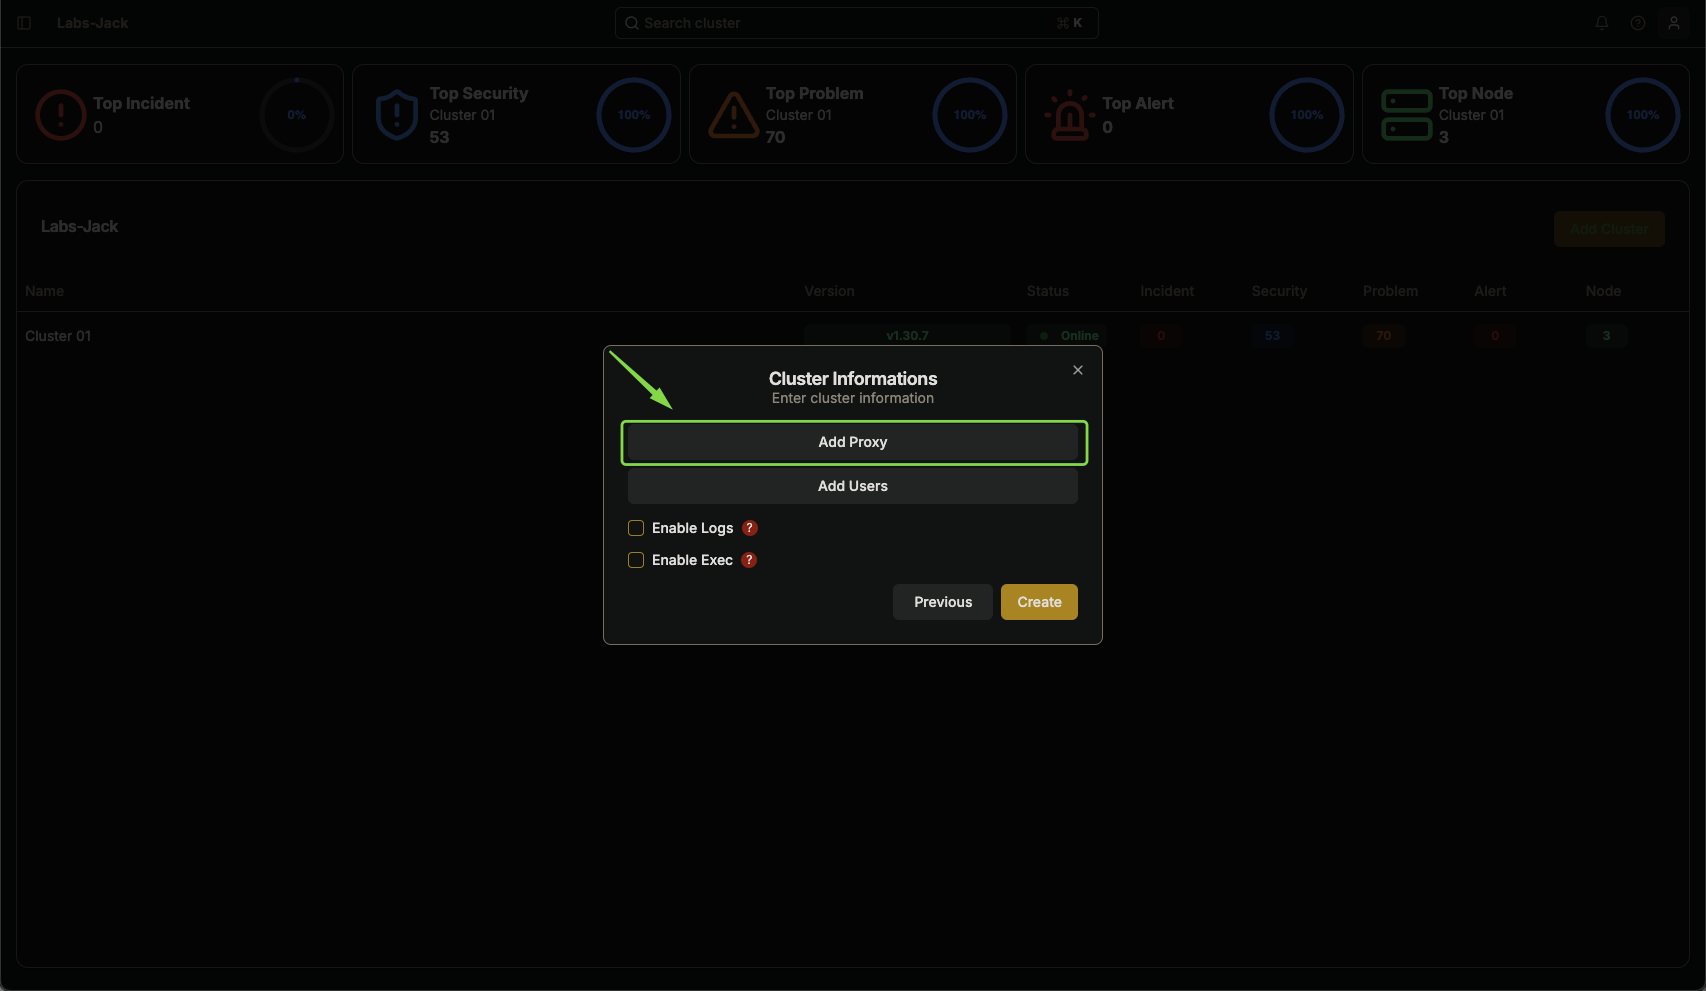
Image 03: Dialog box - cluster information
-
Fill in the required proxy fields that are essential to define how communication will be routed through the proxy.
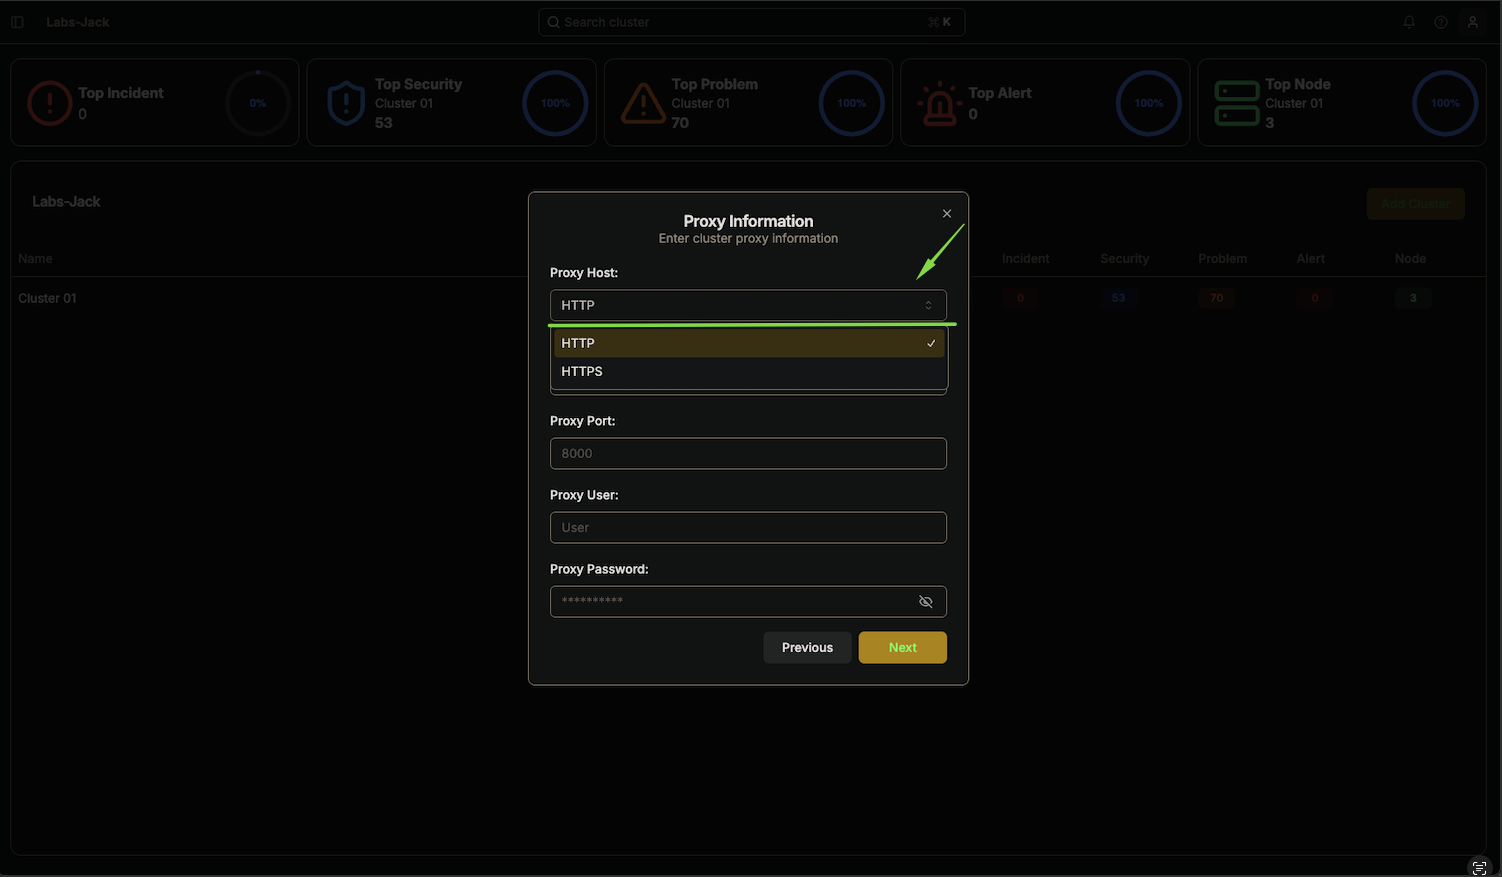
Image 04: Dialog box - Proxy information
- Proxy Host Http/Https (Indicates whether the connection will have encryption or not)
- Proxy Host (Field to define the proxy hostname or IP)
- Proxy Port (Defines the communication channel with the proxy)
- Proxy User (Field that stores the username needed to authenticate with the proxy)
- Proxy Password (Password corresponding to the username)
-
Review the inserted settings and click Next.

Image 05: Dialog box - proxy information
-
If you want to enable logs and remote execution, activate the following options:
- Enable Logs: Allows viewing application logs in the cluster.
- Enable Exec: Allows executing commands remotely in the cluster.
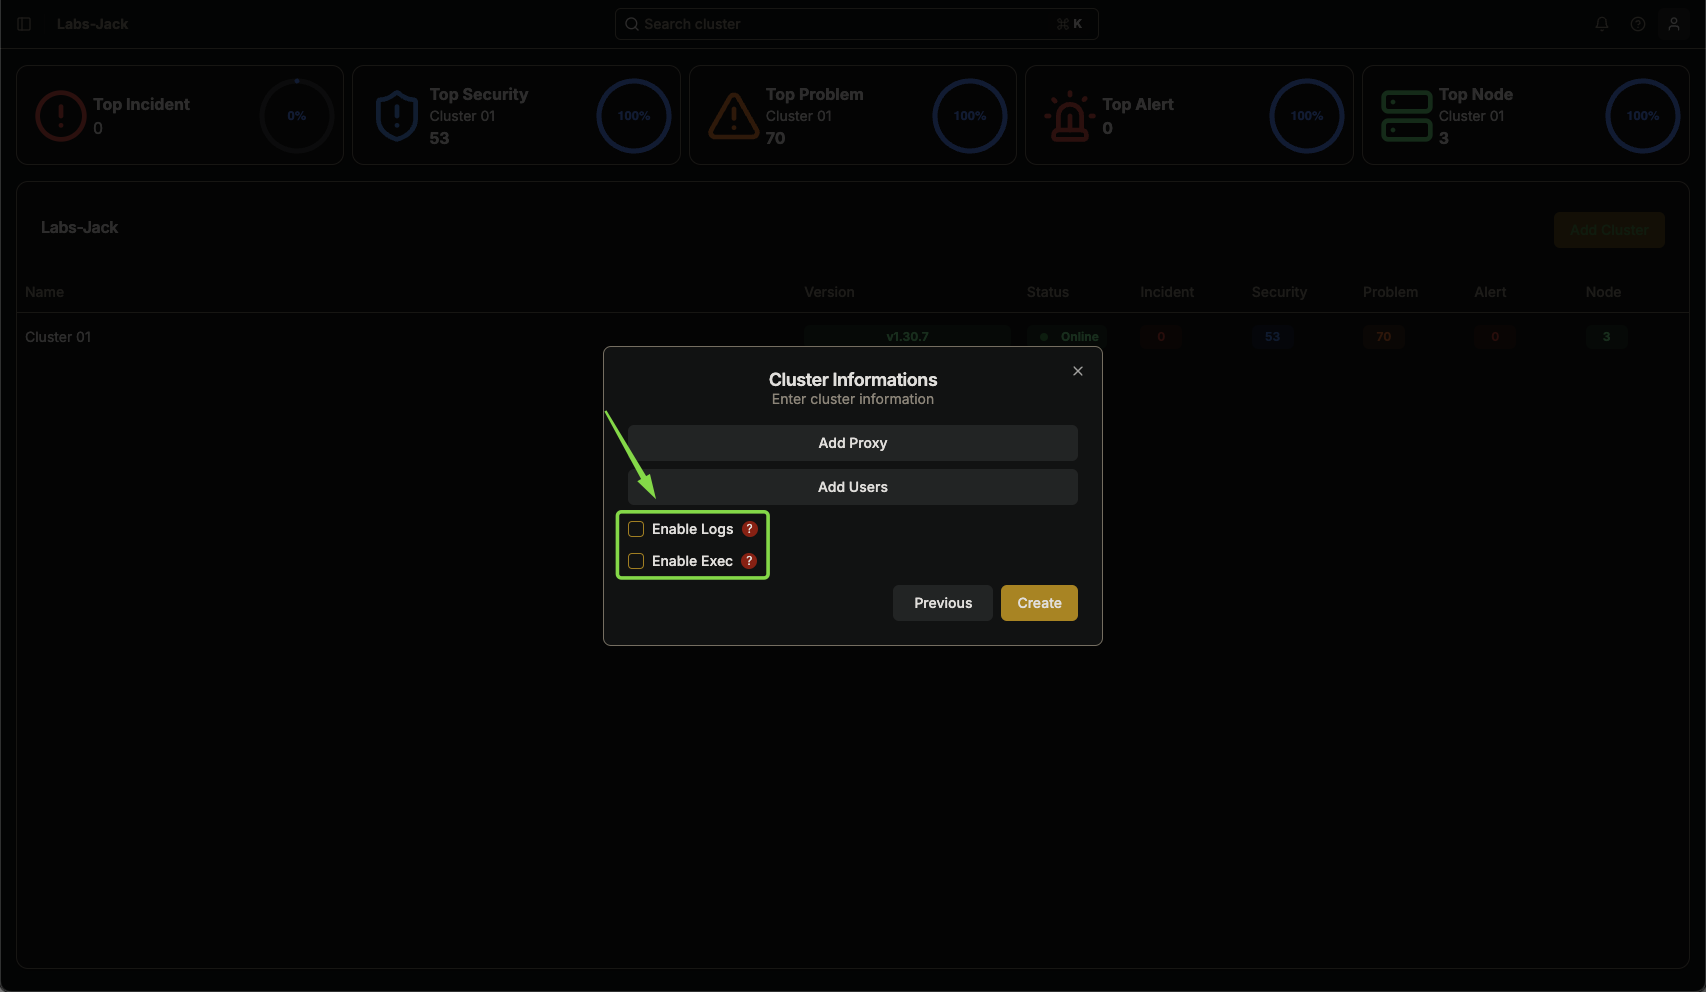
Image 06: Cluster addition - permission options
-
In the bottom left corner, click Create to complete the configuration.
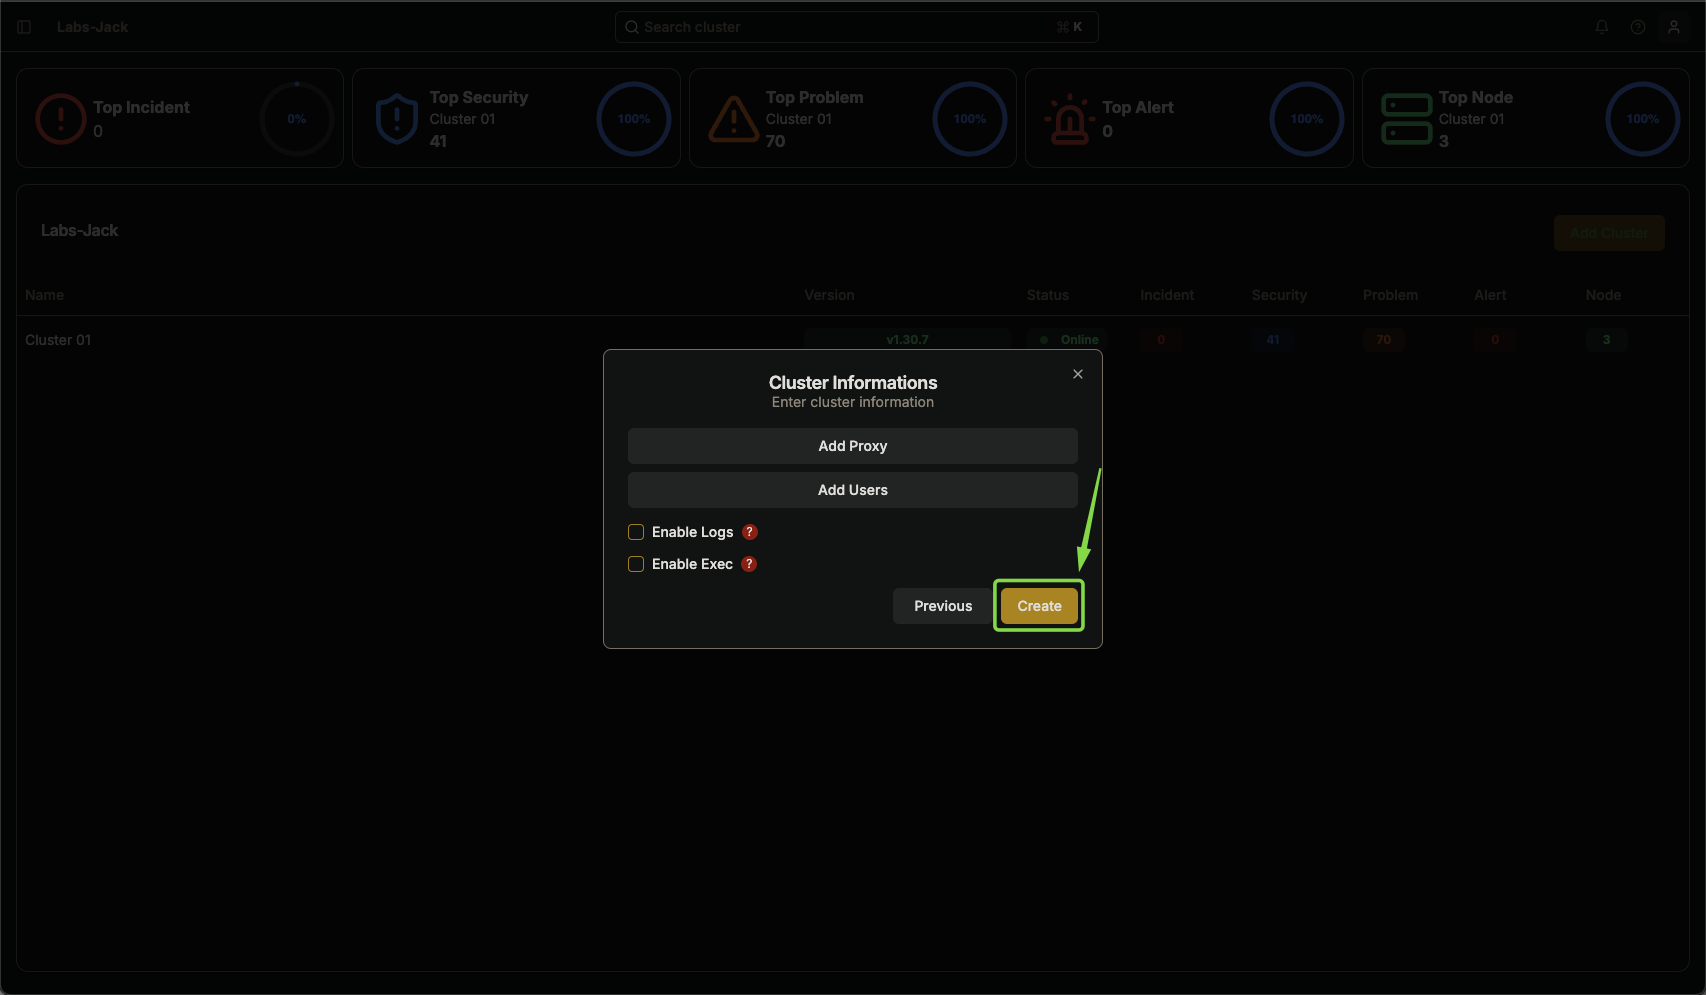
Image 07: Dialog box - Highlight 'Create' button
Option 2: After Adding the Cluster
- Access the menu in the top left corner and open the navbar.
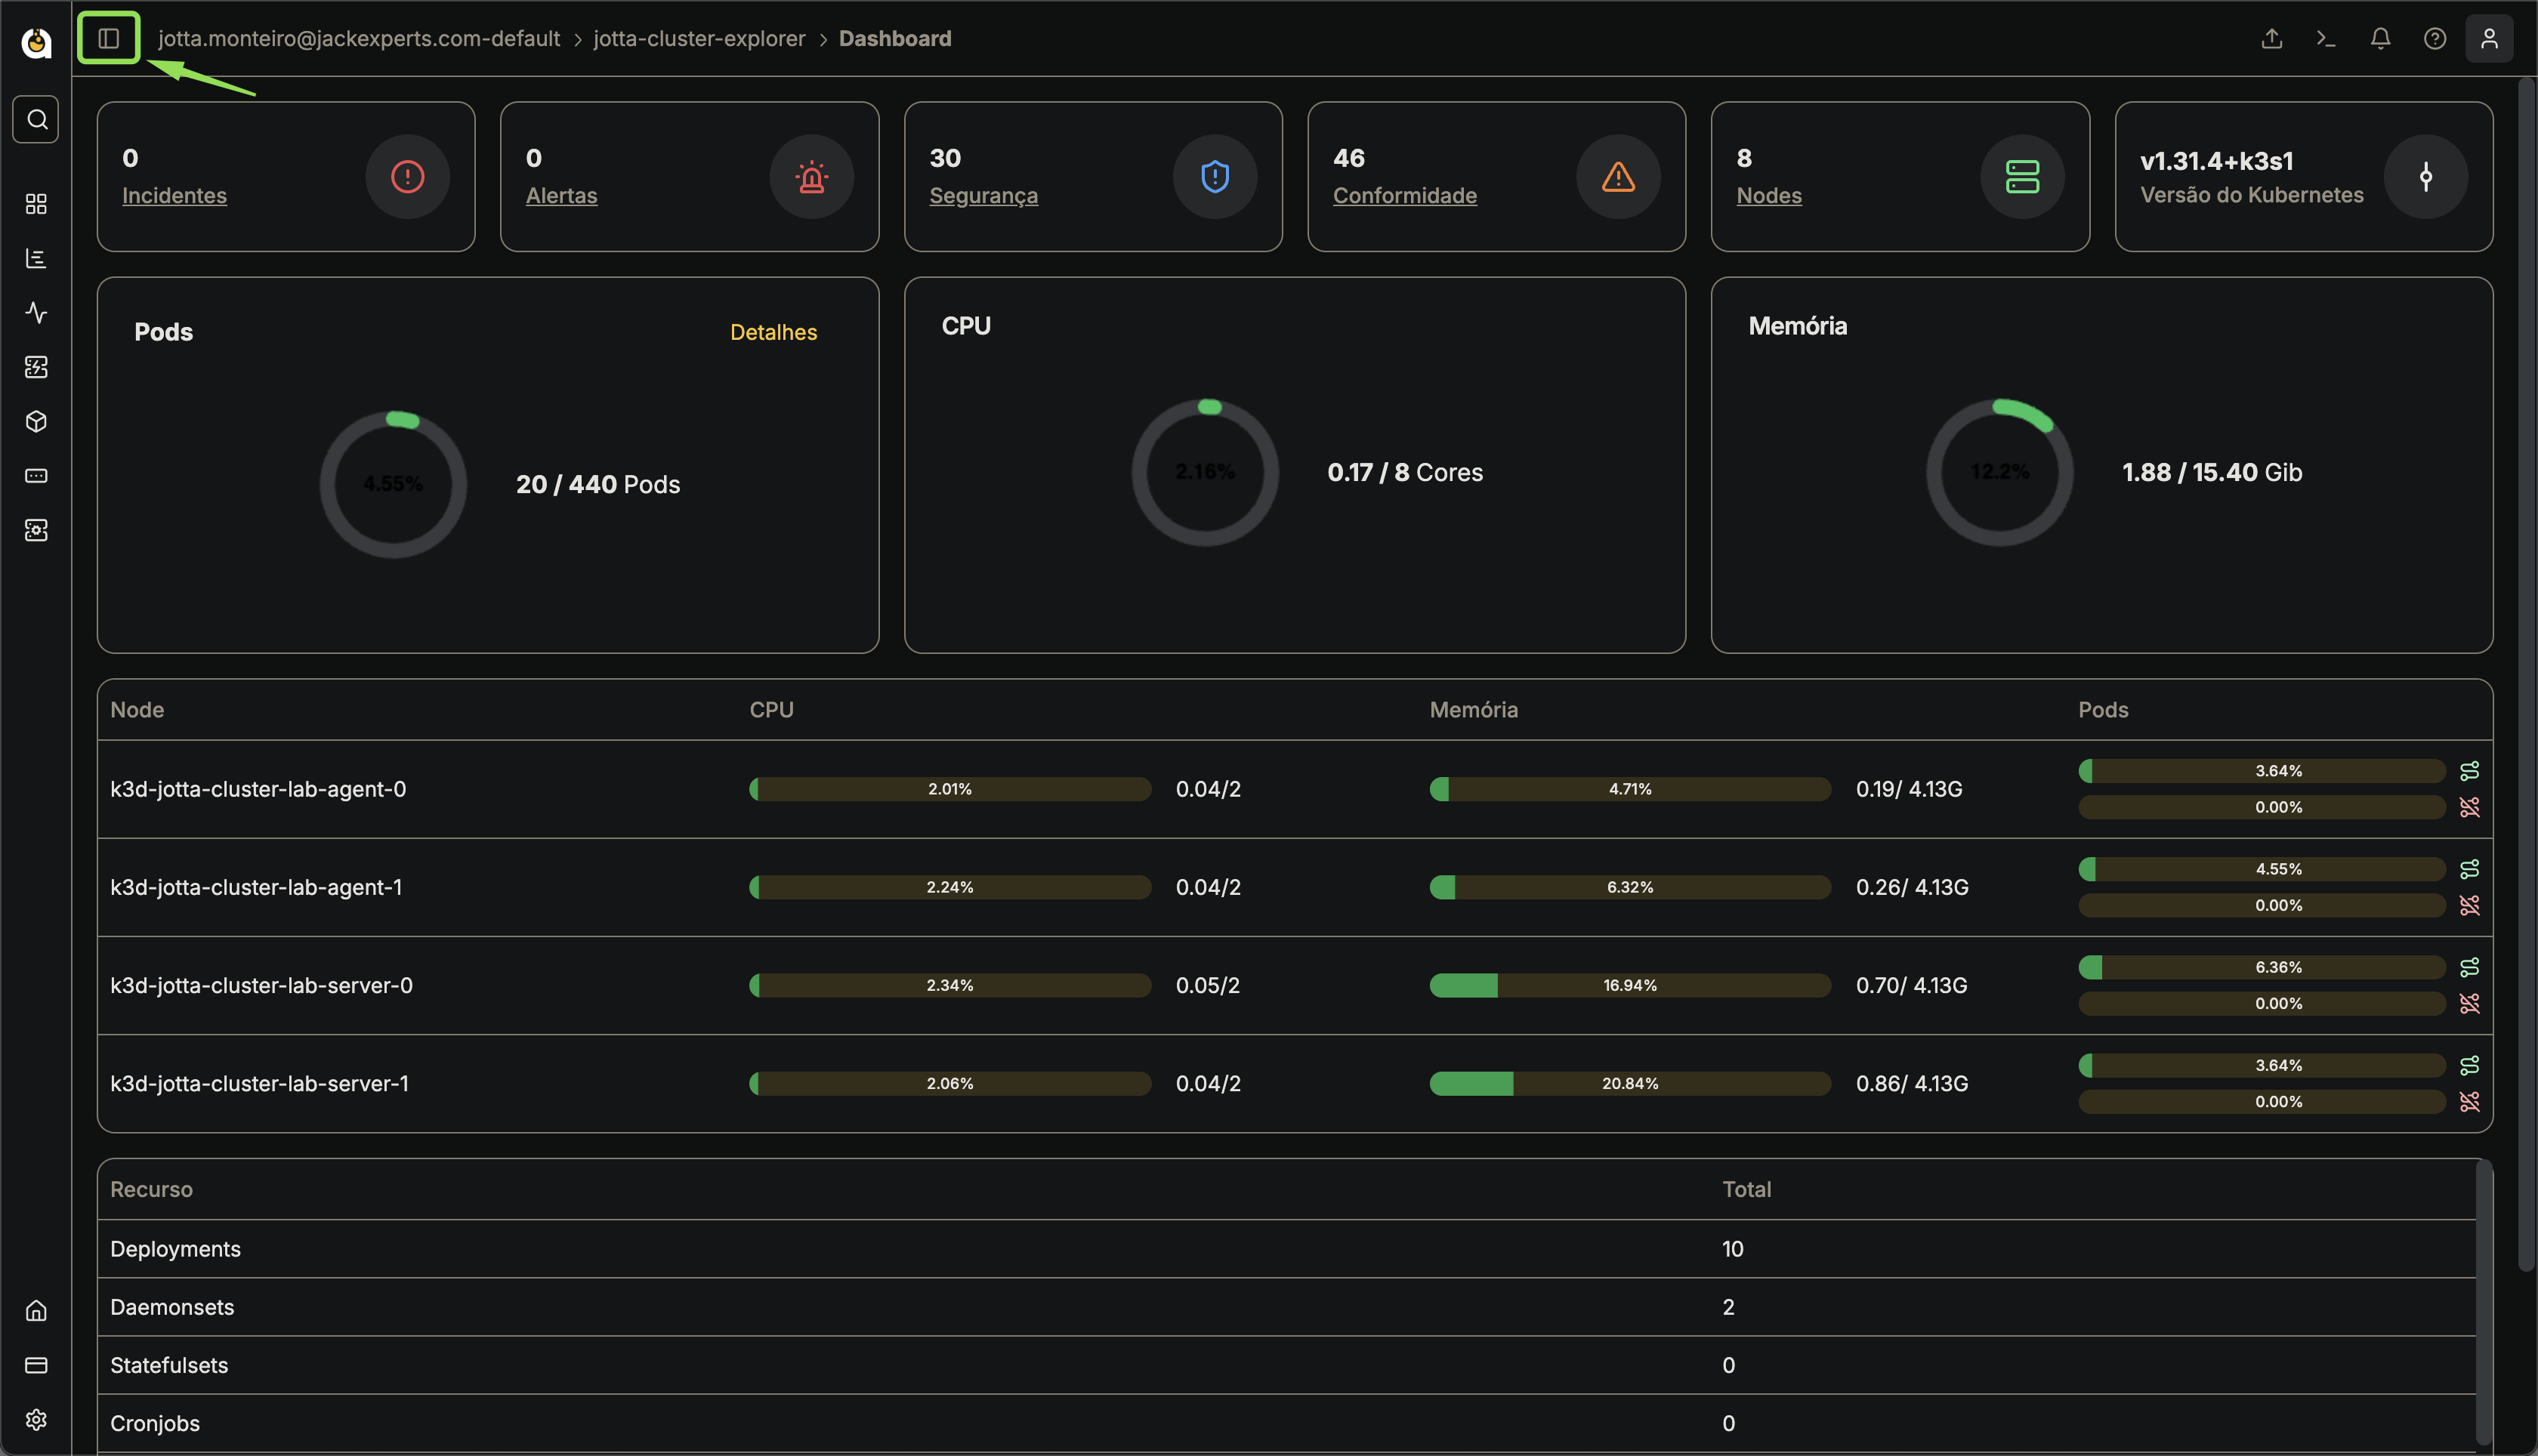
Image 08: Main panel - Cluster
- Navigate to Configuration → Settings.
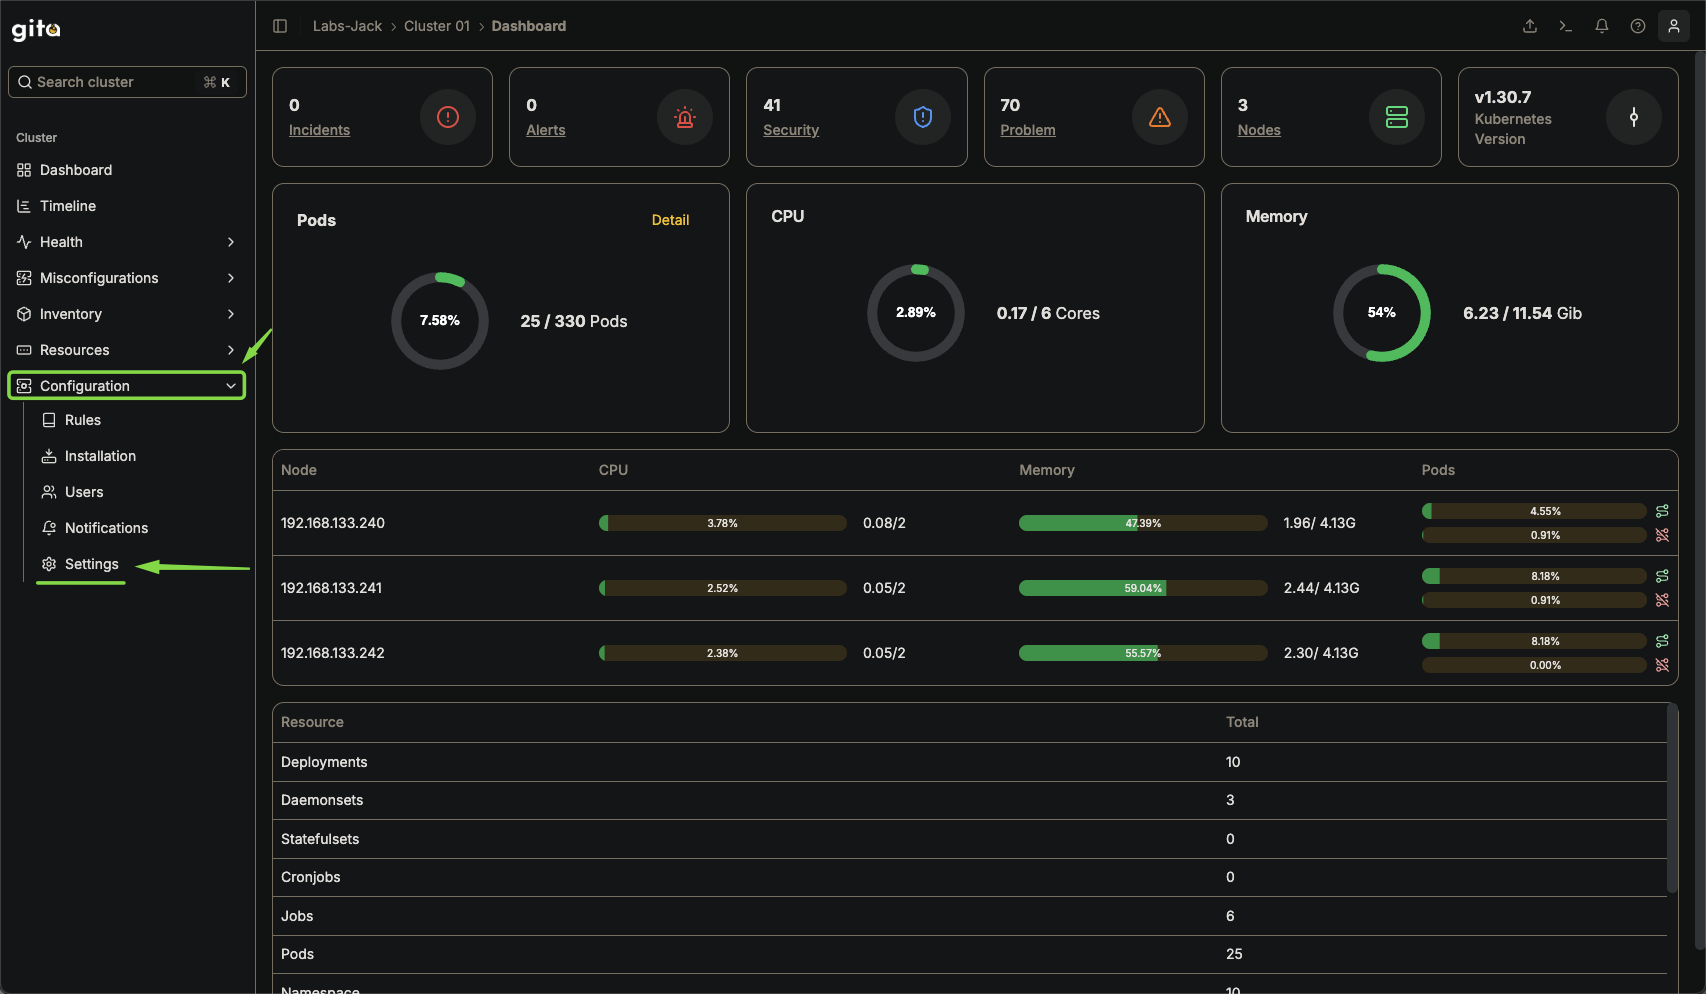
Image 09: Main panel - Highlight settings
- Click on the Proxy tab.
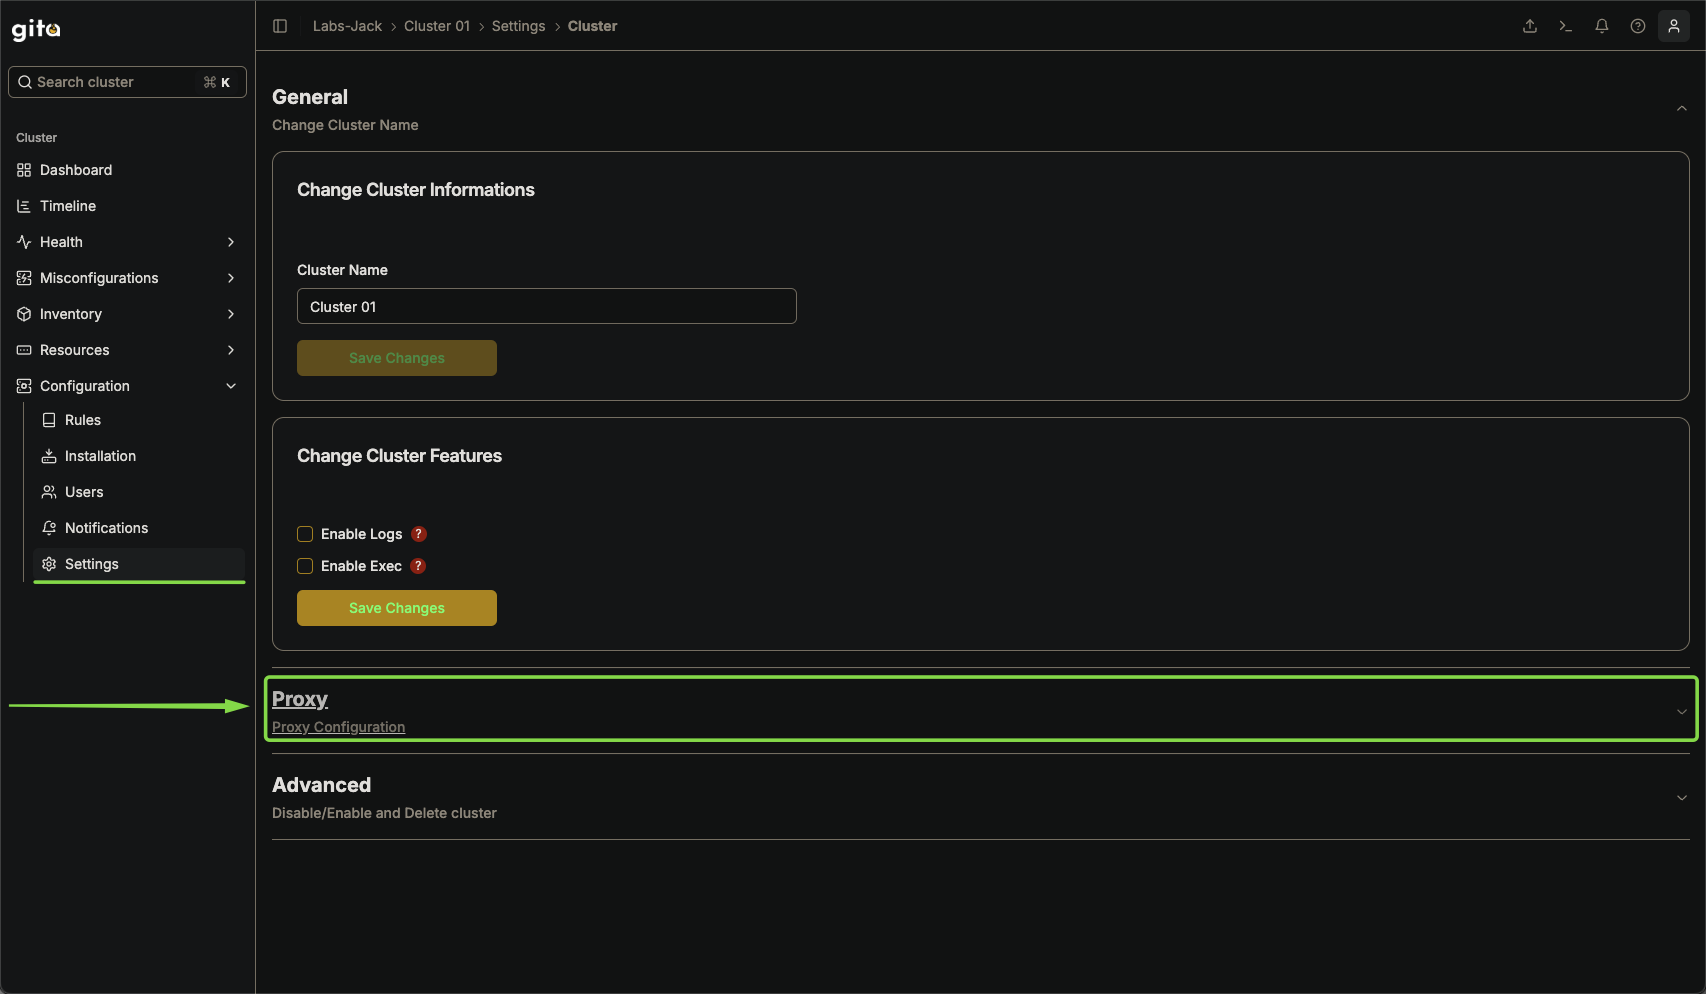
Image 10: Settings - Highlight 'Proxy'
- Fill in the proxy details according to the requirements. You can check the details of filling in the fields in section 1.5.
- Click on Create Configuration.
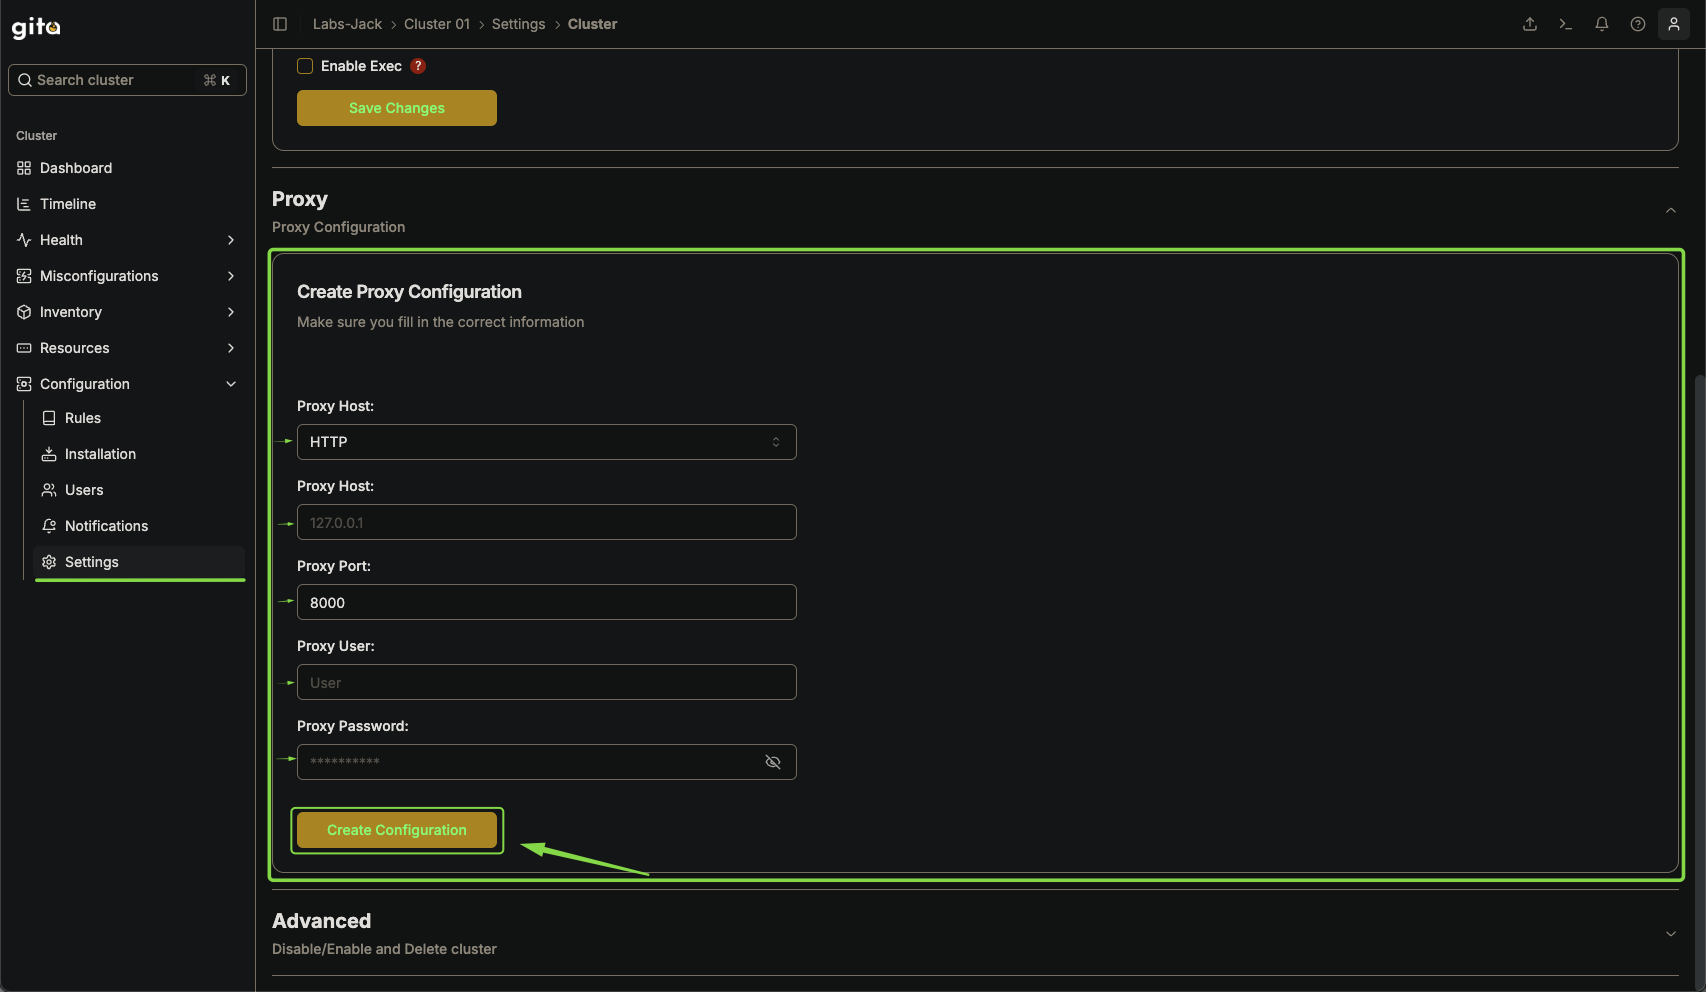
Image 11: Settings - Proxy Information
- Wait for the success message confirming the configuration.
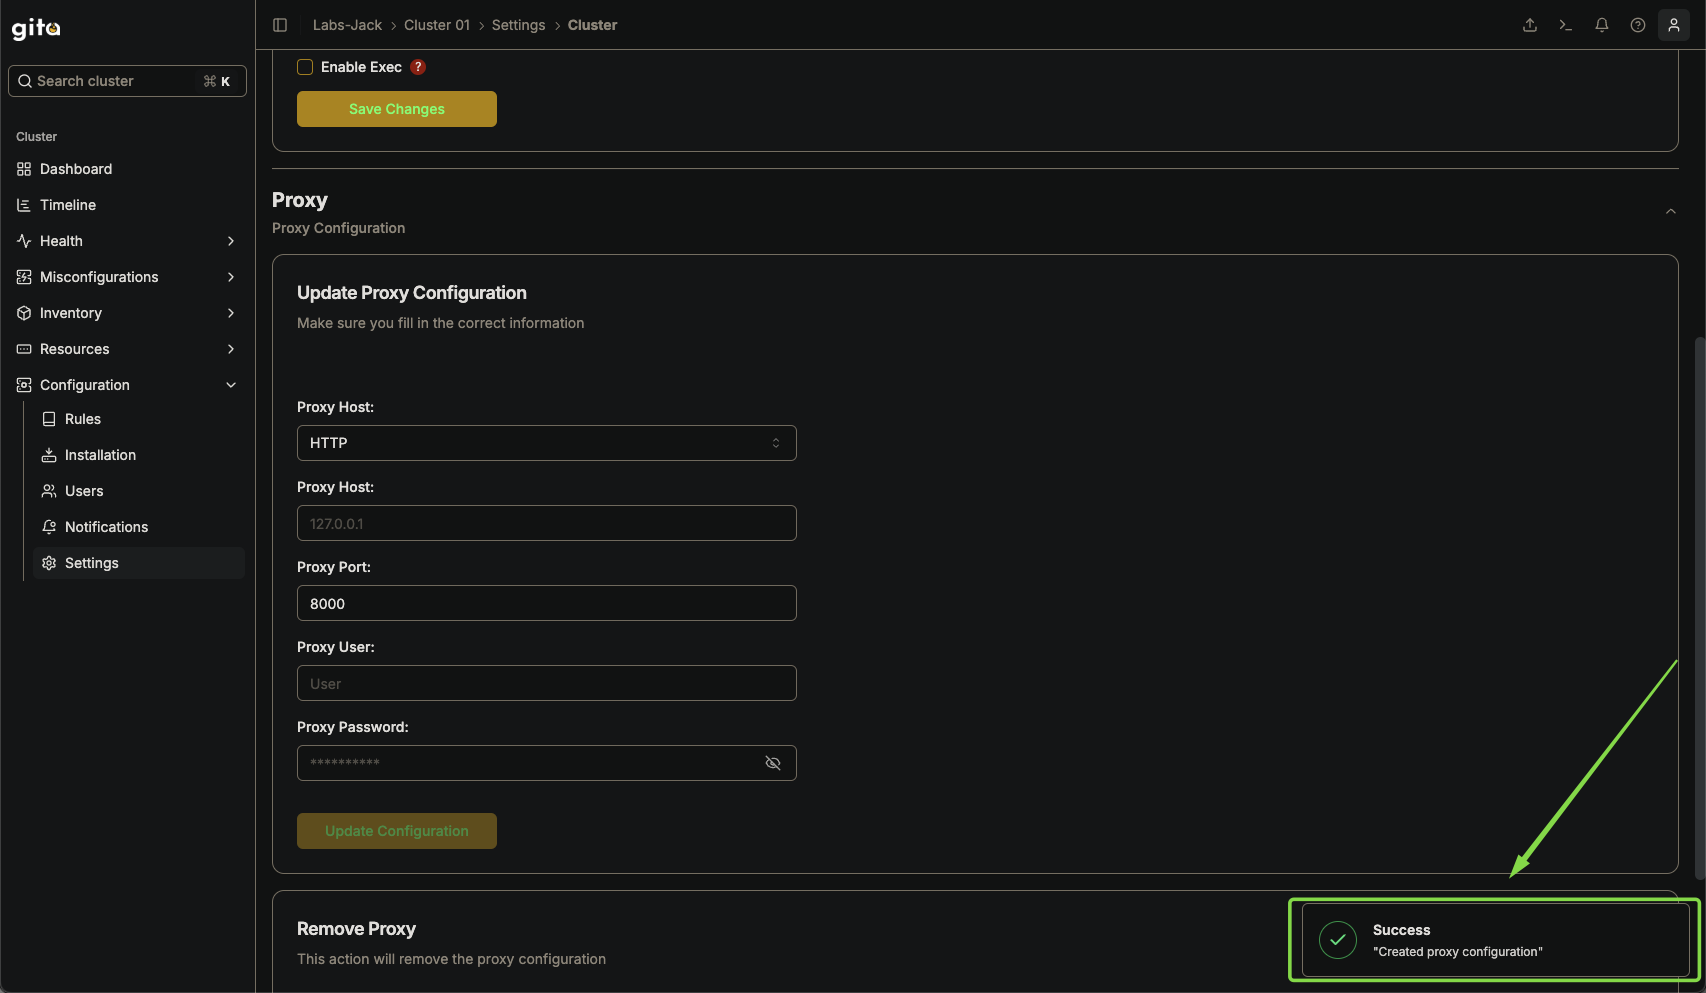
Image 12: Settings - Message indicating success
Removing the Proxy
- Access Configuration → Settings.
Image 13: Panel - Highlight 'Settings'
- Select the Remove Proxy tab.
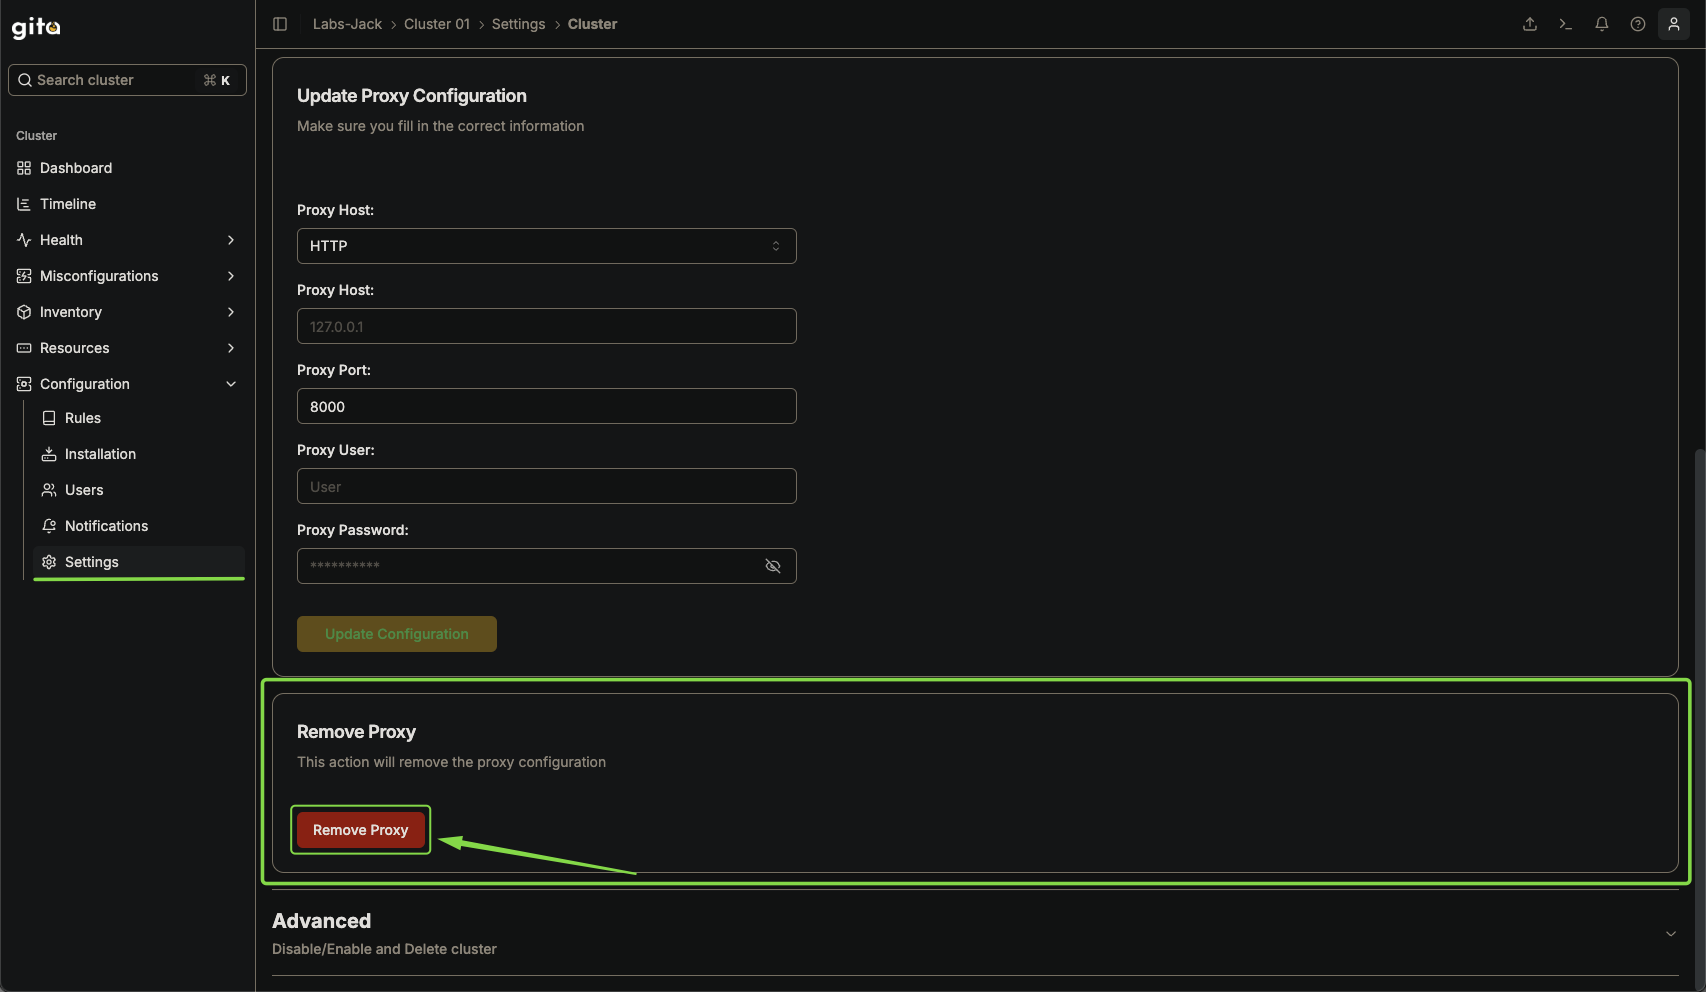
Image 14: Settings - Highlight 'Remove Proxy'
- Click on the Remove Proxy option.
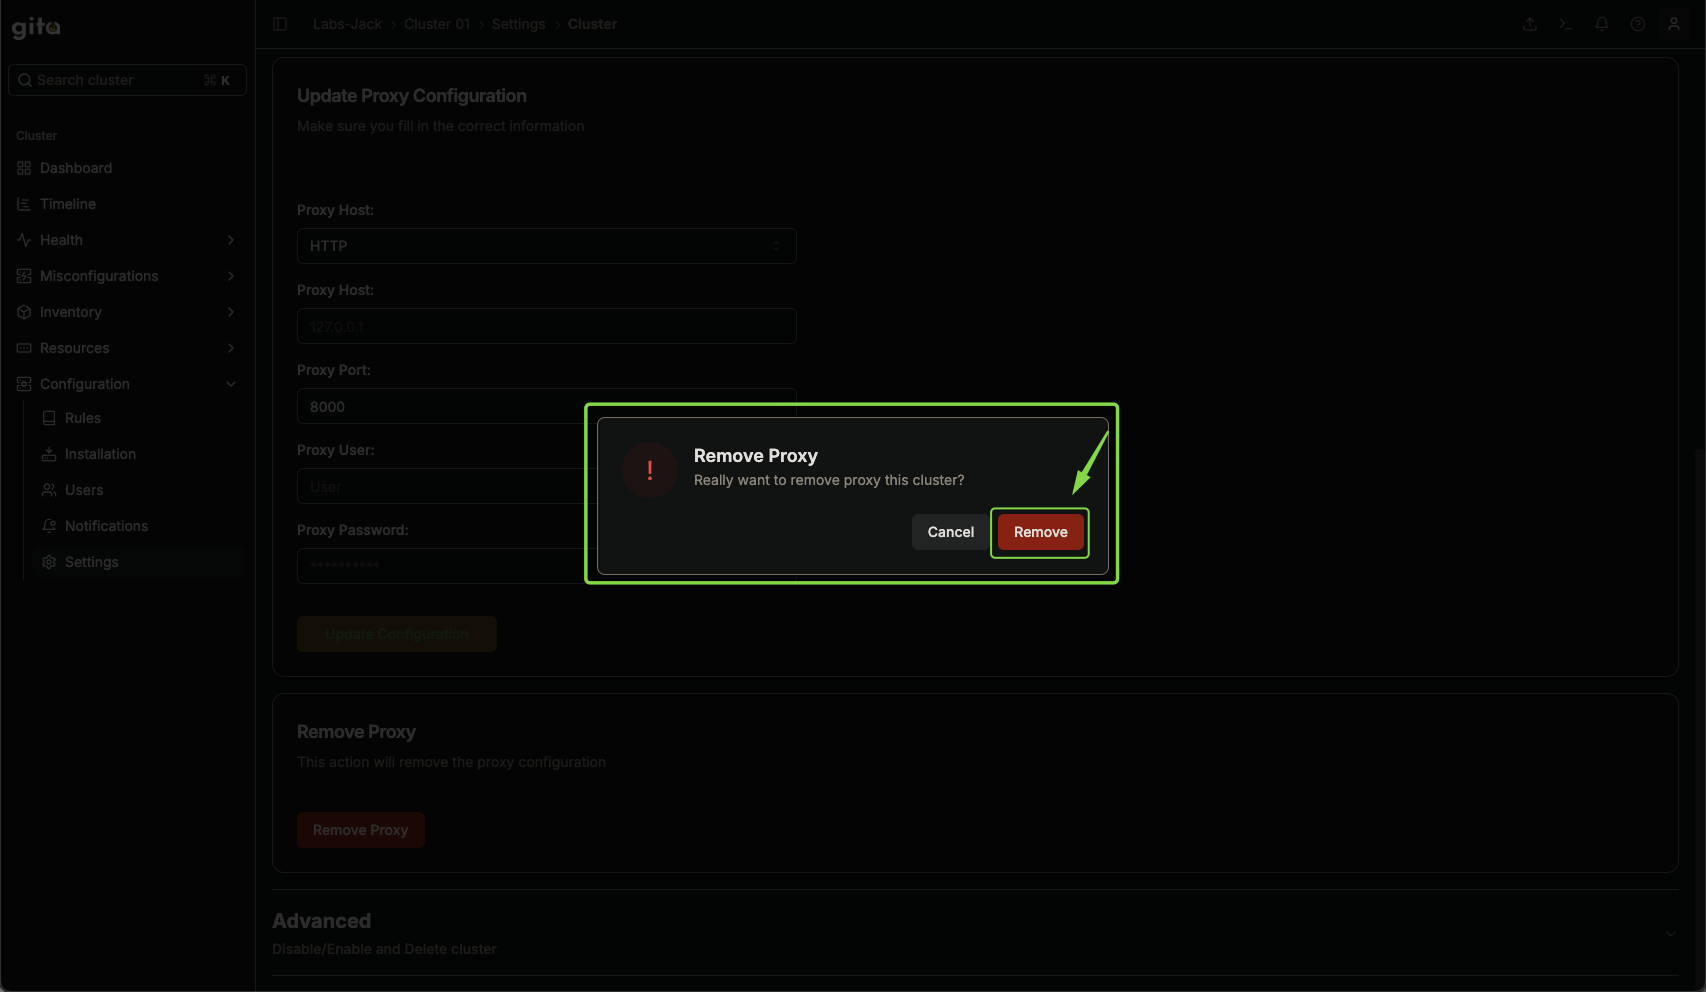
Image 15: Dialog box - Confirm proxy removal
- Confirm the removal and wait for the success notification.
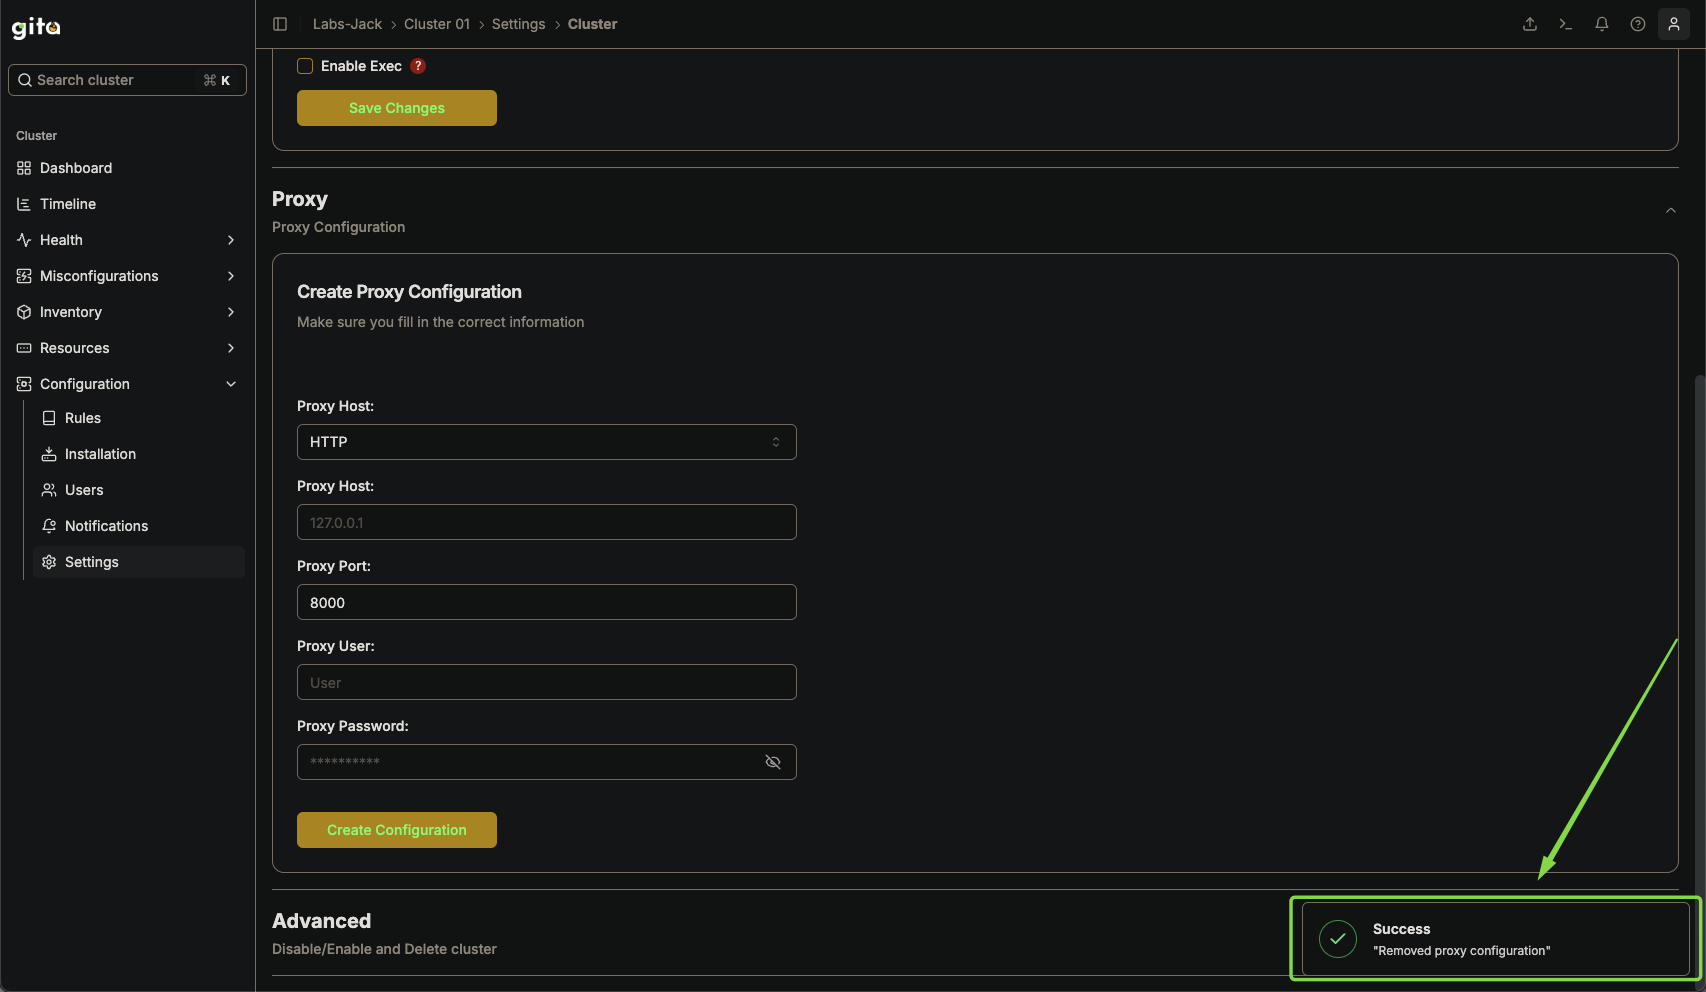
Image 16: Panel - Highlight 'Message indicating success'
Recommendations
- Make sure the proxy credentials are correct before applying them.
- If the proxy requires authentication, validate if the authentication method is compatible with your infrastructure.
- After configuration, test connectivity to ensure the proxy was properly implemented.