How to create a Demo Cluster in GITA?
Creating a demo cluster in GITA allows users to explore and test the platform's features safely, without needing to connect a real cluster. It is ideal for learning, demonstrations, testing, and onboarding new users, providing a risk-free environment to get hands-on experience with GITA!
-
On the Home page of GITA, click the Create Cluster Demo button:
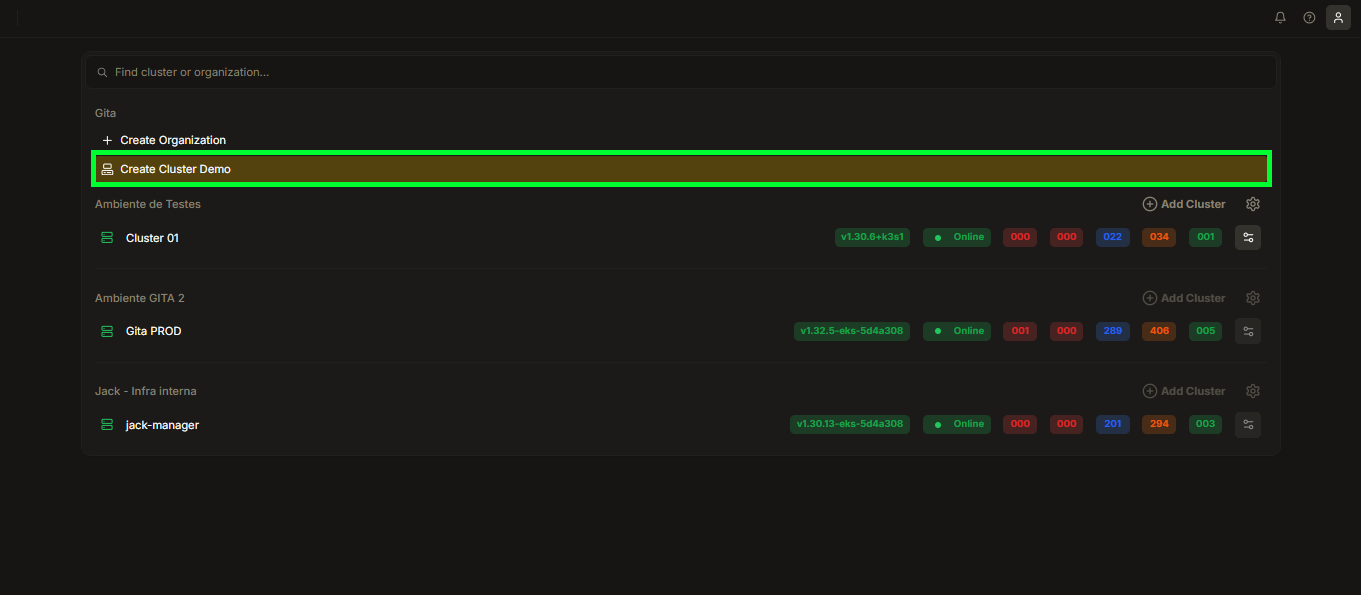
Image 01: Gita Home
-
Name the demo cluster to be created as you prefer:
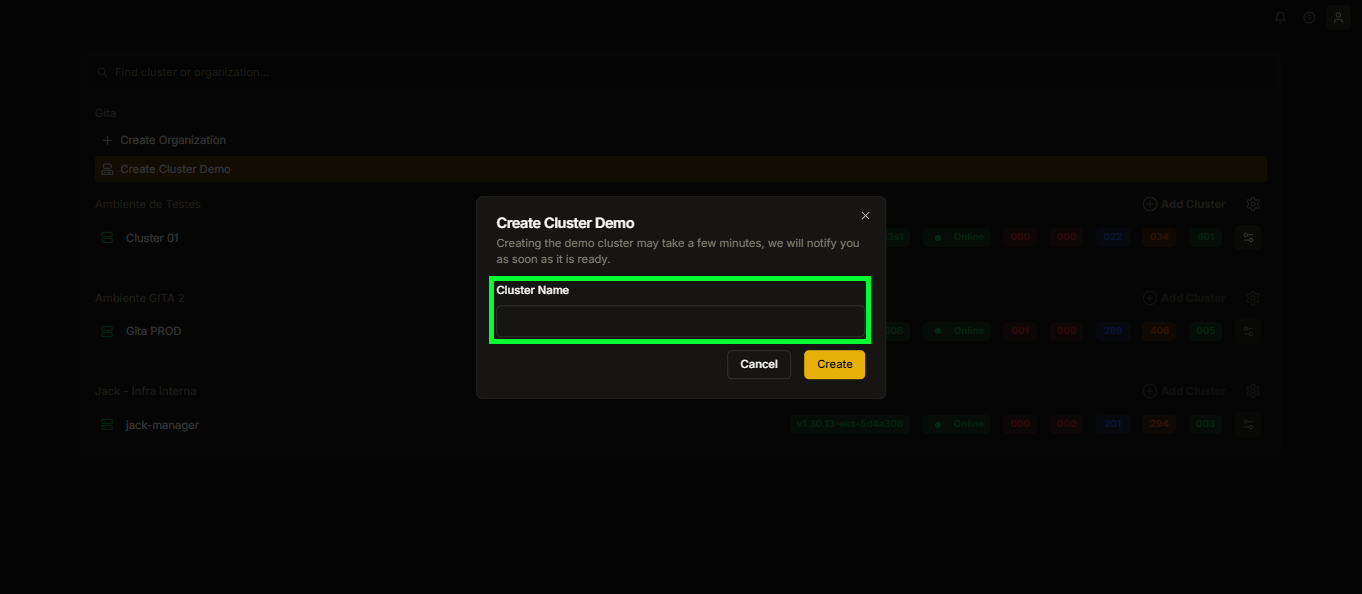
Image 02: Naming Tab for Demo Cluster
-
Click Create and wait for the cluster creation to load, which may take a few minutes:

Image 03: Creation Button
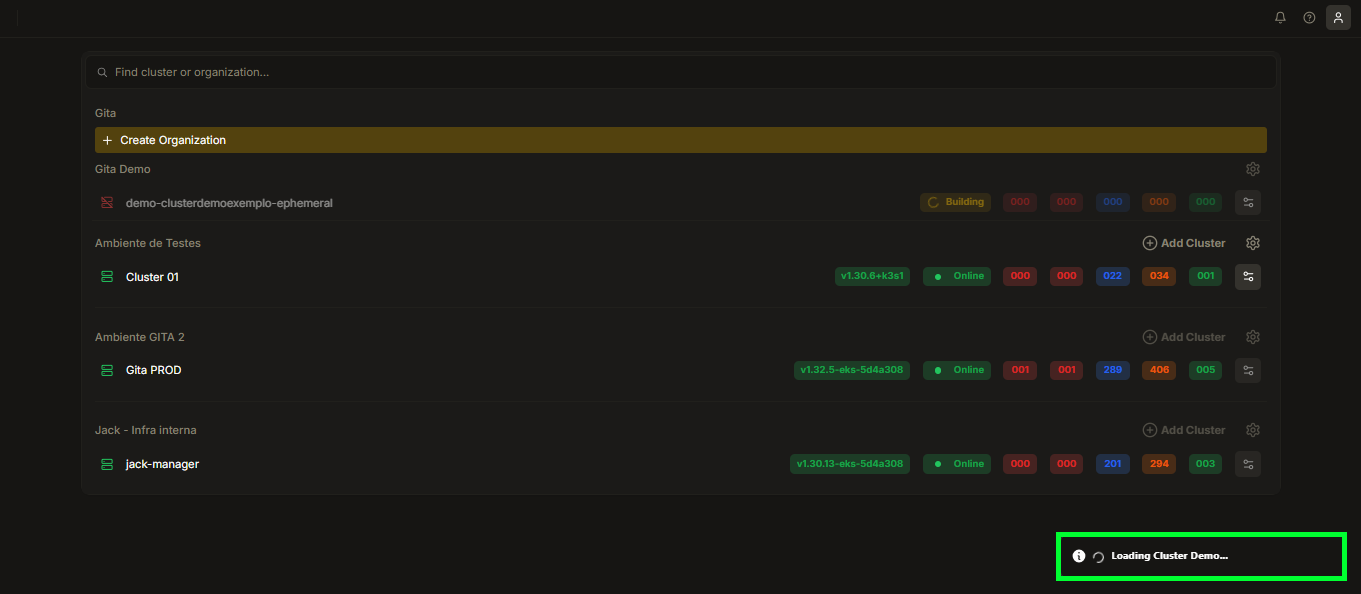
Image 04: Demo Cluster Creation Loading
-
Once the creation is complete, a confirmation message will appear on the screen, informing you until what time the demo cluster will be available - it will remain available for 3 hours after creation. Just click Go to Cluster to use the demo cluster:
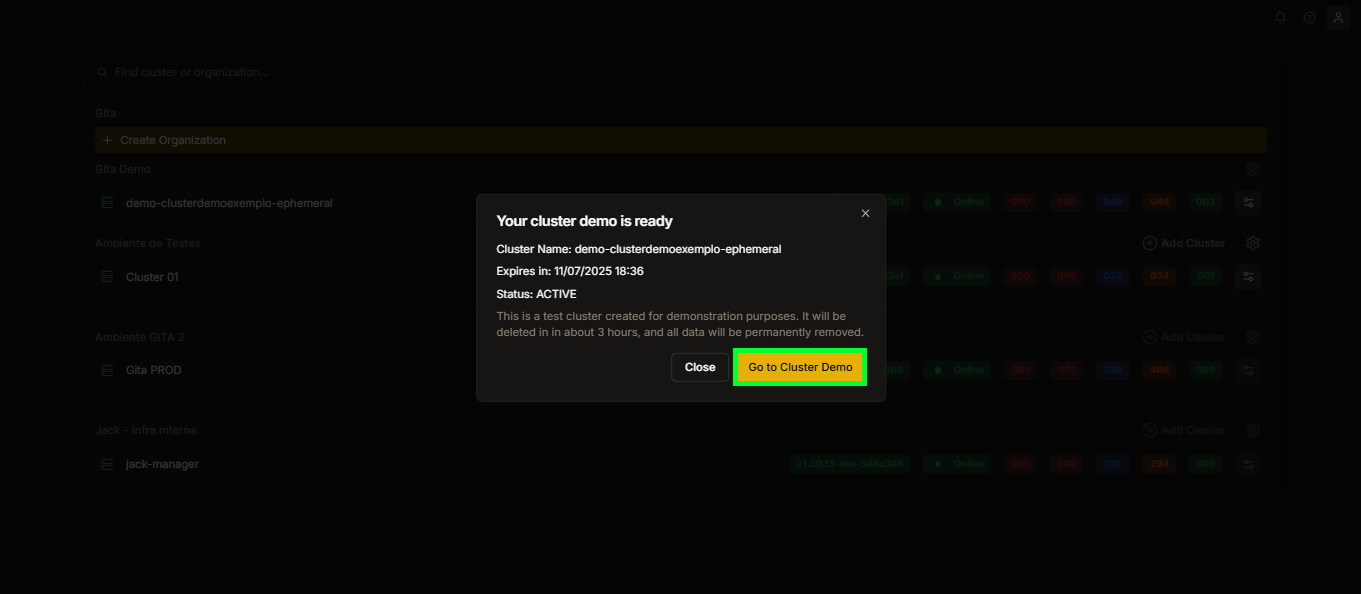
Image 05: Creation Confirmation and Go to Cluster Button
The remaining usage time is shown at the top of the cluster screen:
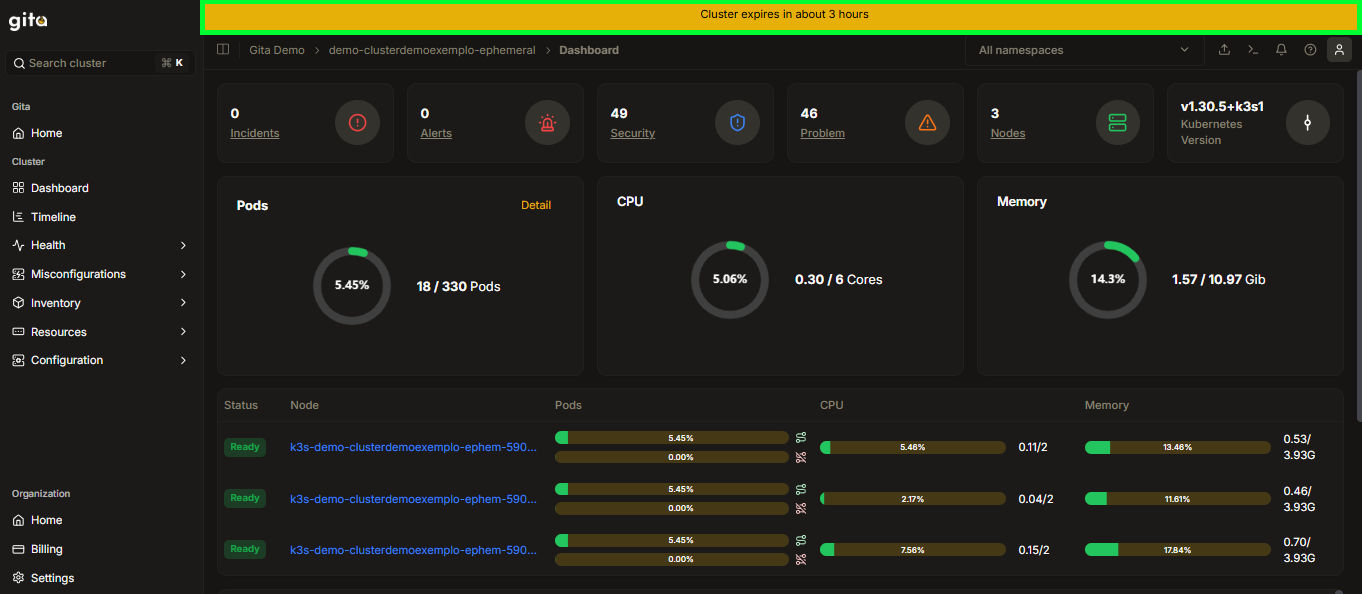
Image 06: Remaining Usage Time for Demo Cluster