How to add CIDR-based access permission to a Cluster in GITA?
CIDR (Classless Inter-Domain Routing) permissioning is a form of access control based on a range of IP addresses belonging to a network. This functionality allows you to define CIDR blocks, making it possible to authorize access to a GITA Cluster only to desired IP addresses.
How to add a CIDR?
-
Access your GITA Home:
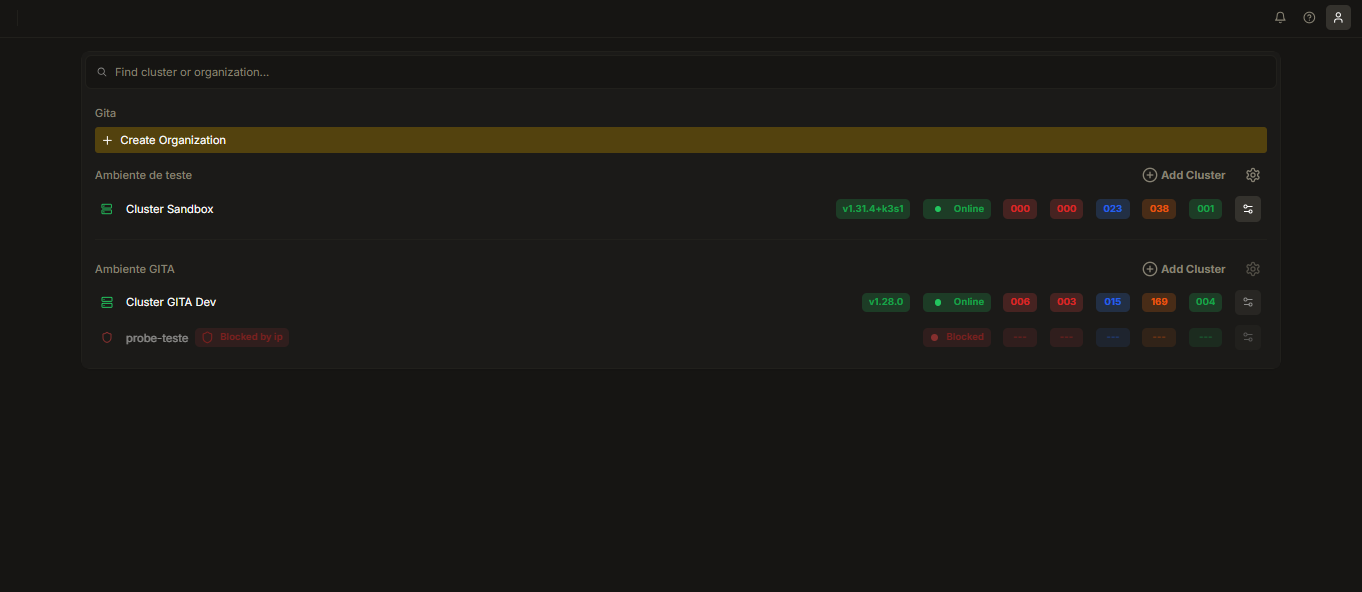
Image 01: Home - Organizations View
-
Click on Settings (gear) to the right of the organization where you want to add the permission:
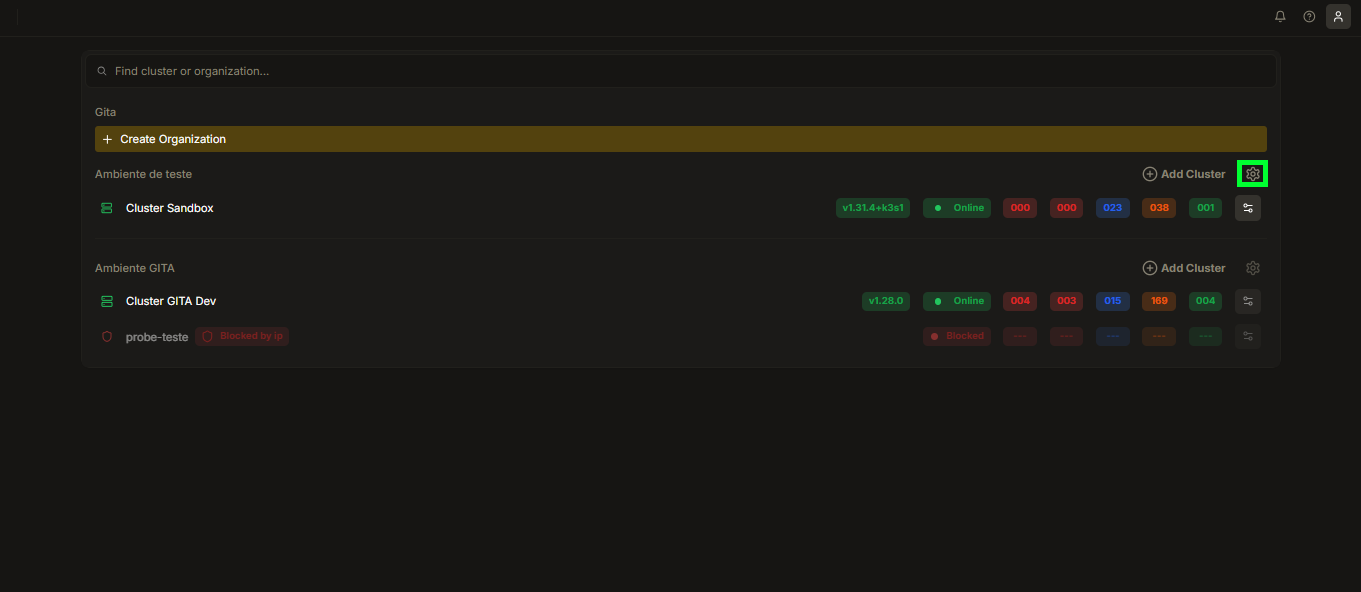
Image 02: Home - Organization Settings
-
You will be directed to the Settings section of the Organization:
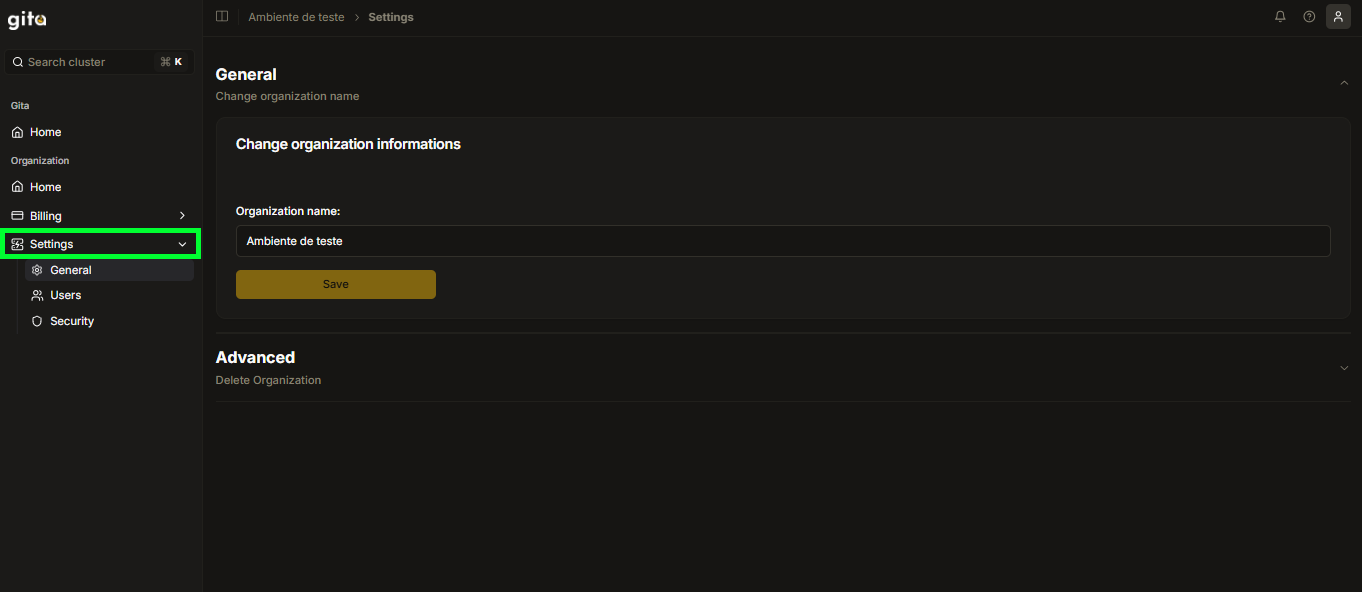
Image 03: Settings Section
-
In the Settings tab, select the Security option to view the CIDRs already added for each Cluster (if any):
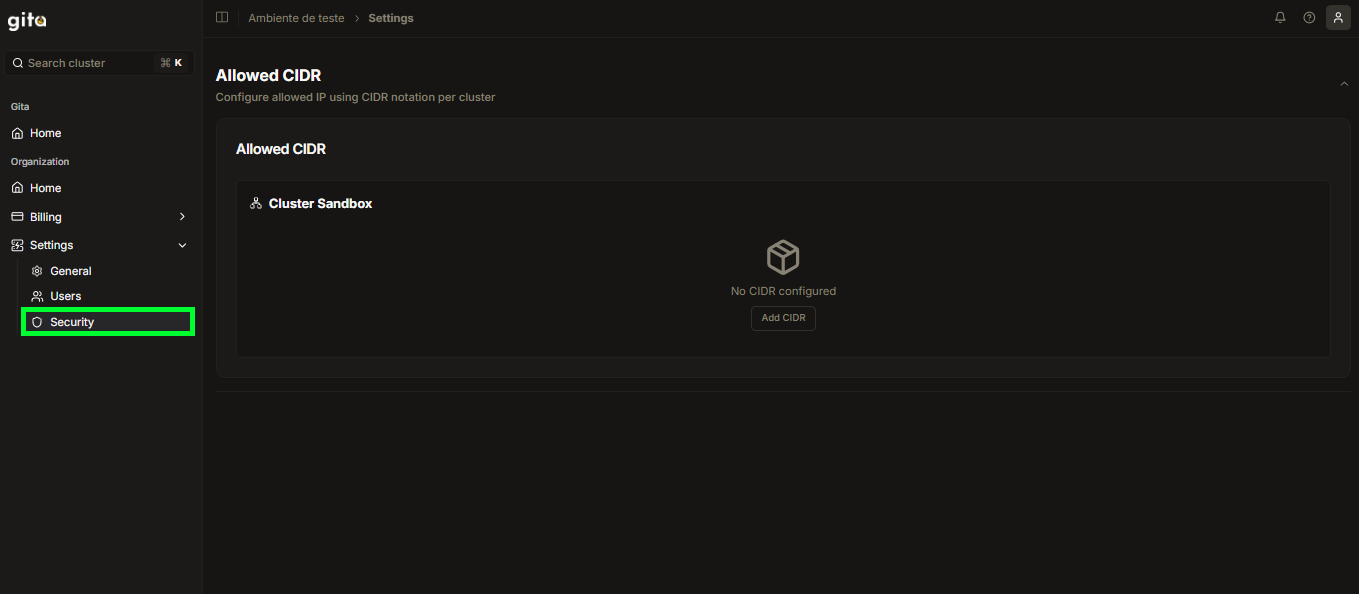
Image 04: Security Section
-
To add a new CIDR, click on Add CIDR in the desired Cluster:
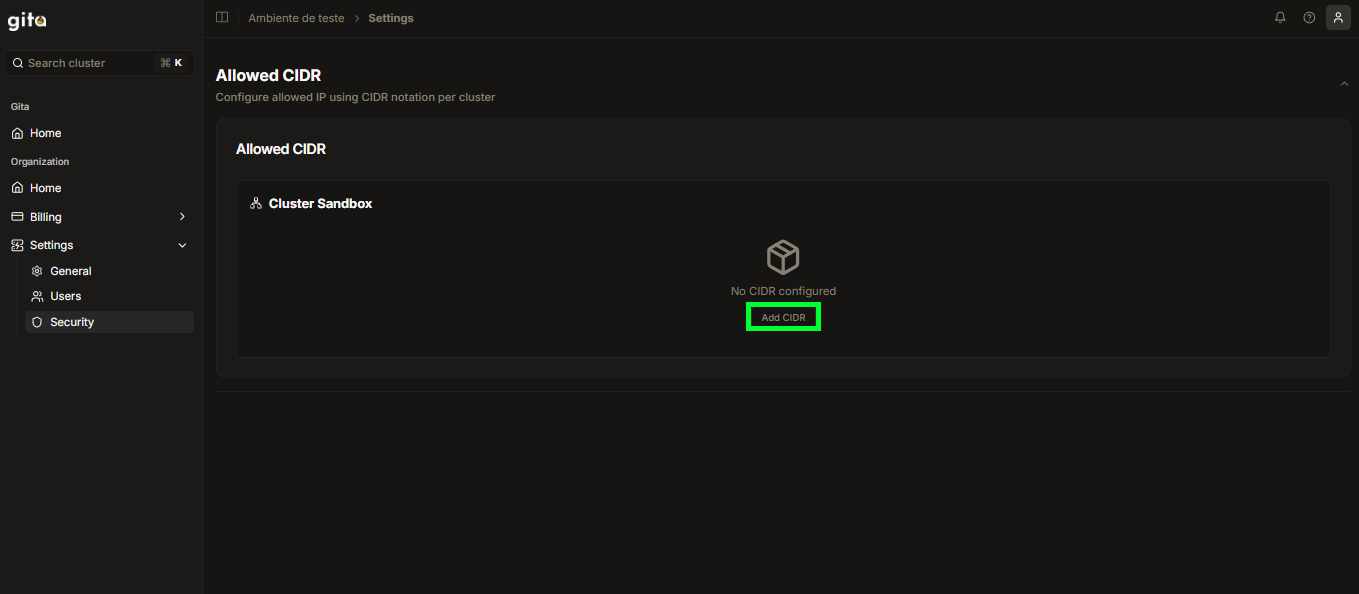
Image 05: View - Allowed CIDR
-
In the Add CIDR tab, fill in the IP Address field with the chosen CIDR and click on Add:
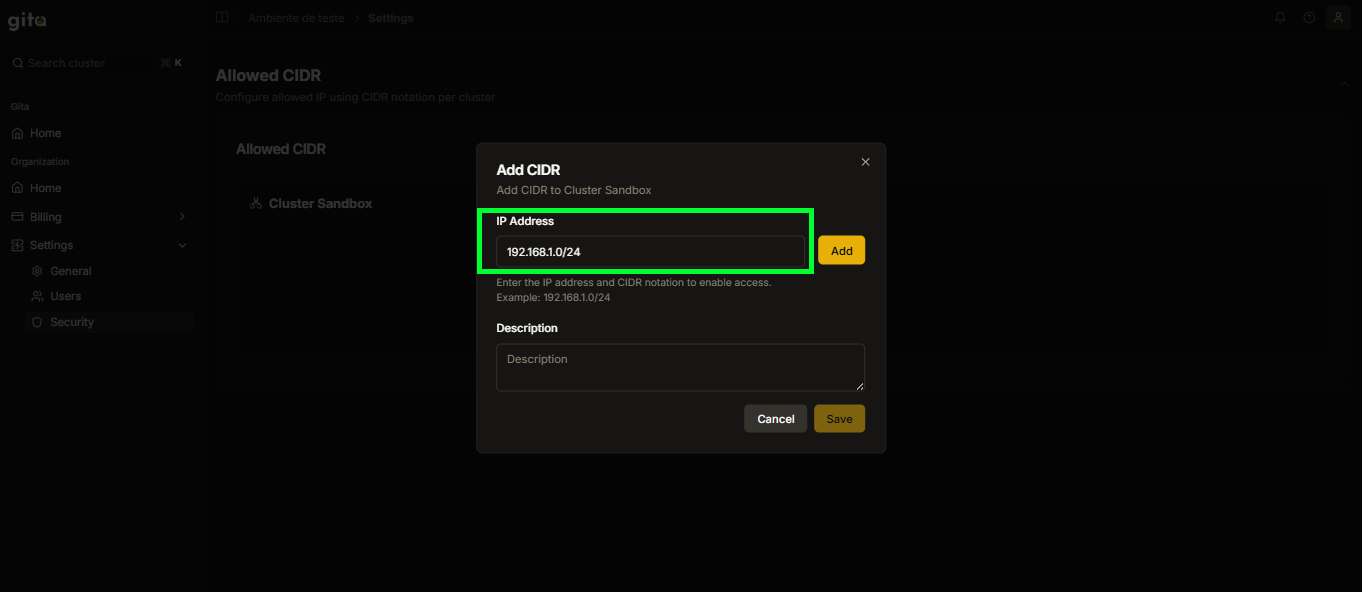
Image 06: Add CIDR Panel - IP Address
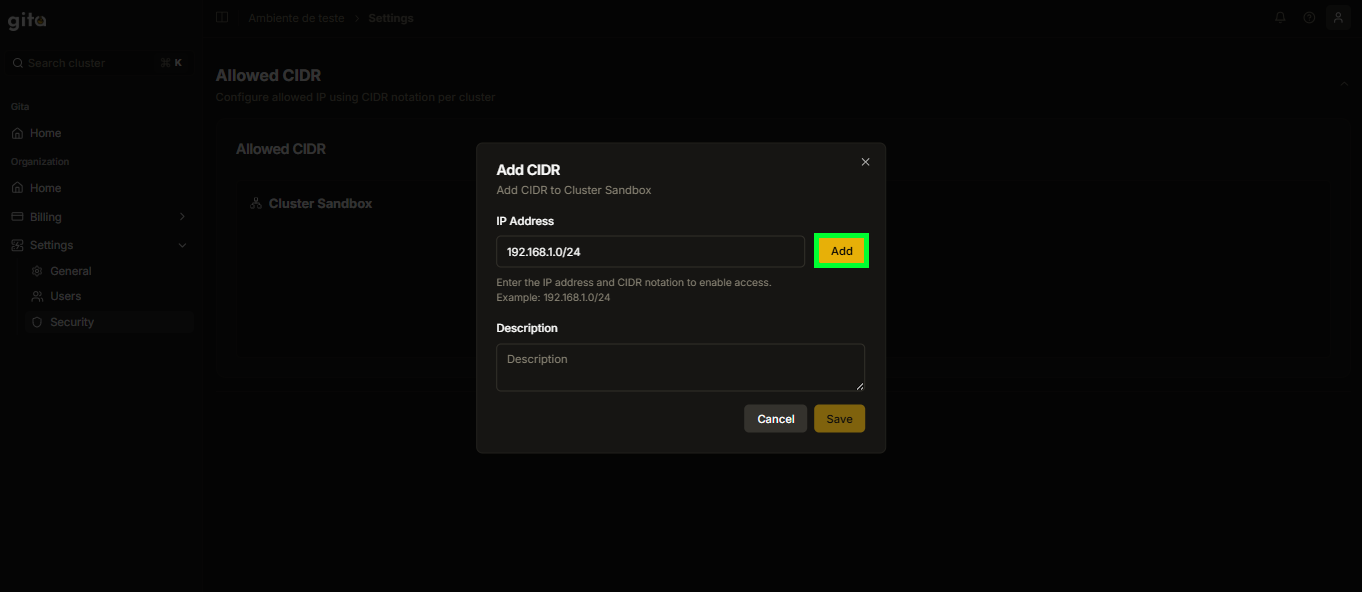
Image 07: Add CIDR Panel - Add Button
-
Add a description in Description if you deem it necessary:
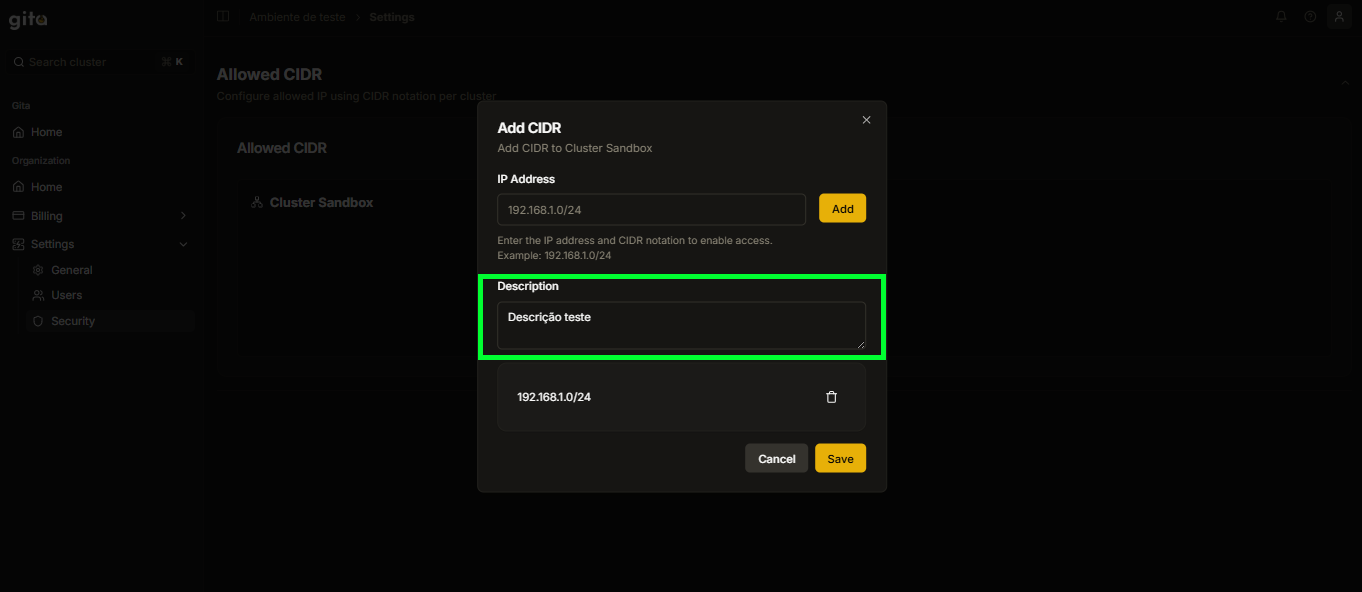
Image 08: Add CIDR Panel - Description
-
Click on Save to save the specifications of the added CIDR:
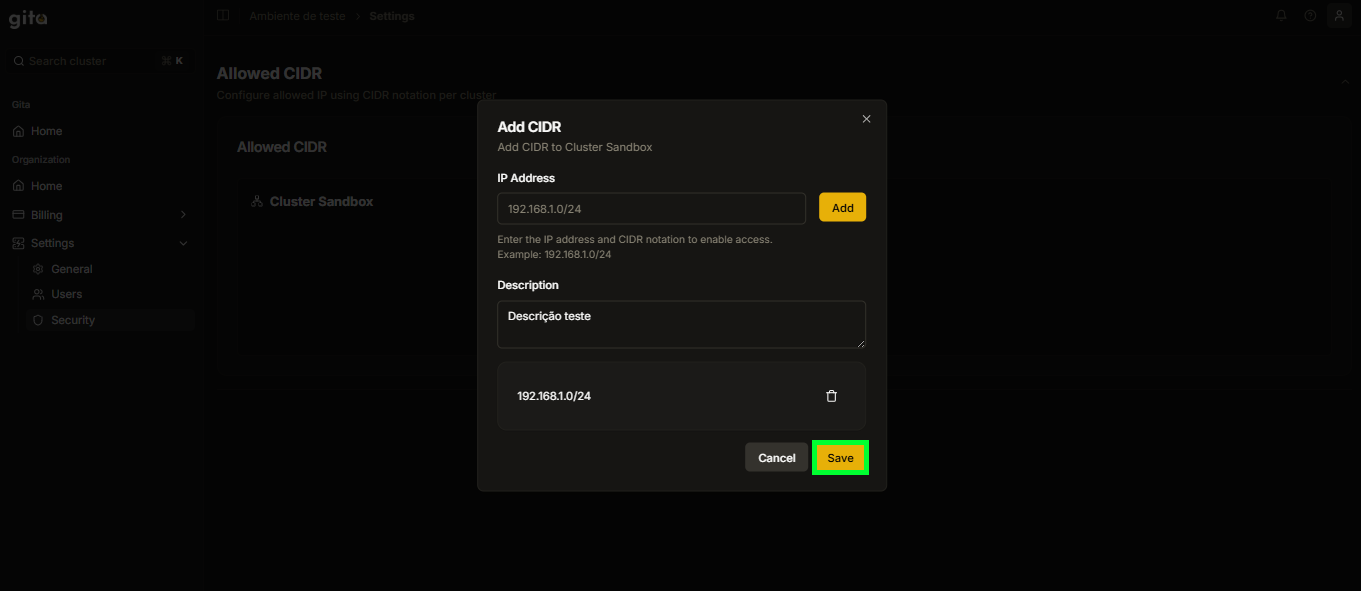
Image 09: Option - Save
-
When added, a message will be displayed on the screen - Success - indicating that the operation was successful, and you will be able to view the added CIDR in the respective Cluster:
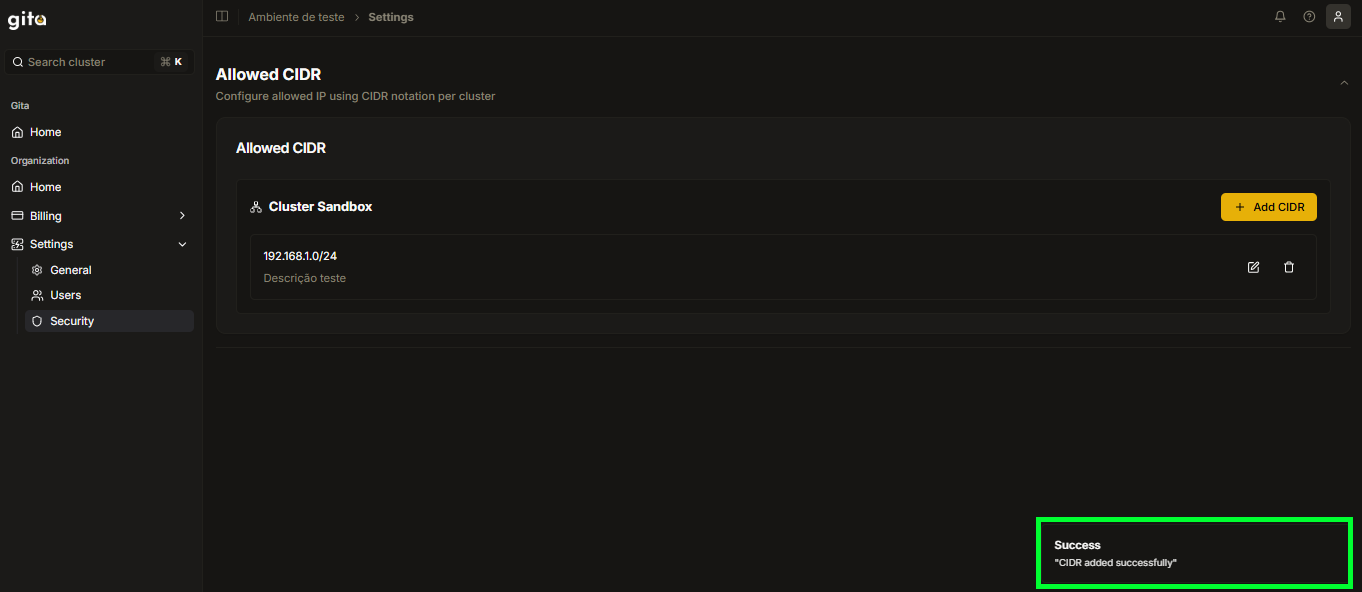
Image 10: View - Added CIDR
-
The user who tries to enter with an IP address within the range of the added CIDR will have their IP blocked and will not be able to access the Cluster in question:
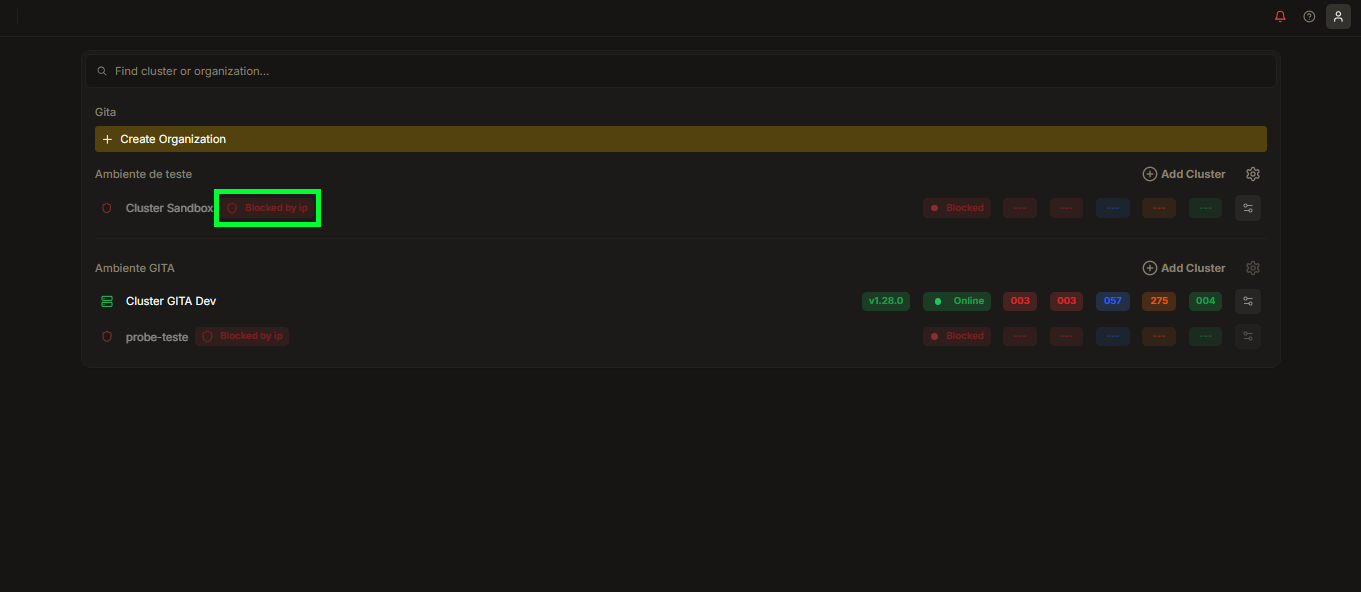
Image 11: Home - Blocked IP View
How to update an added CIDR?
-
Access your GITA Home:
Image 01: Home - Organizations View
-
Click on Settings (gear) to the right of the organization where you want to update the permission:
Image 02: Home - Organization Settings
-
You will be directed to the Settings section of the Organization:
Image 03: Settings Section
-
In the Settings tab, select the Security option to view the CIDRs already added for each Cluster:
Image 04: Security Section
-
To update a CIDR, click on the edit symbol next to the CIDR you want to change:
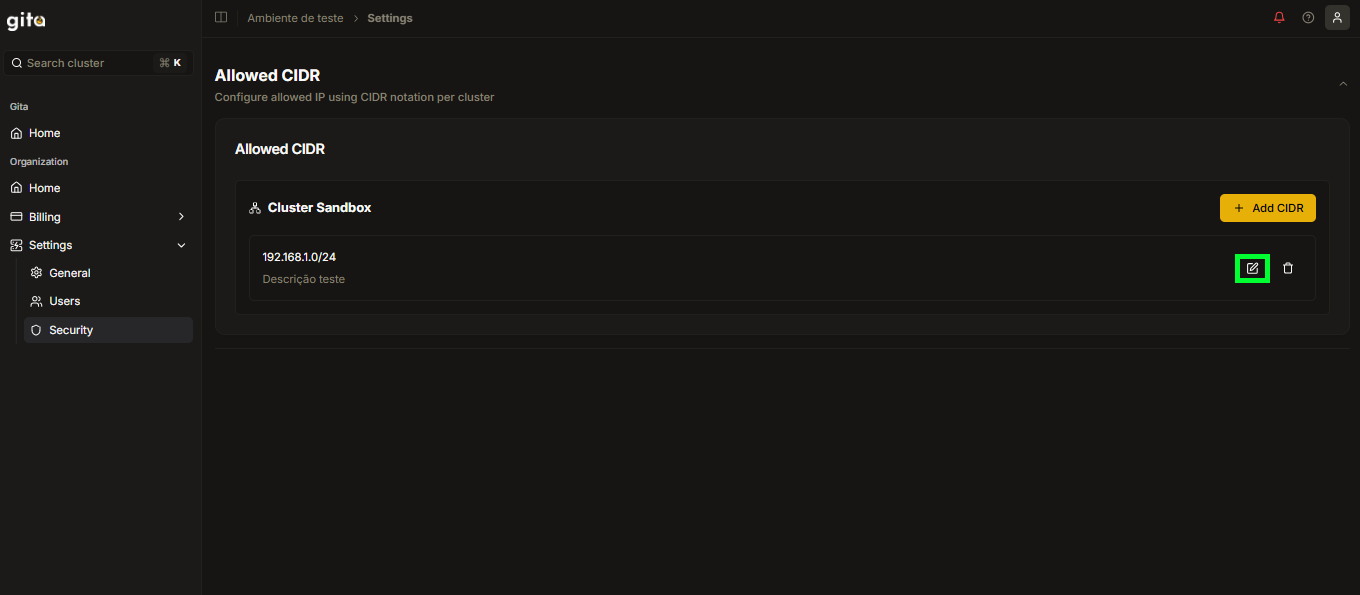
Image 05: View - Edit
-
In the Update CIDR tab, fill in the IP Address field with the updated CIDR:
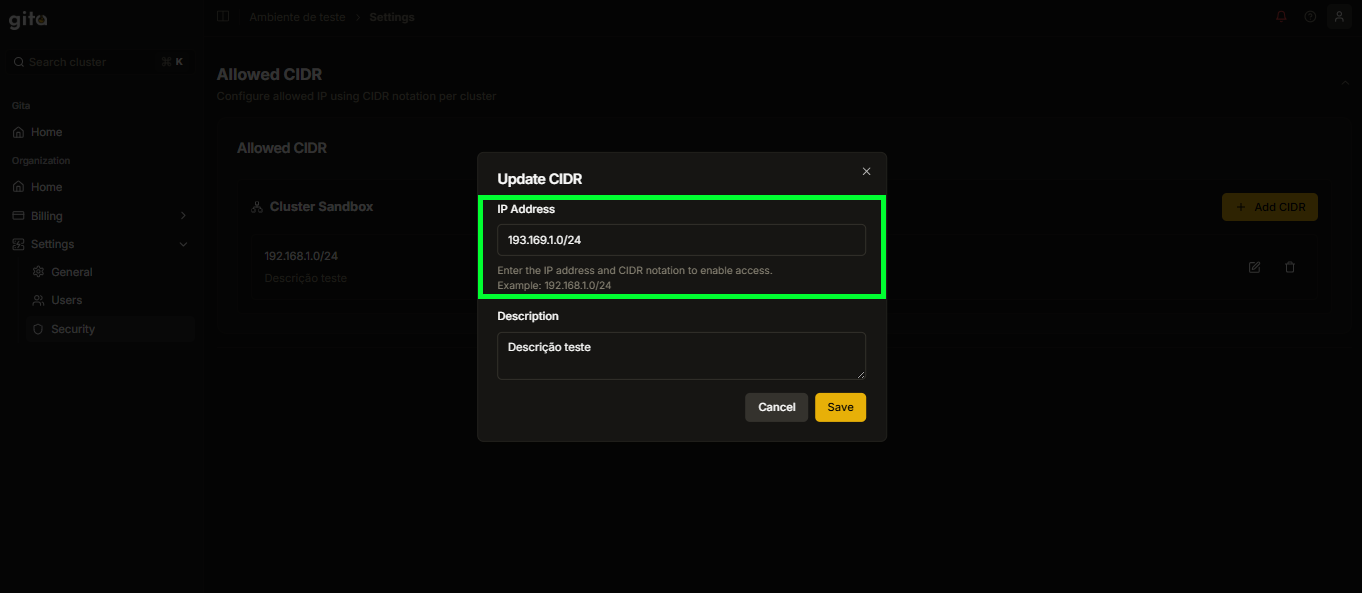
Image 06: Update CIDR Panel - IP Address
-
Also update the description in Description if you deem it necessary:
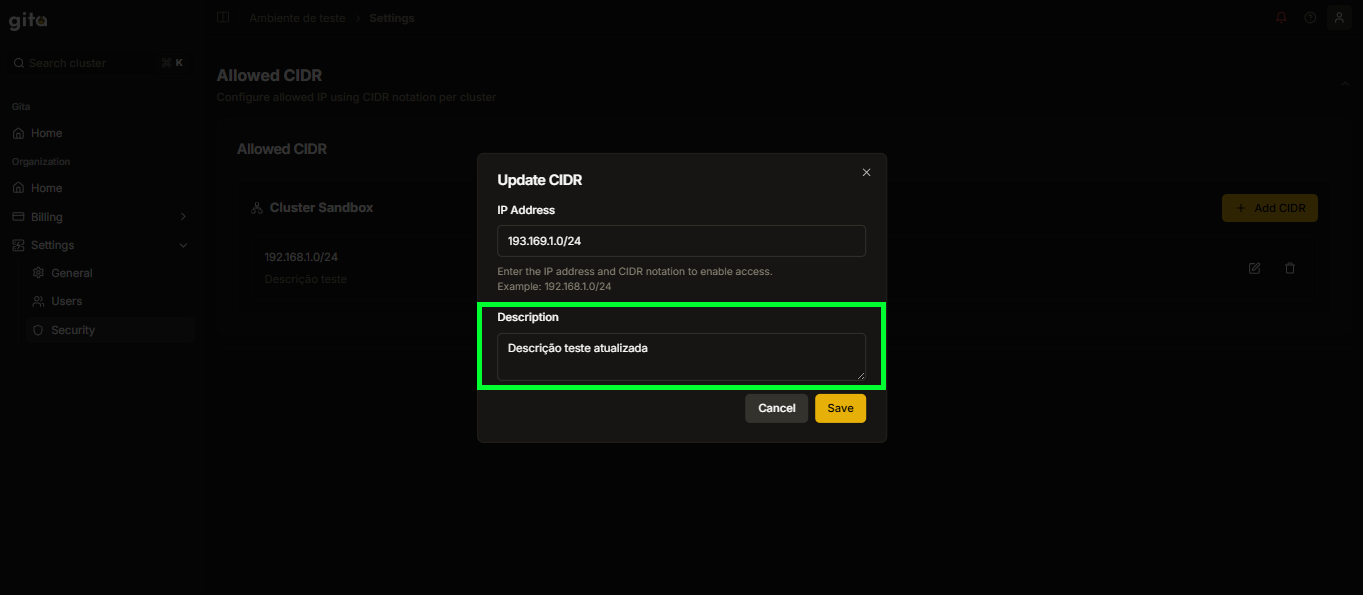
Image 07: Update CIDR Panel - Description
-
Click on Save to save the specifications of the updated CIDR:
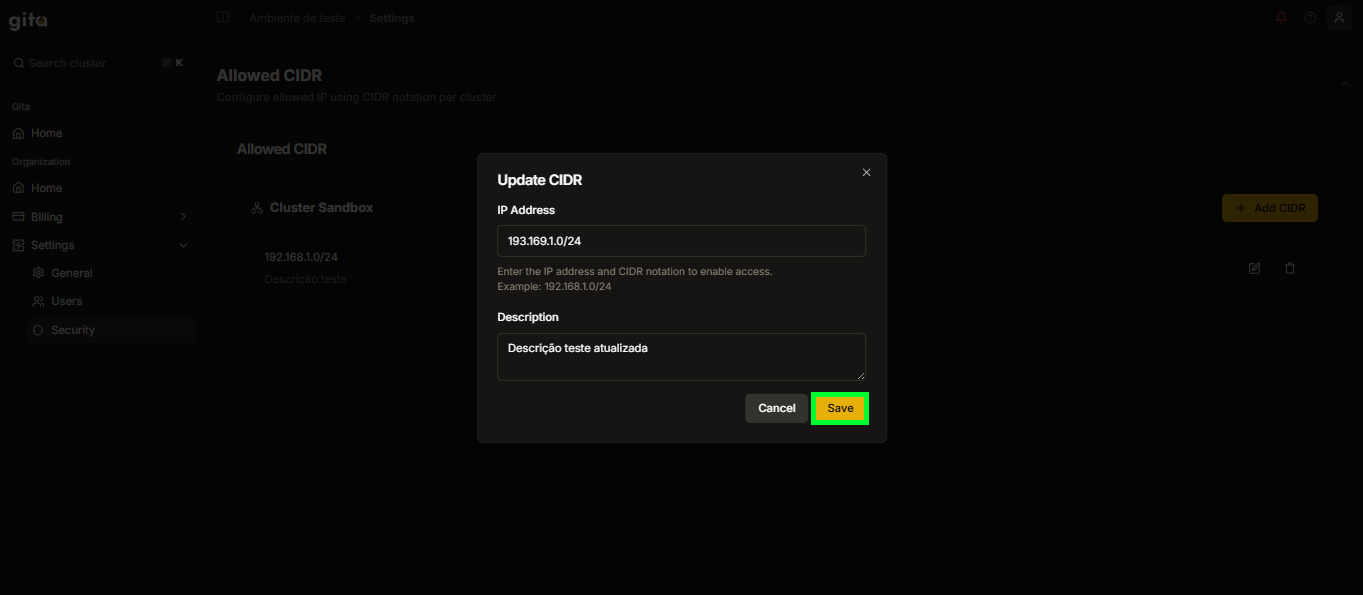
Image 08: Option - Save
-
After the update, a message will be displayed on the screen - Success - indicating that the operation was successful, and you will be able to view the updated CIDR in the respective Cluster:
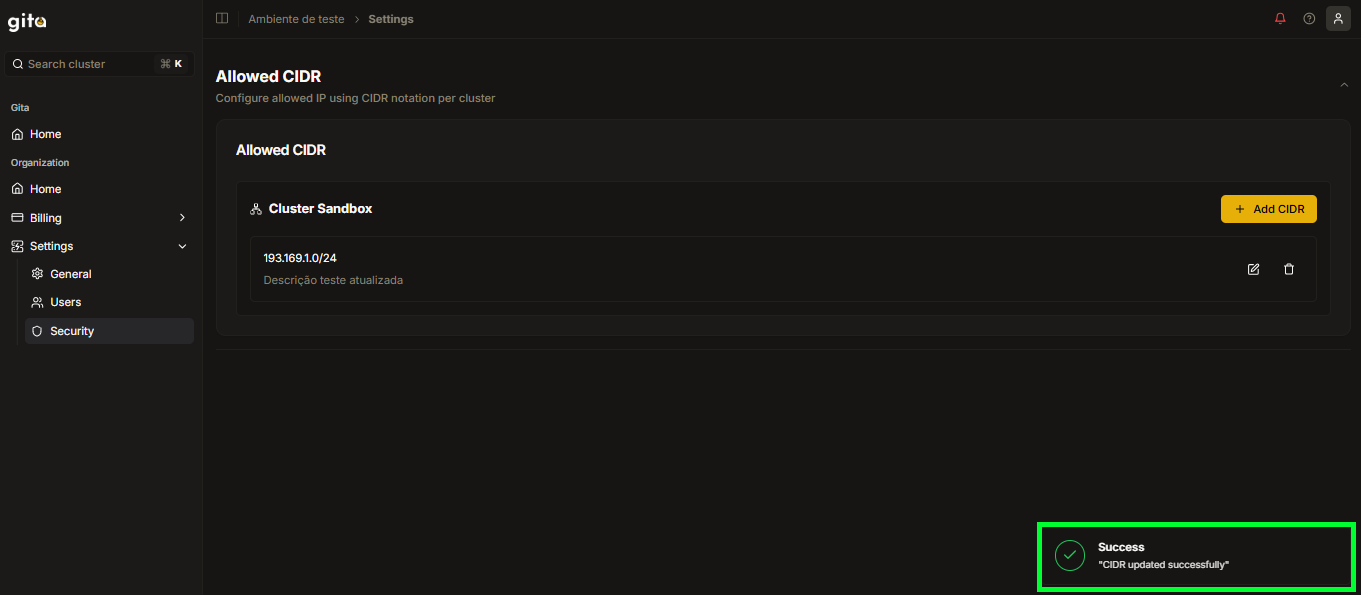
Image 09: View - Updated CIDR
How to delete an added CIDR?
-
Access your GITA Home:
Image 01: Home - Organizations View
-
Click on Settings (gear) to the right of the organization where you want to add the permission:
Image 02: Home - Organization Settings
-
You will be directed to the Settings section of the Organization:
Image 03: Settings Section
-
In the Settings tab, select the Security option to view the CIDRs already added for each Cluster (if any):
Image 04: Security Section
-
To delete an added CIDR, click on the delete symbol (trash) next to the chosen CIDR:
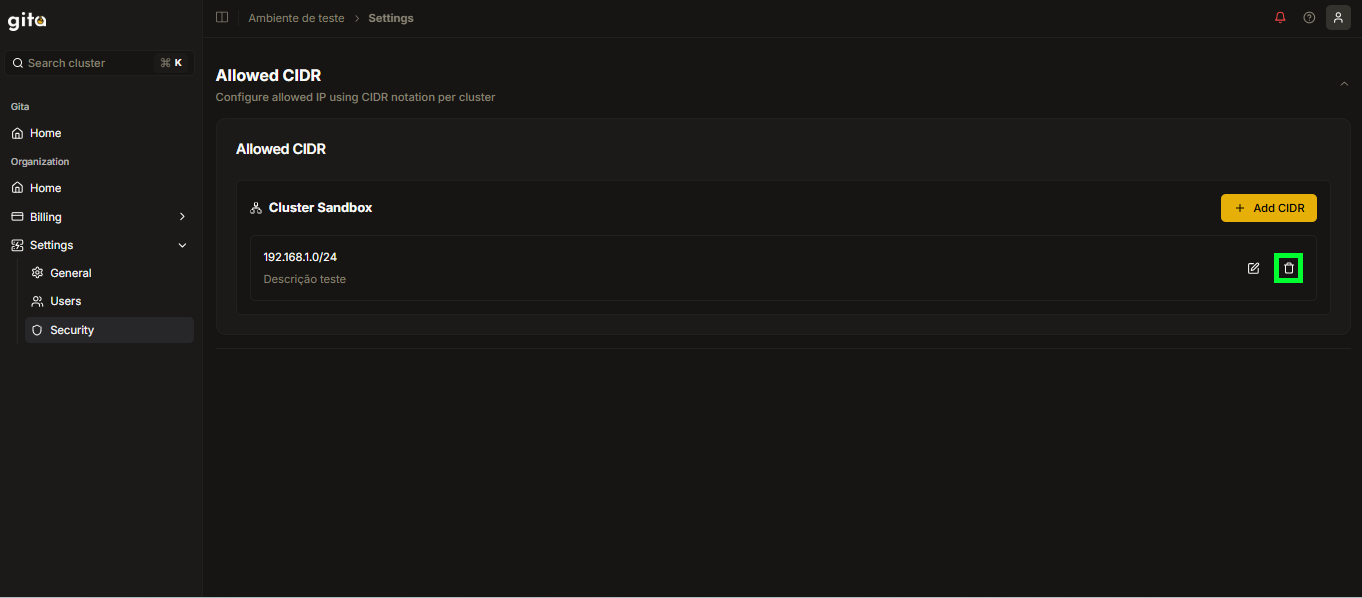
Image 05: View - Delete
-
Click on Remove to confirm the removal of the chosen CIDR:
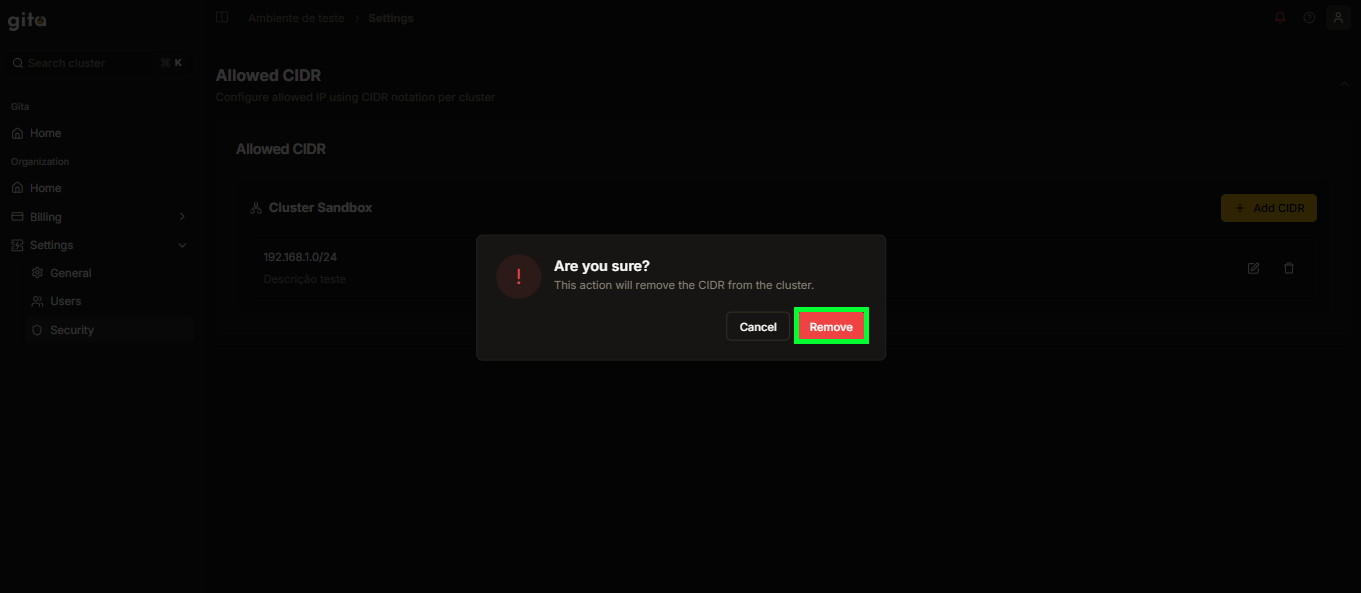
Image 06: Confirmation Panel - Remove Button
-
When deleted, the CIDR will be removed from the display screen:
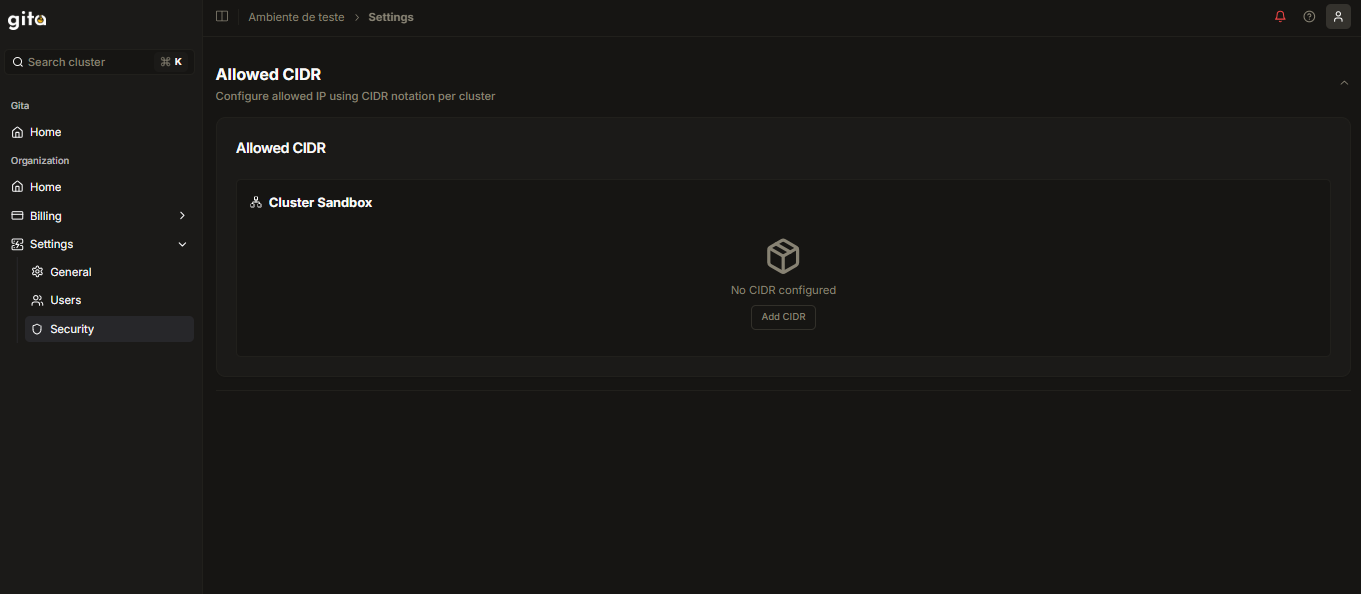
Image 07: View - Allowed CIDR